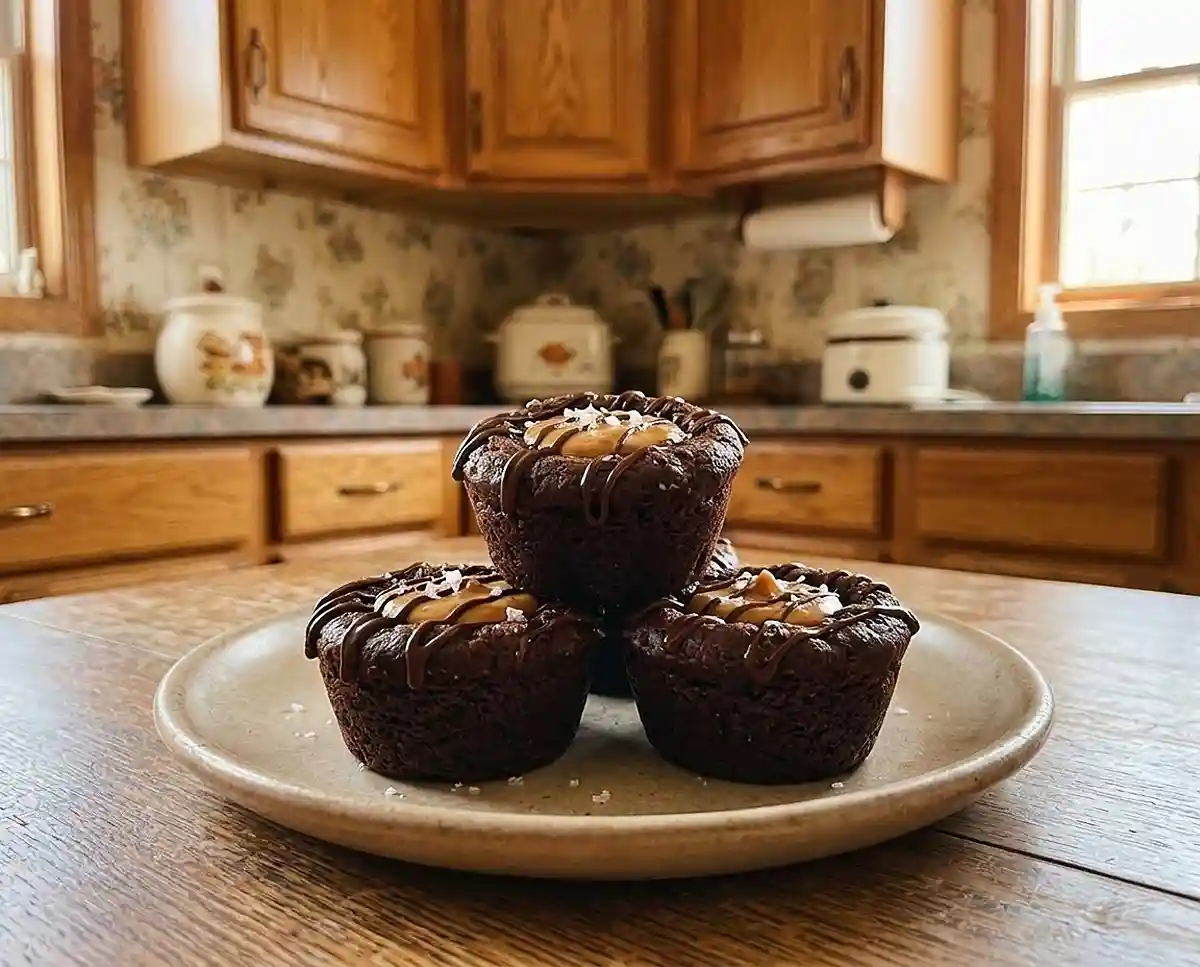
No Bake Peanut Butter Brownie Cups
Learn how to make gluten-free no bake peanut butter brownie cups with almond flour and maple syrup. Step-by-step, with storage tips and fixes.
The first time I made gluten-free no bake peanut butter brownie cups, I zapped the chocolate on full power and ended up with a grainy, dull mess. My kids still tease me about it. I started over, melted it in short bursts, and the cups came out glossy and fudgy.
Ever wanted a brownie that skips the oven, the flour blends, and the guessing game? Well… these come close. Almond flour, peanut butter, cocoa, and maple syrup press into a fudgy base, then a creamy peanut butter center and a chocolate drizzle finish them off.
Craving rich chocolate and peanut butter without turning on the oven? Discover these no bake gluten free snacks packed with effortless, irresistible treats for satisfying sweet cravings. You might find your next chocolatey obsession among these delicious no-bake favorites!
Why You’ll Love These Gluten-Free No Bake Peanut Butter Brownie Cups
- Texture and flavor: A dense, fudgy cocoa base holds a soft peanut butter center, topped with a thin chocolate drizzle and a pinch of flaky sea salt.
- Difficulty level: Beginner-friendly. There’s no oven, no mixer, and no special flour blend, just a few bowls and a microwave.
- Dairy-free option: Made with dairy-free chocolate chips and coconut oil. They do contain peanuts and almond flour, so they aren’t suitable for nut allergies.
- Best for: Make-ahead desserts, potlucks, and sweet cravings when you don’t want to heat up the kitchen.
The Secret to Perfect Gluten-Free No Bake Peanut Butter Brownie Cups
The secret is letting fat and syrup do the binding that gluten and eggs usually handle. No-bake cups skip the oven, so structure comes from ingredient chemistry and a little pressure. Here’s what’s working behind the scenes.
- Almond flour plus peanut butter: Almond flour has no gluten, so there’s no gummy network to worry about. Its natural fat blends with peanut butter to form a pressable dough.
- Maple syrup as the binder: The liquid sweetener hydrates the cocoa and almond flour, which helps stop the crumbling that so often plagues gluten-free treats.
- Coconut oil in the filling: Coconut oil is solid below roughly 76°F, so a short stint in the freezer firms the center quickly.
- Firm pressing: Without baking, compression is what gives the base its structure. Pressing the dough tightly removes air pockets and keeps the cups intact.
Table of Contents
Ingredients
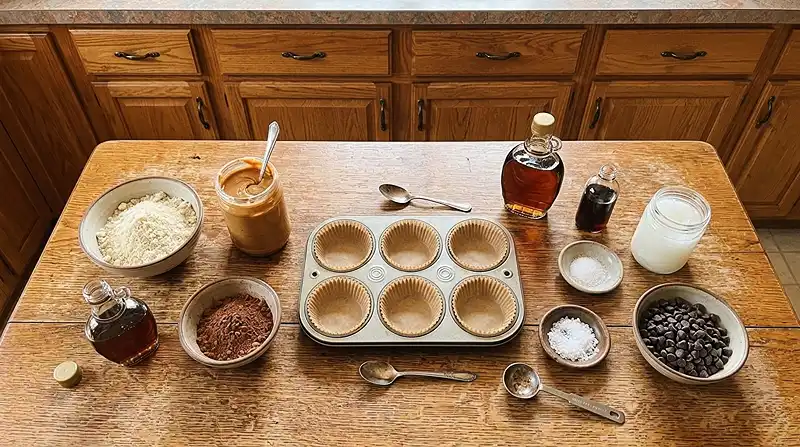
This recipe makes 6 brownie cups.
For the brownie layer
- 1 cup almond flour
- ½ cup creamy peanut butter, labeled gluten-free
- ¼ cup unsweetened cocoa powder, labeled gluten-free
- ¼ cup pure maple syrup
- 1 teaspoon pure vanilla extract, labeled gluten-free
- ¼ teaspoon fine sea salt
For the peanut butter filling
- ⅓ cup creamy peanut butter, labeled gluten-free
- ½ tablespoon pure maple syrup
- ½ tablespoon coconut oil, melted
For the chocolate drizzle
- ¼ cup chocolate chips, labeled gluten-free and dairy-free
- 1 teaspoon coconut oil
- Flaky sea salt, for topping (optional)
Gluten hides in surprising places, so check the label on your cocoa, vanilla, peanut butter, and chocolate chips. This trusted celiac labeling guide explains which ingredients to avoid.
Use finely ground almond flour for a smoother dough and pure maple syrup, not pancake syrup. Stir the peanut butter before measuring so the oil is evenly mixed. If a chocolate brand is unclear, this gluten-free chocolate guide helps.
Instructions
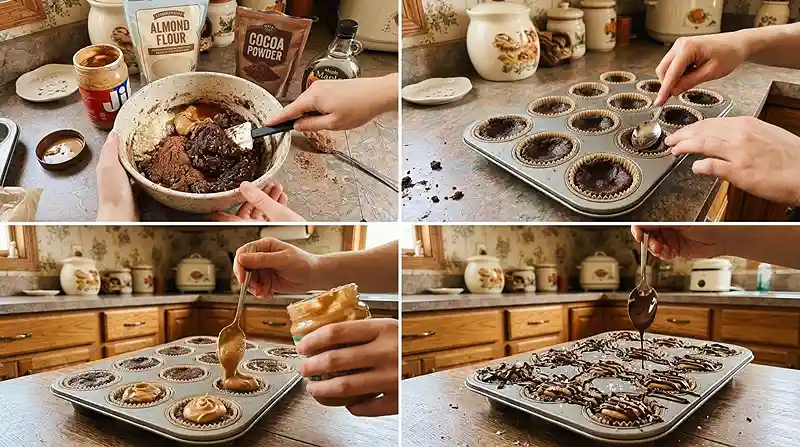
Prepare and shape the cups
- Prepare the pan: Line 6 cups of a standard muffin tin with paper liners or use a silicone muffin pan.
- Make the brownie dough: In a medium bowl, combine the almond flour, peanut butter, cocoa powder, maple syrup, vanilla extract, and sea salt. Mix until a thick, smooth dough forms. Pro Tip: It should feel like cool, smooth modeling clay and hold together when pinched.
- Prepare the filling: In a separate bowl, stir together the peanut butter, maple syrup, and melted coconut oil until creamy. It should look glossy with no streaks of oil.
- Shape the brownie cups: Divide the brownie dough evenly among the 6 muffin cups. Press it firmly across the bottom and slightly up the sides. Use the back of a small spoon to create a hollow in the center of each cup. Pro Tip: Firm pressure removes air pockets so the cups hold together later.
Fill and chill
- Add the filling: Spoon the peanut butter mixture evenly into the hollows, using about 1 tablespoon per cup.
- Chill: Place the muffin pan in the freezer for 5–10 minutes, until the peanut butter filling begins to firm. The top should look set but still feel slightly soft.
Drizzle and store
- Melt the chocolate: Combine the chocolate chips and coconut oil in a microwave-safe bowl. Microwave in 20-second intervals, stirring between each, until completely melted and smooth. Avoid overheating, which turns chocolate dull and grainy.
- Add the drizzle: Remove the brownie cups from the pan. Drizzle the melted chocolate over each one and sprinkle with flaky sea salt, if desired.
- Set and store: If needed, return the cups to the freezer for 1–2 minutes to set the chocolate. Enjoy immediately or store in an airtight container in the refrigerator for up to 1 week.
Make It Your Own
Nut butter swap: Almond butter or cashew butter can replace the peanut butter in the base and the filling, using the same amounts. The flavor turns milder and the filling may be slightly softer. Keep the label gluten-free either way.
Chocolate raspberry twist: For a chocolate raspberry version, press a few fresh raspberries into the filling just before drizzling. Pat them dry first, since extra moisture can soften the cups. The tart fruit cuts through the richness of the chocolate.
Sweetener swap: You know… honey can stand in for maple syrup in the same amounts. The flavor is a bit stronger and it isn’t vegan, but it binds the dough in a similar way.
Fully chocolate covered cups: Melt a second batch of chocolate chips and coconut oil and spoon it over each chilled cup. If you love a classic brownies recipe, this gives you a similar fudgy, chocolate-forward bite without the oven. Keep the drizzle as written for a lighter finish.
What not to swap: Skip coconut flour in place of almond flour. It absorbs far more liquid, so the dough turns dry and crumbly. Almond flour’s natural fat is what makes this dough pressable.
Common Problems & Solutions
Problem: The dough is crumbly. Knead it with your hands for about 30 seconds, then press it again. Warmth softens the peanut butter so the fat coats the almond flour and the dough clings together. Also check that you leveled the almond flour instead of packing it.
Problem: The dough feels greasy. Chill the bowl for 10 minutes, then mix again. Peanut butter that wasn’t stirred before measuring can release extra oil. Cold thickens that oil so it blends back into the dough.
Problem: The chocolate turned grainy or stiff. Microwave it in 20-second bursts and stir between each one. Man, oh man, I learned this the hard way with my first batch. Chocolate scorches fast, and stirring spreads the heat so the last bits melt gently.
Problem: The cups fall apart when removed. Press the dough more firmly and give the pan its full time in the freezer. With no baking, compression and cold fat are all that hold the cups together. A slightly thicker layer on the sides adds support.
Storage & Meal Prep
| Method | Duration | Notes |
|---|---|---|
| Counter | 2-3 days | Airtight container, cool room only |
| Fridge | 5-7 days | Bring to room temp |
| Freezer | 2-3 months | Wrap individually |
No reheating is needed, since these are best cool. Let a chilled cup sit at room temperature for a few minutes if you want a softer bite.
For no-waste ideas, crumble any broken cups over yogurt or ice cream. Stir leftover melted chocolate into oatmeal or drizzle it over fruit.
Your Questions Answered
Can I freeze gluten-free no bake peanut butter brownie cups?
Yes, you can freeze them for 2-3 months. Wrap each cup individually, then store them in an airtight container so they don’t absorb freezer odors. Thaw in the refrigerator, then let them sit at room temperature for a few minutes before serving.
How do I keep the chocolate drizzle smooth?
Microwave the chocolate and coconut oil in 20-second intervals, stirring between each. Stop when the last few chips are almost melted and keep stirring until smooth. Overheating makes chocolate dull and grainy.
What’s the best peanut butter for brownie cups?
Use creamy peanut butter labeled gluten-free and stir it thoroughly before measuring. A smooth, evenly mixed jar gives a consistent dough and filling. Always check the label, since gluten can sneak in through processing or added ingredients.
Why did my brownie dough turn out crumbly?
Crumbly dough usually means the almond flour was packed too tightly or the dough is too cold. Level your measuring cup gently and knead the dough with warm hands for about 30 seconds. Almond flour has no gluten, so the fat and maple syrup need a little warmth to bind.
Serving Suggestions
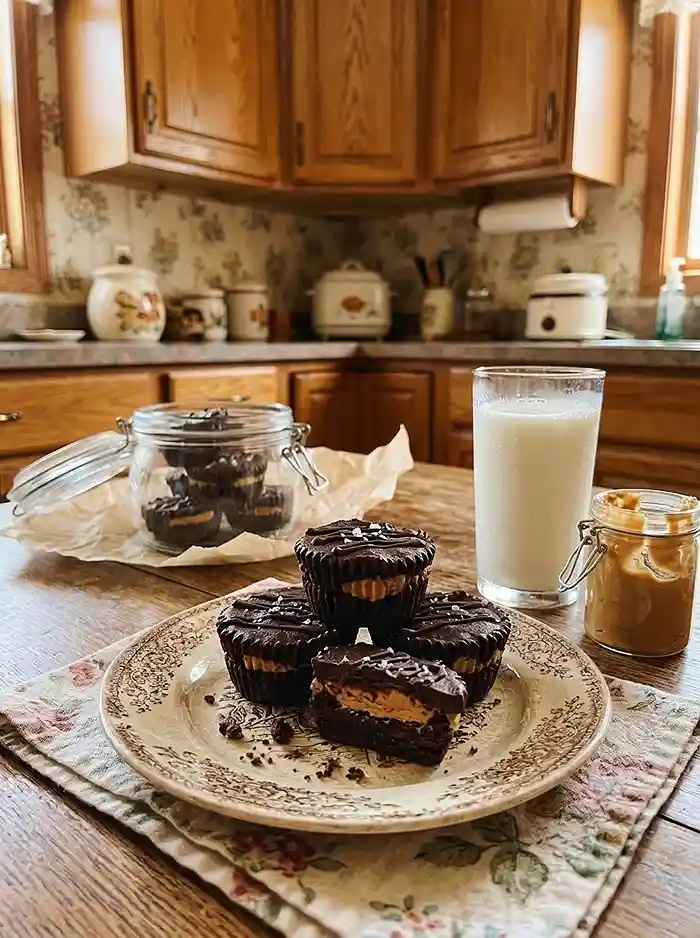
Serve these cold with a cup of coffee or a glass of milk or dairy-free milk. They also fit on a Fourth of July dessert table or a Thanksgiving spread, since you can make them days ahead.
For a bigger tray, add easy no-bake chocolate oat bars and gluten-free no-bake coconut cups.
Round it out with vegan no-bake pecan pie bars for holiday gatherings.
If you make these gluten-free no bake peanut butter brownie cups, I’d love to hear how they turned out. Leave a rating and a comment below, and tell me about any swaps you tried.
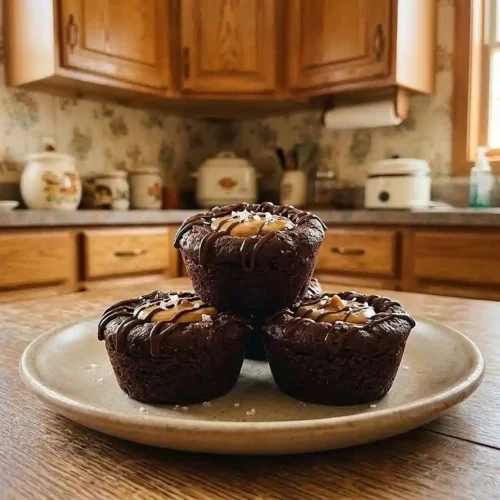
Gluten-Free No Bake Peanut Butter Brownie Cups
Equipment
- Standard Muffin Tin
- Paper muffin liners
- Mixing bowls
- Small spoon
- Microwave-safe bowl
- Microwave
Ingredients
For the Brownie Layer
- 1 cup Almond flour Finely ground
- ½ cup Creamy peanut butter Labeled gluten-free; stirred before measuring
- ¼ cup Unsweetened cocoa powder Labeled gluten-free
- ¼ cup Pure maple syrup
- 1 teaspoon Pure vanilla extract Labeled gluten-free
- ¼ teaspoon Fine sea salt
For the Peanut Butter Filling
- ⅓ cup Creamy peanut butter Labeled gluten-free
- ½ tablespoon Pure maple syrup
- ½ tablespoon Coconut oil Melted
For the Chocolate Drizzle
- ¼ cup Chocolate chips Labeled gluten-free and dairy-free
- 1 teaspoon Coconut oil
- Flaky sea salt For topping; optional
Instructions
- Line 6 cups of a standard muffin tin with paper liners or use a silicone muffin pan.
- In a medium bowl, combine the almond flour, peanut butter, cocoa powder, maple syrup, vanilla extract, and sea salt. Mix until a thick, smooth dough forms. It should feel like cool, smooth modeling clay and hold together when pinched.
- In a separate bowl, stir together the peanut butter, maple syrup, and melted coconut oil until creamy and glossy, with no streaks of oil.
- Divide the brownie dough evenly among the 6 muffin cups. Press it firmly across the bottom and slightly up the sides. Use the back of a small spoon to create a hollow in the center of each cup. Press firmly to remove air pockets and help the cups hold together.
- Spoon the peanut butter mixture evenly into the hollows, using about 1 tablespoon per cup.
- Place the muffin pan in the freezer for 5–10 minutes, until the peanut butter filling begins to firm. The top should look set but still feel slightly soft.
- Combine the chocolate chips and coconut oil in a microwave-safe bowl. Microwave in 20-second intervals, stirring between each, until completely melted and smooth. Avoid overheating to prevent the chocolate from turning dull and grainy.
- Remove the brownie cups from the pan. Drizzle the melted chocolate over each one and sprinkle with flaky sea salt, if desired.
- If needed, return the cups to the freezer for 1–2 minutes to set the chocolate. Enjoy immediately or store in an airtight container in the refrigerator for up to 1 week.