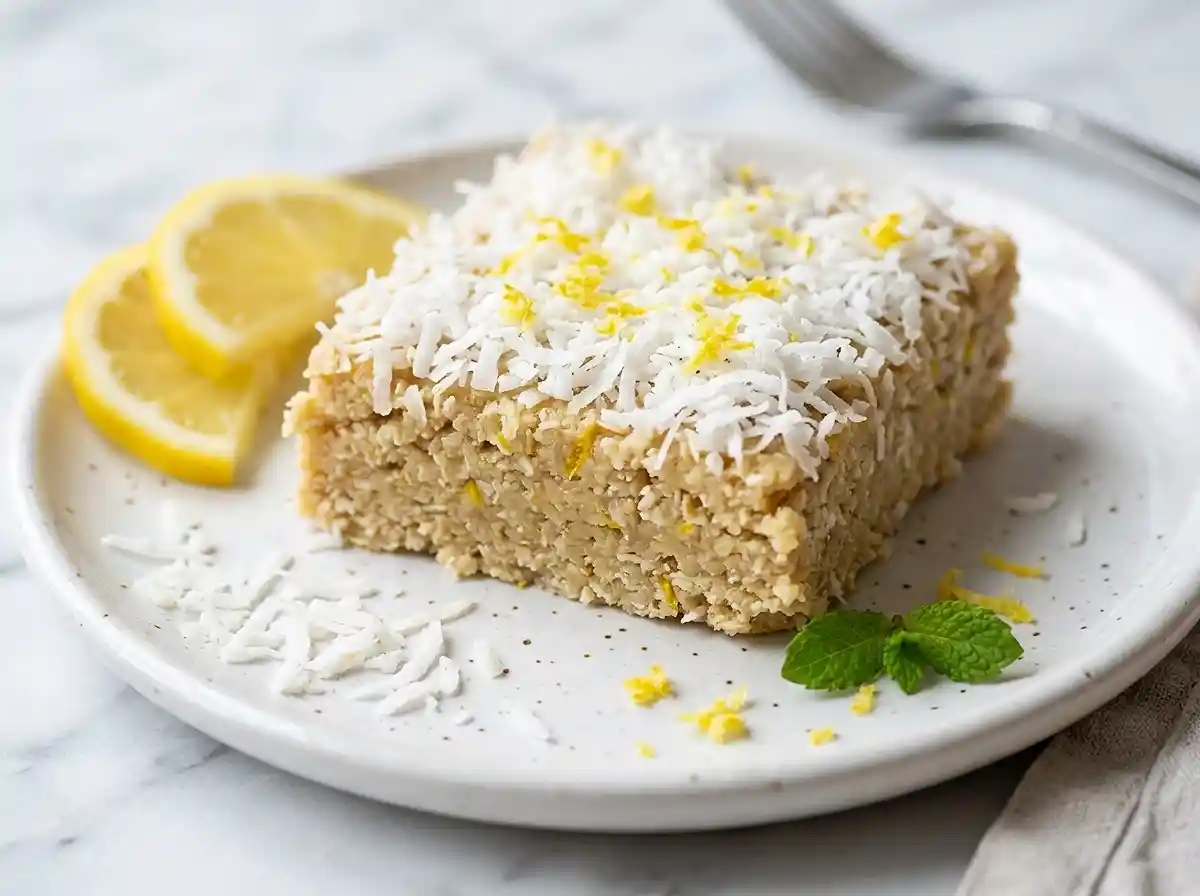
No-Bake Lemon Coconut Cookie Dough Bars
Make gluten-free no-bake lemon coconut cookie dough bars with a bright citrus flavor, chewy coconut topping, and no oven required.
The first time I made a no-bake bar recipe for my daughter’s spring dance recital, I skipped the freezer step because I was in a rush. Every single bar smeared apart the second I tried to lift it out of the pan, and I ended up serving lemon coconut crumbles with a spoon instead.
You know, that little mistake taught me exactly why these gluten-free no-bake lemon coconut cookie dough bars need that patience built into the process. If you’re craving something bright and citrusy without turning on the oven, well, this is the recipe that finally gets the texture right.
Table of Contents
Why You’ll Love This Gluten-Free No-Bake Lemon Coconut Cookie Dough Bars
- Bright lemon flavor balanced against toasty coconut, with a texture that’s soft but holds together clean when sliced
- Beginner-friendly: no oven, no mixer, just two bowls and a fridge
- Naturally dairy-free and freezer-friendly, which makes it an easy make-ahead lunchbox sweet
- Works best as a no-bake dessert for warm weather, potlucks, or anytime the oven feels like too much
The Secret to Perfect Gluten-Free No-Bake Lemon Coconut Cookie Dough Bars
- Certified gluten-free oat flour and almond flour together create a dense enough base that the bars hold their shape without eggs or baking
- Almond butter and maple syrup act as the binder, so the dough stays soft and scoopable instead of dry and crumbly, the way many gluten-free no-bake bars turn out
- A full chill in the fridge lets the coconut oil in both layers firm back up, which is what actually gives these bars their sliceable structure
- Fresh lemon juice and zest, rather than extract, keep the citrus flavor sharp instead of muddy once the bars are chilled
Ingredients

Lemon Coconut Cookie Dough
- 1 cup certified gluten-free oat flour (certification matters here, since standard oat flour is frequently cross-contaminated with wheat during processing)
- ½ cup almond flour
- ½ cup unsweetened shredded coconut
- ⅓ cup creamy almond butter
- ¼ cup pure maple syrup
- 2 tbsp melted coconut oil
- 2 tbsp fresh lemon juice
- 1 tbsp finely grated lemon zest
- 1 tsp vanilla extract
- ¼ tsp salt
Lemon Coconut Topping
- ½ cup unsweetened shredded coconut
- 2 tbsp melted coconut oil
- 1 tbsp maple syrup
- 1 tbsp fresh lemon juice
- 1 tsp lemon zest
Yields 12 bars.
Instructions
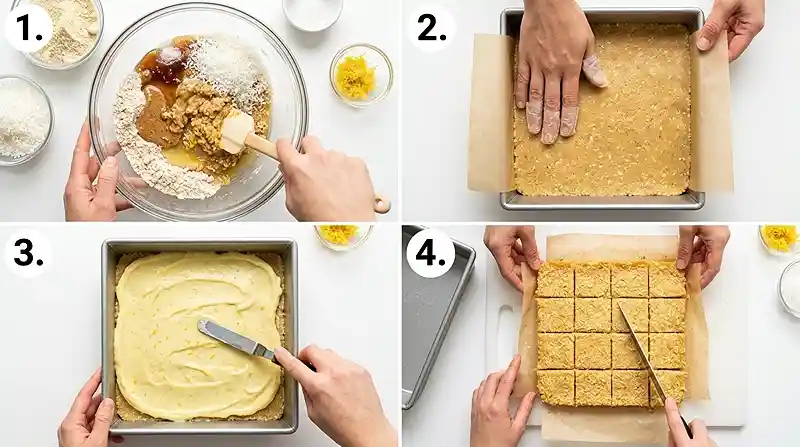
- Line an 8×8-inch pan with parchment paper, leaving overhang on two sides for easy removal.
- In a large bowl, whisk together the certified gluten-free oat flour, almond flour, shredded coconut, and salt until evenly combined.
- Add the almond butter, maple syrup, melted coconut oil, lemon juice, lemon zest, and vanilla to the dry mixture.
- Stir until a soft, cohesive cookie-dough mixture forms with a bright, tangy aroma. Pro Tip: if it seems too dry, add 1 teaspoon of almond butter or maple syrup at a time until it holds together.
- Press the mixture firmly and evenly into the prepared pan, smoothing the top with the back of a spoon.
- In a small bowl, combine the topping coconut, melted coconut oil, maple syrup, lemon juice, and lemon zest until well coated.
- Spread the coconut mixture evenly over the cookie-dough layer, pressing gently so it sticks.
- Refrigerate for at least 3 to 4 hours, until firm. Pro Tip: for cleaner slices, freeze the bars for about 45 to 60 minutes before cutting.
- Lift the chilled slab from the pan using the parchment paper and cut into 12 bars with a sharp knife.
- Store refrigerated and serve chilled.
Make It Your Own
Swap the almond butter for sunflower seed butter if you need this nut-free, keeping the amount exactly the same. The dough holds together just as well, though the flavor turns slightly earthier instead of nutty.
If you want more of a lunchbox sweet, cut the bars into 16 smaller pieces and wrap them individually for grab-and-go snacking. They hold their shape well at a smaller size since the base is so dense.
Well, if you’re craving more coconut flavor throughout, fold an extra two tablespoons of shredded coconut directly into the cookie dough layer. It adds texture without throwing off how the dough binds together.
For a different citrus twist on these gluten-free no bake bars, try lime juice and zest in place of lemon. The swap works one-to-one and keeps that same bright, tangy edge against the toasted coconut.
Common Problems & Solutions
Problem: My cookie dough won’t hold together and keeps crumbling. Solution: add almond butter or maple syrup one teaspoon at a time until the mixture clumps when pressed. Humidity and brand differences in oat flour can change how much moisture the dough needs.
Problem: The bars are too soft to slice cleanly, even after refrigerating. Solution: pop the pan in the freezer for 45 to 60 minutes right before cutting. The coconut oil needs to firm up completely, and a few minutes in the freezer speeds that along.
You know, the biggest reason no-bake bars fall apart on the cutting board is skipping the chill time altogether. Give the full 3 to 4 hours in the fridge before you even think about slicing, since rushing it is the number one culprit.
Problem: The lemon flavor tastes flat instead of bright. Solution: use fresh lemon juice and zest rather than bottled juice or extract. Freshly grated zest holds onto the essential oils that give this dessert its punch, and bottled juice loses that sharpness fast.
Storage & Meal Prep
| Method | Duration | Notes |
|---|---|---|
| Counter | 2-3 days | Airtight container |
| Fridge | 5-7 days | Bring to room temp |
| Freezer | 2-3 months | Wrap individually |
These bars are meant to be enjoyed straight from the fridge, so there’s no reheating needed here. If a bar softens too much on the counter, just pop it back in the fridge for 15 minutes to firm back up, and any leftover crumbles make a great topping for yogurt.
No-Bake Lemon Coconut Cookie Dough Bars FAQs
Can I make these bars ahead of a party or event?
Yes, these bars actually work best made a day ahead since the chill time lets the layers set completely. Store them covered in the fridge and slice right before serving for the cleanest edges.
How do I know if my oat flour is actually safe for celiac disease?
Look for a certified gluten-free label specifically on the oat flour packaging, not just gluten-free oats used to make it. Oat flour is only safe for a strict gluten-free diet when it comes from oats grown and processed in a dedicated gluten-free facility.
What’s the best way to get clean, even slices?
Freeze the fully chilled bars for 45 to 60 minutes before cutting, then use a sharp knife wiped clean between each slice. Skipping the freezer step is the most common reason these bars smear instead of cutting cleanly.
Why did my cookie dough turn out too dry to hold together?
This usually means the oat flour absorbed more moisture than expected, which varies by brand. Add almond butter or maple syrup a teaspoon at a time until the dough clumps together when pressed between your fingers.
Can I freeze these bars for longer storage?
Yes, wrap the bars individually and freeze them for up to 2 to 3 months. Let them sit in the fridge for about 15 to 20 minutes before serving so they soften slightly.
Serving Suggestions
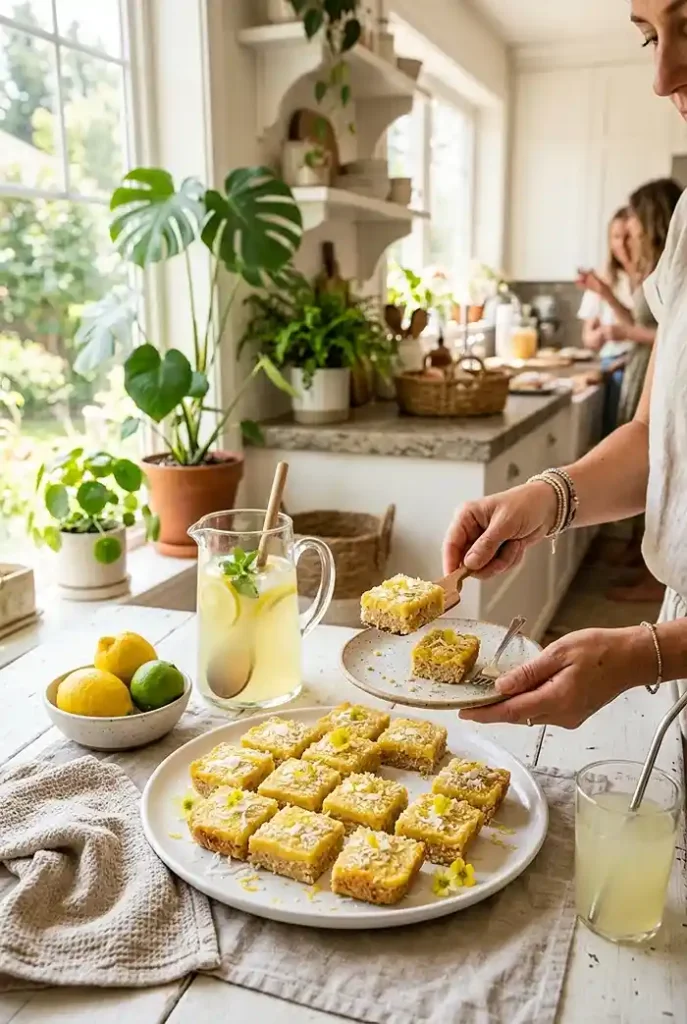
These bars make a refreshing addition to a Memorial Day picnic spread, served chilled straight from a cooler alongside fresh berries. They also work well as an afternoon pick-me-up with iced tea on a hot summer day.
For more gluten-free ideas, try this gluten-free Japanese corn potage, or round out your spread with this coconut syrup for dirty soda recipe.
According to Beyond Celiac’s guidance on gluten-free oat flour, oat flour is only safe for a strict gluten-free diet when it’s made from oats grown, harvested, and processed in dedicated gluten-free facilities.
Conclusion
Give these bars a try the next time you want dessert without heating up the kitchen, and don’t be surprised if they disappear before they’re even fully chilled. If you make any swaps, I’d love to hear how they turned out in the comments, and a Pinterest pin always makes my day.
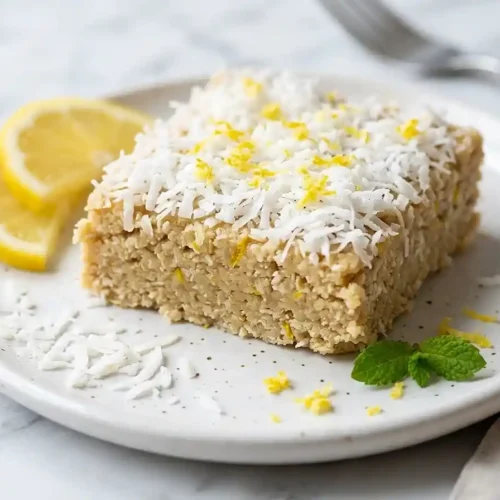
Simple Gluten-Free No-Bake Lemon Coconut Cookie Dough Bars
Equipment
- 8×8-inch baking pan
- Parchment paper
- Large mixing bowl
- Small mixing bowl
- Whisk
- Spoon
- Sharp knife
Ingredients
Lemon Coconut Cookie Dough
- 1 cup certified gluten-free oat flour Certification matters to reduce cross-contact risk.
- ½ cup almond flour
- ½ cup unsweetened shredded coconut
- ⅓ cup creamy almond butter
- ¼ cup pure maple syrup
- 2 tbsp melted coconut oil
- 2 tbsp fresh lemon juice
- 1 tbsp finely grated lemon zest
- 1 tsp vanilla extract
- ¼ tsp salt
Lemon Coconut Topping
- ½ cup unsweetened shredded coconut
- 2 tbsp melted coconut oil
- 1 tbsp maple syrup
- 1 tbsp fresh lemon juice
- 1 tsp lemon zest
Instructions
- Line an 8×8-inch pan with parchment paper, leaving overhang on two sides for easy removal.
- In a large bowl, whisk together the certified gluten-free oat flour, almond flour, shredded coconut, and salt until evenly combined.
- Add the almond butter, maple syrup, melted coconut oil, lemon juice, lemon zest, and vanilla to the dry mixture.
- Stir until a soft, cohesive cookie-dough mixture forms. If it seems too dry, add 1 teaspoon of almond butter or maple syrup at a time until it holds together.
- Press the mixture firmly and evenly into the prepared pan, smoothing the top with the back of a spoon.
- In a small bowl, combine the topping coconut, melted coconut oil, maple syrup, lemon juice, and lemon zest until well coated.
- Spread the coconut mixture evenly over the cookie-dough layer, pressing gently so it sticks.
- Refrigerate for at least 3 to 4 hours, until firm. For cleaner slices, freeze the bars for about 45 to 60 minutes before cutting.
- Lift the chilled slab from the pan using the parchment paper and cut into 12 bars with a sharp knife.
- Store refrigerated and serve chilled.