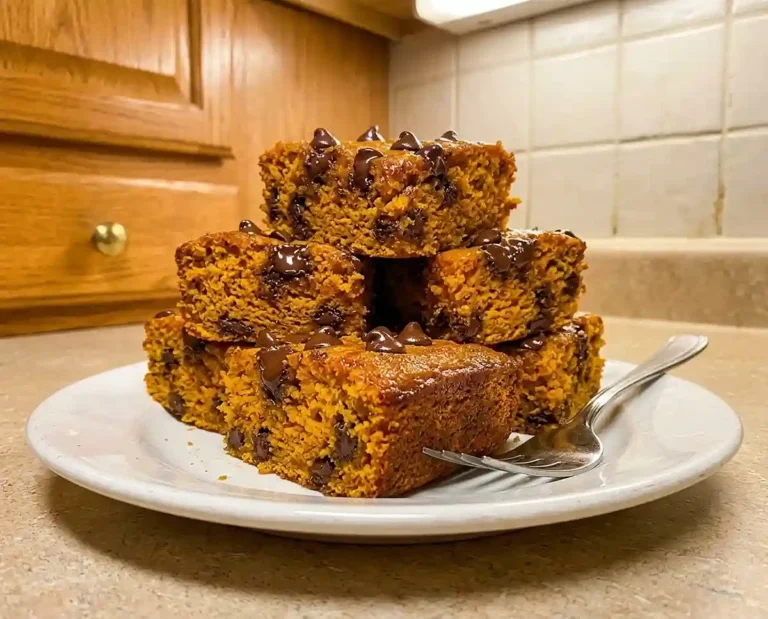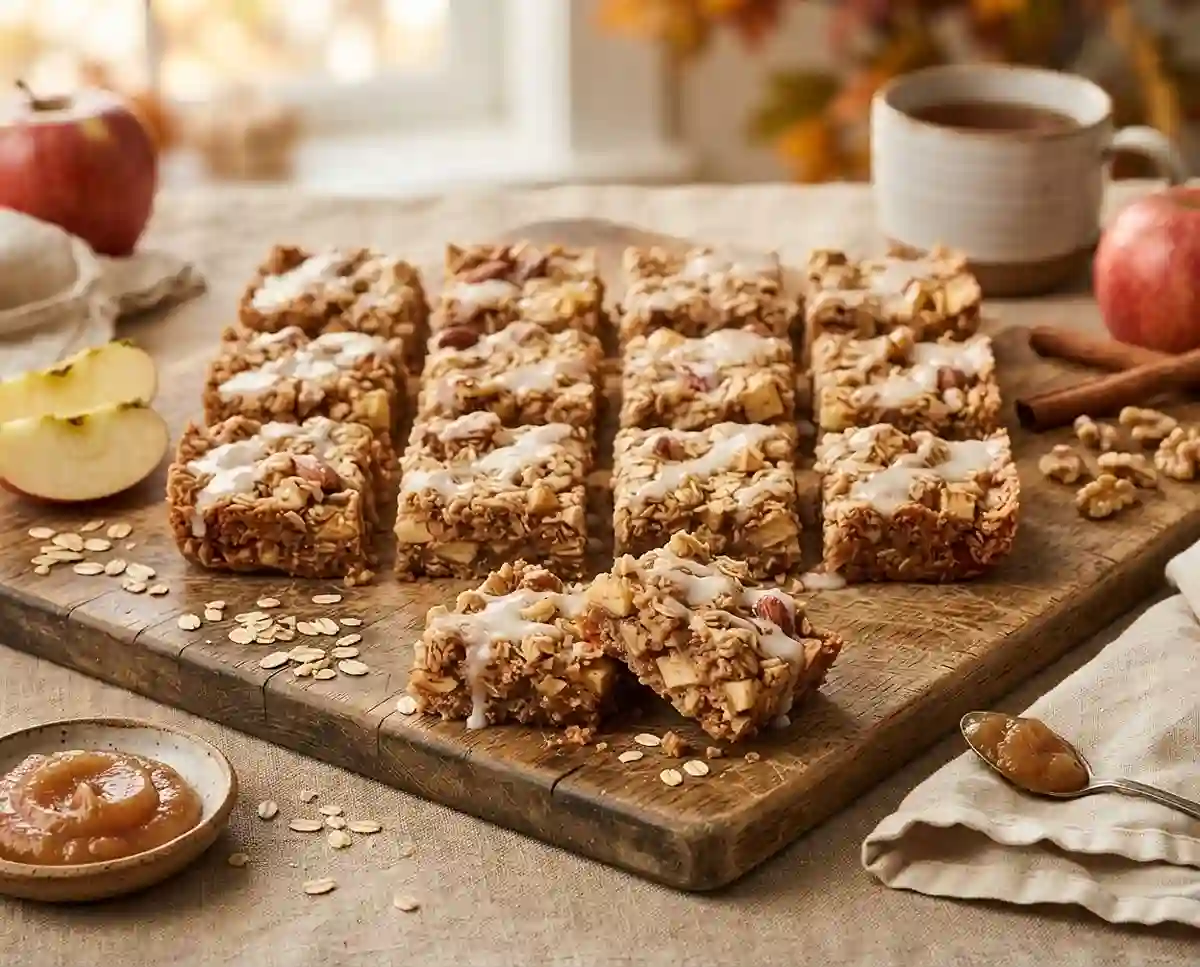
Apple Cinnamon Granola Butter Bars
Make gluten-free apple cinnamon granola butter bars with oats, maple syrup, and fresh apple. Step-by-step recipe with storage tips and substitutions.
The first time I made gluten-free granola bars for my sister’s back-to-school lunchbox haul, I used a store-bought blend that turned the whole batch into sad, crumbly pucks. Not exactly the triumphant moment I’d imagined.
That failure sent me down a rabbit hole of testing, and eventually I landed on granola butter as the star binder. These gluten-free apple cinnamon granola butter bars hold together beautifully, slice cleanly, and taste like something you’d actually want to eat.
What makes them stand out among gluten-free granola bars? The combination of rolled oats, unsweetened applesauce, and granola butter creates a texture that’s soft in the center with just enough chew—like a snack bar crossed with a soft oat cookie. Well… once you try them, the store-bought version won’t cut it anymore.
Why You’ll Love These Apple Cinnamon Granola Butter Bars
- Texture win: Soft and chewy center with lightly golden edges—not dry, not gummy.
- Beginner-friendly: One bowl, no mixer, no special equipment needed.
- Naturally sweetened: Maple syrup and applesauce do the heavy lifting, with no refined sugar overload.
- Make-ahead ready: Bake a batch Sunday and you’re set for the whole week.
The Secret to Perfect Gluten-Free Apple Cinnamon Granola Butter Bars
- Granola butter as a binder: Unlike nut butters, granola butter is made from oats, so it reinforces the structure without making bars greasy or dense.
- Applesauce replaces excess fat: It keeps bars moist without adding oil, and pairs naturally with the cinnamon spice.
- Press firmly before baking: A compact, even layer means bars that hold their shape when you cut them. Don’t skip this step.
- Cool completely before cutting: Cutting warm bars is the number one reason gluten-free bars fall apart. Patience pays off here.
Table of Contents
Ingredients
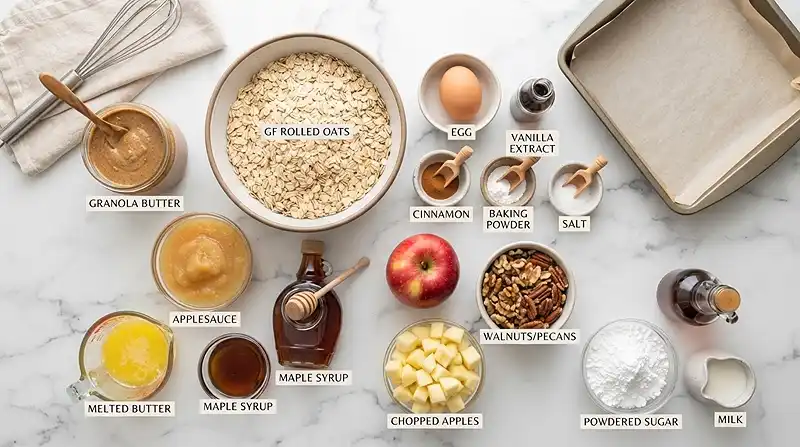
Apple Cinnamon Bars
| Ingredient | Amount | Notes |
|---|---|---|
| Gluten-free rolled oats | 1 ½ cups | Certified GF to avoid cross-contamination |
| Gluten-free granola butter | 1 cup | Oat-based spread; find it in specialty or natural food stores |
| Unsweetened applesauce | ½ cup | Adds moisture and natural sweetness |
| Pure maple syrup | ⅓ cup | Use 100% pure, not pancake syrup |
| Melted unsalted butter or coconut oil | ¼ cup | Coconut oil makes this dairy-free |
| Large egg | 1 | Binds the mixture |
| Vanilla extract | 1 teaspoon | |
| Ground cinnamon | 1 teaspoon | |
| Baking powder | ½ teaspoon | |
| Fine salt | ¼ teaspoon | |
| Medium apple, peeled, cored, finely diced | 1 | Honeycrisp or Fuji work well |
| Chopped walnuts or pecans (optional) | ¼ cup | Adds crunch; omit for nut-free |
Optional Maple Glaze
| Ingredient | Amount | Notes |
|---|---|---|
| Powdered sugar | ½ cup | |
| Pure maple syrup | 1 tablespoon | |
| Milk (any kind) | 1–2 teaspoons | Add gradually for drizzle consistency |
Instructions
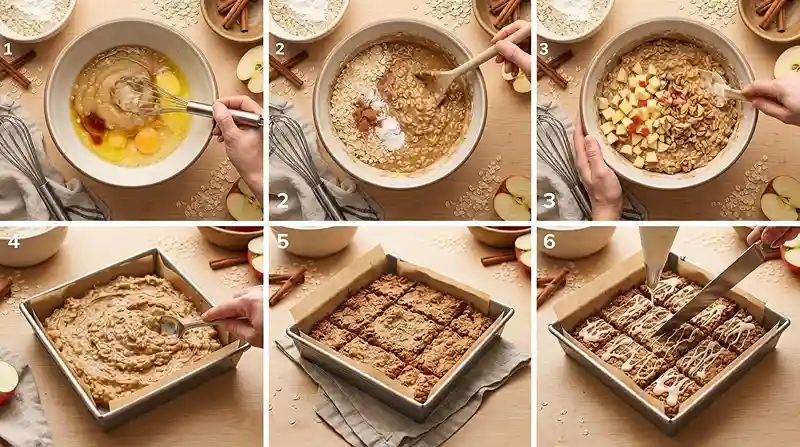
Step 1: Prepare the Pan
Preheat the oven to 350°F (175°C). Line an 8×8-inch baking pan with parchment paper, leaving some overhang on the sides for easy removal later.
Step 2: Mix the Wet Ingredients
In a large bowl, whisk together the granola butter, applesauce, maple syrup, melted butter (or coconut oil), egg, and vanilla extract until smooth and creamy. The mixture should look glossy and uniform.
Step 3: Add the Dry Ingredients
Stir in the rolled oats, cinnamon, baking powder, and salt. Mix until everything is evenly combined. The batter will be thick—that’s exactly right.
Step 4: Fold in the Apples
Gently fold the finely diced apple and chopped walnuts or pecans (if using) into the mixture. Pro Tip: Dice the apple small—about ¼-inch pieces—so every bar gets an even distribution of fruit without soggy pockets.
Step 5: Transfer to the Pan
Spread the batter evenly into the prepared pan. Use a spatula or the back of a damp spoon to press it firmly into an even, compact layer. Don’t rush this step—it’s what keeps bars from crumbling.
Step 6: Bake
Bake for 25–30 minutes, or until the edges are lightly golden and the center feels set when gently pressed. Avoid overbaking so the bars stay soft and chewy—pull them when the center still looks very slightly underdone.
Step 7: Cool Completely
Let the bars cool in the pan for at least 30 minutes. Then use the parchment paper overhang to lift them out and transfer to a cutting board. Do not cut them warm—they need time to firm up fully.
Step 8: Make the Optional Maple Glaze
Whisk the powdered sugar and maple syrup together. Add milk one teaspoon at a time until you reach a thick but drizzleable consistency. It should fall off the spoon in a slow, steady ribbon.
Step 9: Finish and Cut
Drizzle the maple glaze over the cooled bars. Let it set for a few minutes, then cut into 12 squares or rectangles. A sharp knife, wiped clean between cuts, gives you the cleanest edges.
Make It Your Own
You know… the beauty of this back-to-school snack is how flexible it is. Swap the melted butter for coconut oil and use any non-dairy milk in the glaze, and these bars go fully dairy-free without changing the texture at all.
No granola butter on hand? A smooth sunflower seed butter works as a substitute—it’s nut-free and binds the bars just as well. Avoid chunky or natural-style nut butters that separate, since they introduce too much oil and make the batter greasy.
For extra fall flavor, fold in ¼ teaspoon of ground nutmeg or cardamom alongside the cinnamon. These apple cinnamon butter bars are already warmly spiced, but a little nutmeg deepens the flavor in a way that smells absolutely incredible as it bakes.
Want more fruit variety? Replace half the diced apple with fresh or frozen blueberries. Frozen berries work fine—just don’t thaw them first or they’ll make the batter watery. This variation is especially popular with younger kids who love the color payoff.
Common Problems & Solutions
Man, oh man… the number of times I’ve been asked “why did my bars fall apart?” always comes back to the same two culprits: cutting too soon and not pressing the batter firmly enough.
Problem: Bars crumble when cut. Cool the bars completely before slicing—at least 30 minutes at room temperature, or 15 minutes in the fridge. Also check that you pressed the batter firmly into an even, compact layer before baking. Loose batter = crumbly bars, every time.
Problem: Center is gummy or undercooked. The apple releases moisture during baking, which can make the center seem underdone. Make sure your apple pieces are finely diced (not chunky) and that the pan goes into a fully preheated oven. Bake until the edges are visibly golden and the center springs back lightly when touched.
Problem: Bars are dry and dense. Overbaking is the main culprit here. Gluten-free baked goods continue to firm up as they cool, so pull them from the oven when the center still looks just barely set. According to trusted celiac research from Beyond Celiac, certified gluten-free oats are safe for most people with celiac disease—but quality of ingredients matters for texture too. Use fresh oats, not stale ones.
Problem: Bars stick to the pan. Always line the pan with parchment and leave overhang on at least two sides. If you skipped the parchment, run a thin offset spatula around the edges before trying to lift the bars.
Storage & Meal Prep
| Method | Duration | Notes |
|---|---|---|
| Counter | 2–3 days | Airtight container, room temperature |
| Fridge | 5–7 days | Bring to room temp before serving for best texture |
| Freezer | 2–3 months | Wrap each bar individually, then store in a zip bag |
To reheat from frozen, unwrap a bar and microwave for 20–25 seconds. The center comes back soft and the cinnamon aroma fills the kitchen all over again.
For meal prep, bake a double batch and freeze half. You’ll have a grab-and-go gluten-free snack ready for busy mornings without any extra effort midweek.
Apple Cinnamon Granola Butter Bars FAQs
Can I make these bars without an egg?
Yes. Replace the egg with a flax egg: mix 1 tablespoon of ground flaxseed with 3 tablespoons of water and let it sit for 5 minutes until gel-like. The bars will be slightly denser but still hold together well thanks to the granola butter.
What’s the best apple variety for this recipe?
Honeycrisp, Fuji, and Braeburn apples work best because they’re firm and hold their shape during baking. Avoid very soft apples like McIntosh—they turn mushy and release too much liquid, which can make the center gummy.
How do I know when the bars are done baking?
The edges should be lightly golden and the center should feel set when you gently press it—it shouldn’t jiggle. Remember that gluten-free bars firm up significantly as they cool, so pulling them at “just set” is correct.
Why did my glaze turn out too thick or too thin?
Add milk to the powdered sugar mixture one teaspoon at a time and whisk after each addition. A proper drizzle glaze should fall off a spoon in a slow, steady ribbon. If it gets too thin, sift in a little more powdered sugar and stir.
Can I use instant oats instead of rolled oats?
Rolled oats are strongly recommended. Instant oats absorb liquid faster and produce a mushier, less structured bar. If rolled oats are unavailable, quick oats are an acceptable second choice—but avoid instant oats entirely.
Serving Suggestions
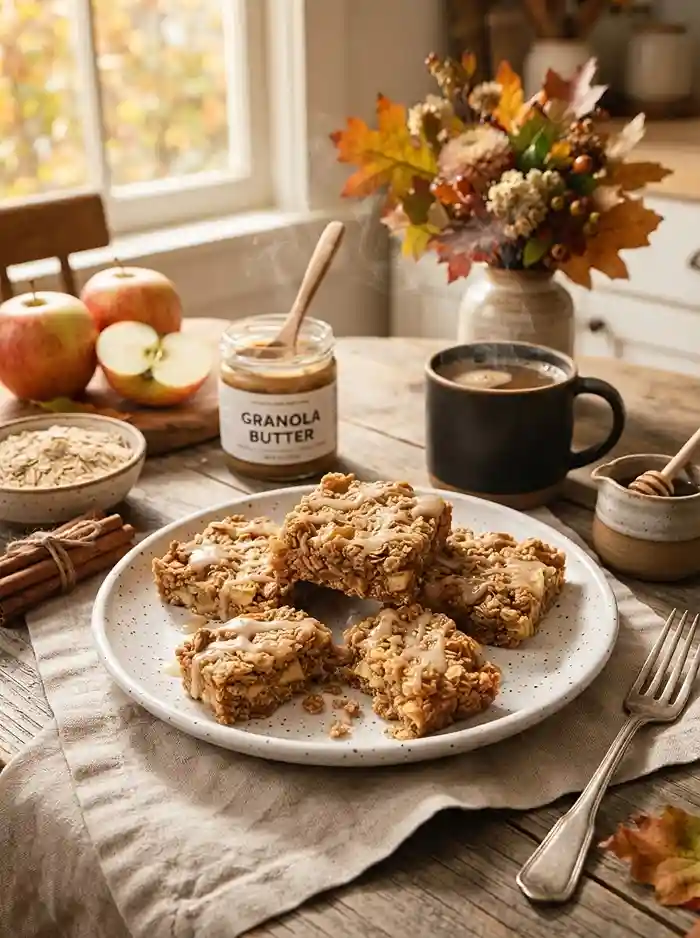
These bars are a natural fit alongside a warm mug of tea or a glass of cold oat milk—the cinnamon and maple flavors carry the pairing beautifully. For a heartier snack, serve them next to something savory, like this gluten-free air fryer fish sandwich for a balanced lunch spread.
They also make a crowd-pleasing Thanksgiving morning bite—something to set out while the big meal is still hours away. Cut them into smaller squares and arrange them on a platter with sliced apples and a drizzle of extra maple syrup for a simple, festive display.
Looking for more weeknight-friendly gluten-free cooking? The gluten-free lemongrass risotto is a comforting dinner that pairs these bars perfectly as an after-school snack beforehand. And if you’re building out a full gluten-free sandwich spread, don’t miss this gluten-free veal parmesan sandwich for something truly satisfying.
According to the Harvard T.H. Chan School of Public Health’s gluten-free nutrition guide, whole oats are a valuable source of fiber and nutrients for those managing a gluten-free diet—making these bars a genuinely nourishing choice, not just a treat.
Conclusion
These gluten-free apple cinnamon granola butter bars are the kind of recipe that earns a permanent spot in your rotation. They’re easy enough for a weeknight bake and special enough to share.
Give them a try and let me know how it goes in the comments below. Did you try a fun variation? Rate the recipe and share your notes—your feedback genuinely helps other readers succeed.
If you loved these, save the recipe to Pinterest so you can find it again when apple season rolls around next year.
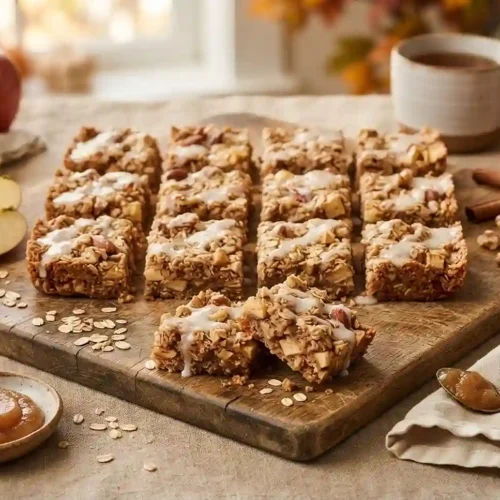
Gluten-Free Apple Cinnamon Granola Butter Bars
Equipment
- 8×8-inch baking pan
- Parchment paper
- Large mixing bowl
- Whisk
- Spatula
- Cutting board
- Sharp knife
Ingredients
Apple Cinnamon Bars
- 1 ½ cups Gluten-free rolled oats Certified GF to avoid cross-contamination
- 1 cup Gluten-free granola butter Oat-based spread; find it in specialty or natural food stores
- ½ cup Unsweetened applesauce Adds moisture and natural sweetness
- ⅓ cup Pure maple syrup Use 100% pure, not pancake syrup
- ¼ cup Melted unsalted butter or coconut oil Coconut oil makes this dairy-free
- 1 large Egg Binds the mixture
- 1 teaspoon Vanilla extract
- 1 teaspoon Ground cinnamon
- ½ teaspoon Baking powder
- ¼ teaspoon Fine salt
- 1 medium Apple, peeled, cored, finely diced Honeycrisp or Fuji work well
- ¼ cup Chopped walnuts or pecans Optional; omit for nut-free
Optional Maple Glaze
- ½ cup Powdered sugar
- 1 tablespoon Pure maple syrup
- 1–2 teaspoons Milk Any kind; add gradually for drizzle consistency
Instructions
- Preheat the oven to 350°F (175°C). Line an 8×8-inch baking pan with parchment paper, leaving some overhang on the sides for easy removal.
- In a large bowl, whisk together the granola butter, applesauce, maple syrup, melted butter or coconut oil, egg, and vanilla extract until smooth, creamy, glossy, and uniform.
- Stir in the rolled oats, cinnamon, baking powder, and salt until evenly combined. The batter will be thick.
- Gently fold in the finely diced apple and chopped walnuts or pecans, if using. Dice the apple into about ¼-inch pieces for even distribution and to prevent soggy pockets.
- Spread the batter evenly into the prepared pan. Use a spatula or the back of a damp spoon to press it firmly into an even, compact layer.
- Bake for 25–30 minutes, or until the edges are lightly golden and the center feels set when gently pressed. Avoid overbaking so the bars remain soft and chewy.
- Let the bars cool in the pan for at least 30 minutes. Use the parchment overhang to lift them onto a cutting board. Do not cut while warm, as the bars need time to firm up.
- For the optional maple glaze, whisk together the powdered sugar and maple syrup. Add milk one teaspoon at a time until the glaze reaches a thick but drizzleable consistency.
- Drizzle the glaze over the cooled bars. Let it set for a few minutes, then cut into 12 squares or rectangles using a sharp knife wiped clean between cuts.