Apple Pie Protein Muffin Bars
Step-by-step gluten-free apple pie protein muffin bars with real apple, maple syrup, and Greek yogurt. High-protein, easy breakfast bake ready in 35 minutes.
The first time I made these gluten-free apple pie protein muffin bars, I was scrambling to feed my family something warm and filling on a cold October morning—without a gluten-fueled crash by noon.
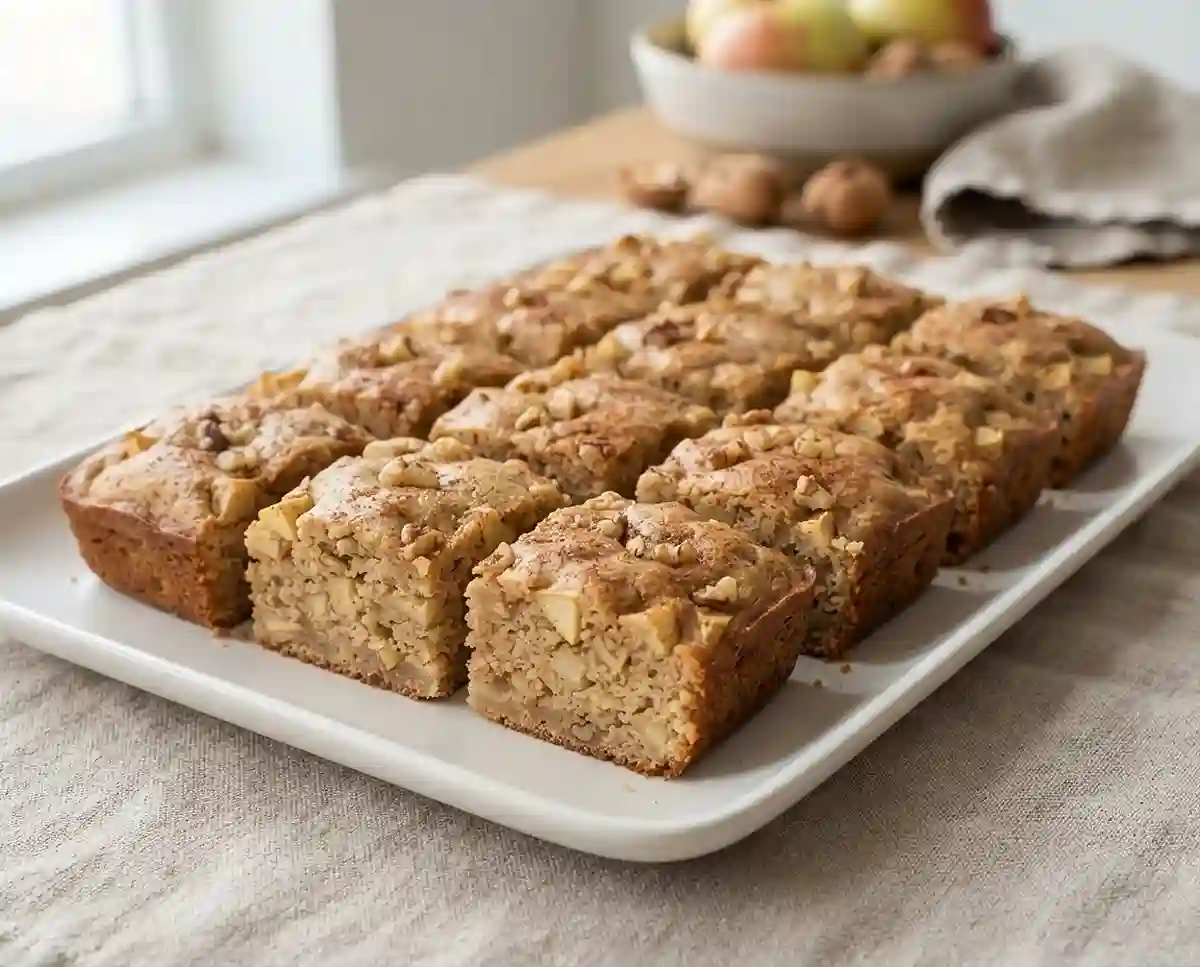
I’d already burned through three batches of dry, crumbly gluten-free breakfast bakes that week. Then I folded in fresh apple, swapped sour cream for Greek yogurt, and everything changed. The bars came out tender, protein-packed, and exactly like a warm slice of apple pie in handheld form.
Can a breakfast bar really replace your morning coffee ritual? These come close. Well… once you smell cinnamon and nutmeg filling your kitchen, you’ll understand why this recipe has become a weekly staple in our house.
Why You’ll Love This Gluten-Free Apple Pie Protein Muffin Bar Recipe
- Texture that holds together: No crumbling, no gumminess—just a soft, moist bar with tender apple bits in every bite, as fluffy as a cloud but sturdy enough to grab and go.
- Beginner-friendly bake: One bowl for wet ingredients, one for dry—stir, fold, and bake. No mixer required.
- Naturally sweetened: Maple syrup and unsweetened applesauce do all the heavy lifting—no refined sugar needed.
- Meal prep gold: Makes 12 bars, stores beautifully, and works just as well for a Thanksgiving morning breakfast as it does for a regular Tuesday.
The Secret to Perfect Gluten-Free Apple Pie Protein Muffin Bars
- Protein powder as a flour partner: Vanilla protein powder replaces a portion of flour, adding structure and protein without drying out the bars. The key is using it alongside gluten-free all-purpose flour—not as a standalone swap.
- Greek yogurt locks in moisture: Unlike oil, Greek yogurt adds richness and keeps the crumb tender for days. It also contributes extra protein, which is why these bars actually keep you full.
- Applesauce doubles as a binder: Unsweetened applesauce replaces a significant portion of fat while binding the batter. This is especially important in gluten-free baking, where the lack of gluten means you need every binder you can get.
- “Just combined” is your magic phrase: Overmixing gluten-free batter activates the starches and leads to dense, gummy bars. Stir until no dry streaks remain—then stop.
Table of Contents
Ingredients
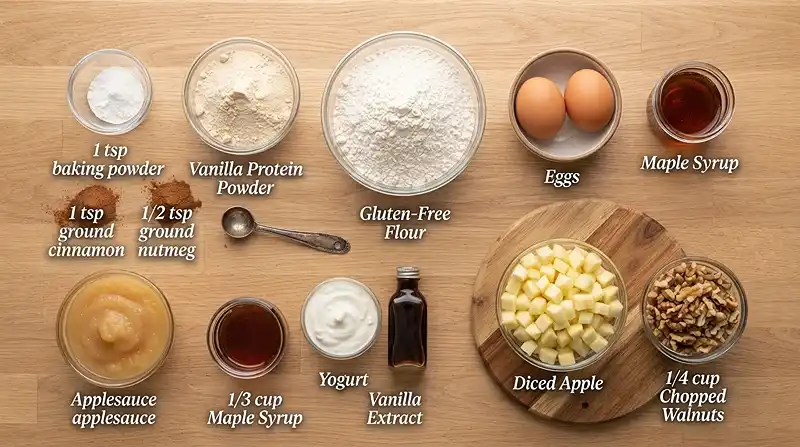
Dry Ingredients
| Ingredient | Amount | Notes |
|---|---|---|
| Gluten-free all-purpose flour | 1 1/2 cups | Use a 1:1 blend with xanthan gum included |
| Vanilla protein powder | 1/2 cup | Whey or plant-based both work; avoid gritty textures |
| Baking powder | 1 tsp | Check label—most brands are naturally gluten-free |
| Ground cinnamon | 1 tsp | |
| Ground nutmeg | 1/2 tsp | Freshly grated adds deeper warmth |
| Salt | 1/4 tsp |
Wet Ingredients
| Ingredient | Amount | Notes |
|---|---|---|
| Large eggs | 2 | Room temperature binds better |
| Unsweetened applesauce | 1/2 cup | Acts as a fat replacer and binder |
| Maple syrup | 1/3 cup | Pure, not pancake syrup |
| Plain Greek yogurt | 1/3 cup | Full-fat gives the best texture; use dairy-free for a vegan-friendly version |
| Vanilla extract | 1 tsp |
Mix-Ins
| Ingredient | Amount | Notes |
|---|---|---|
| Apple, peeled and finely diced | 1 cup | Honeycrisp or Granny Smith hold up well during baking |
| Chopped walnuts (optional) | 1/4 cup | Add crunch and healthy fats; omit for nut-free |
Instructions
- Preheat the oven to 350°F. Line an 8×8-inch baking pan with parchment paper, leaving a little overhang on the sides so you can lift the bars out cleanly later.
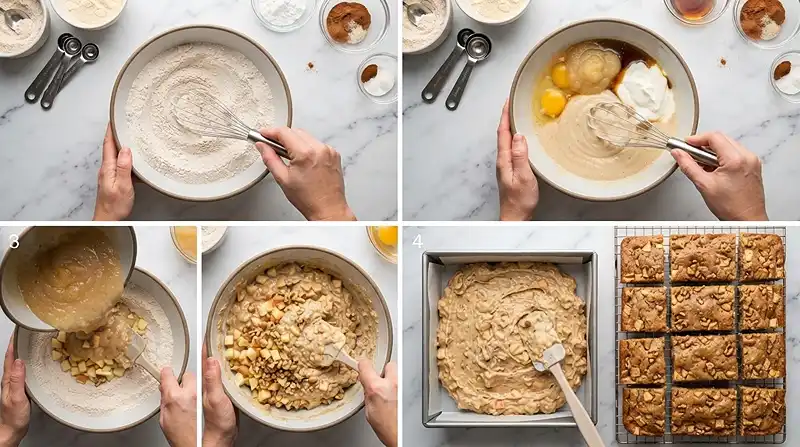
- Whisk the dry ingredients. In a medium bowl, whisk together the gluten-free flour, protein powder, baking powder, cinnamon, nutmeg, and salt until evenly combined and no clumps remain.
- Mix the wet ingredients. In a separate bowl, whisk together the eggs, applesauce, maple syrup, Greek yogurt, and vanilla extract until smooth and slightly frothy—about 30 seconds of vigorous whisking.
- Combine wet and dry. Pour the wet ingredients into the dry and stir until just combined. A few small lumps are fine. Do not overmix or the bars will turn dense.
- Fold in the apple and walnuts. Gently fold in the diced apple and walnuts (if using) with a rubber spatula. You want the apple pieces evenly distributed without deflating the batter.
- Spread into the pan. Transfer the batter to the prepared pan and spread it evenly with the spatula. The batter will be thick—use the back of the spatula to smooth the top.
- Bake for 25–30 minutes. The bars are done when the center is set, the edges pull slightly away from the pan, and a toothpick inserted in the middle comes out clean. The top should look golden and matte, not shiny or wet.
- Cool completely before cutting. Let the bars cool in the pan for at least 30 minutes, then lift out by the parchment and cut into 12 bars. Cutting warm bars leads to crumbling—patience is worth it here.
Make It Your Own
You know… the best part of a recipe like this is how easily it bends to what you have on hand. Swap the Greek yogurt for a dairy-free coconut yogurt to make these completely dairy-free. The texture stays creamy and the bars hold together just as well—I’ve tested this version multiple times with great results.
If you’re working with a pea protein powder instead of whey, add an extra tablespoon of applesauce to compensate for the drier texture pea protein tends to create. Plant-based protein absorbs more liquid, so this small adjustment keeps the bars moist without changing the flavor.
For a pear pie variation, swap the diced apple for an equal amount of peeled, finely diced Bosc pear. Pears are slightly softer after baking, so dice them a little larger than you would the apple to prevent them from disappearing entirely into the batter. These also pair beautifully with a pinch of cardamom alongside the cinnamon.
Want to turn these into gluten-free protein bars with a more dessert-forward vibe? Drizzle the cooled bars with a simple maple glaze—two tablespoons of maple syrup whisked with one tablespoon of powdered sugar. It sets into a light, crackly finish that makes these look as good as they taste. For more gluten-free dessert bar ideas, that peach cobbler blondie recipe is another winner from the same 8×8 pan.
Common Problems and Solutions
Man, oh man… gluten-free baking has a way of humbling even experienced bakers. Here’s how to troubleshoot the most common issues with this recipe.
Problem: The bars are gummy in the center. This almost always means underbaking. The toothpick test is your best friend here—if it comes out with wet batter, not just a few moist crumbs, give the bars another 5 minutes. Every oven runs a little differently, so check at 25 minutes and trust your senses over the timer.
Problem: The bars crumbled when I cut them. Two likely culprits: cutting while still warm, or overmixing the batter. Gluten-free batters are more fragile when hot. Let them cool completely—ideally an hour at room temperature—before slicing. A sharp knife (not a serrated one) also makes cleaner cuts.
Problem: The bars turned out dry and dense. This usually traces back to the protein powder. Some brands, especially those with a high whey isolate concentration, absorb significantly more liquid than others. If your bars consistently turn out dry, reduce the protein powder by two tablespoons and add one extra tablespoon of Greek yogurt. According to the Celiac Disease Foundation’s guidance on gluten-free flour alternatives, ingredient ratios in GF baking are more sensitive than in conventional recipes—small adjustments matter.
Problem: My apple pieces are mushy. The apple variety and dice size both matter. Softer apples like McIntosh turn to mush at 350°F. Use Honeycrisp or Granny Smith, diced no smaller than 1/4 inch, and they’ll hold their shape while still becoming tender and jammy inside the bar.
Storage and Meal Prep
| Method | Duration | Notes |
|---|---|---|
| Counter | 2–3 days | Airtight container; cool, dry spot away from sunlight |
| Fridge | 5–7 days | Bring to room temp or warm briefly before eating |
| Freezer | 2–3 months | Wrap individually in plastic wrap, then store in a zip bag |
To reheat from the fridge, microwave a bar for 20–25 seconds. From frozen, let it thaw overnight in the fridge or microwave for 45–60 seconds from frozen. Either way, the texture bounces back beautifully.
For a zero-waste idea, crumble a leftover bar over a bowl of plain Greek yogurt with a drizzle of maple syrup. It turns yesterday’s breakfast bar into today’s parfait topping—no extra effort required.
Apple Pie Protein Muffin Bars FAQs
Can I use a different protein powder in this recipe?
Yes, both whey and plant-based protein powders work in this recipe. Stick to vanilla-flavored powder to complement the apple pie spices. If using pea or brown rice protein, add an extra tablespoon of applesauce to keep the bars moist, since plant-based proteins absorb more liquid than whey.
How do I keep these bars from crumbling when I cut them?
Cool the bars completely before cutting—at least 30 minutes in the pan, ideally an hour. Use a sharp chef’s knife rather than a serrated blade, and press straight down instead of sawing. If your bars still crumble, they may have been underbaked slightly; add 3–5 minutes to your bake time next batch.
What’s the best apple variety to use in this breakfast bake?
Honeycrisp and Granny Smith are the top choices. Both hold their shape during baking and offer a pleasant sweet-tart contrast to the maple syrup. Avoid softer varieties like McIntosh or Red Delicious, which tend to turn mushy in the oven.
Why did my bars come out gummy in the middle?
Gummy centers almost always mean underbaking. Every oven is different, so start checking at 25 minutes with a toothpick. If it comes out with wet batter rather than a few moist crumbs, bake for another 3–5 minutes. Make sure your oven is fully preheated to 350°F before the pan goes in.
Can I make these bars dairy-free?
Yes. Swap the Greek yogurt for a plain, unsweetened dairy-free coconut yogurt in the same amount. The bars will be just as moist and hold together equally well. Make sure your protein powder is also dairy-free if you’re avoiding all dairy.
Serving Suggestions
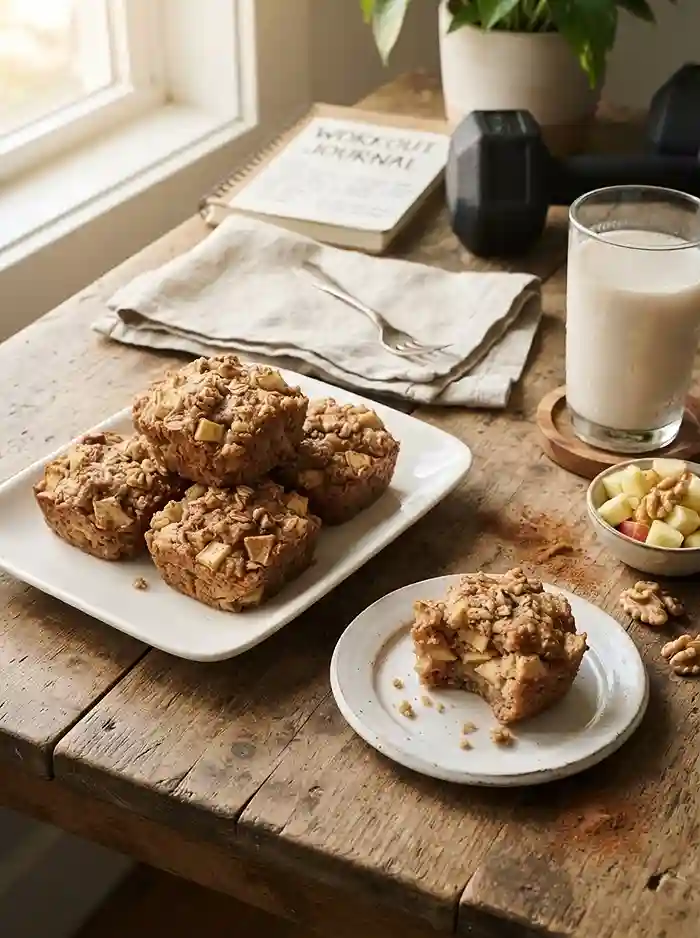
These bars shine on their own, but they also pair beautifully with a warm mug of chai or a strong black coffee. The cinnamon and nutmeg in the bars echo the spices in a good chai—it’s a natural match that makes breakfast feel intentional.
For a full spread on Thanksgiving morning—when everyone needs something sustaining before the big meal—set out a plate of these bars alongside a dairy-free blueberry peach soft serve for the kids and a gluten-free jalapeño ranch pizza dip for the adults who need something savory to start. The combination keeps everyone happy and fueled without touching the main event.
Leftovers work wonderfully crumbled over yogurt parfaits or packed into a lunchbox alongside sliced apples and a small wedge of sharp cheddar. The sweet-spiced flavor holds up beautifully for days, making each bar feel just as good as the first.
If you made these and loved them—or if you swapped something out and discovered a brilliant new version—drop a comment below. I read every one, and your experiments often inspire the next recipe. Pin this to your breakfast boards so you can find it easily when apple season rolls around again.
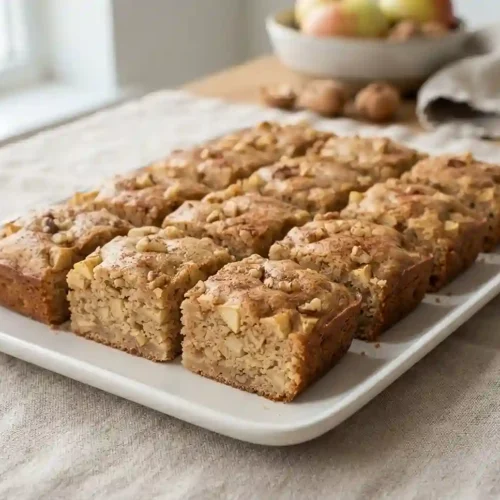
Gluten-Free Apple Pie Protein Muffin Bars
Equipment
- 8×8-inch baking pan
- Parchment paper
- Medium mixing bowl
- Mixing bowl
- Whisk
- Rubber spatula
- Sharp chef’s knife
Ingredients
Dry Ingredients
- 1 ½ cups Gluten-free all-purpose flour Use a 1:1 blend with xanthan gum included
- ½ cup Vanilla protein powder Whey or plant-based both work; avoid gritty textures
- 1 tsp Baking powder Check label—most brands are naturally gluten-free
- 1 tsp Ground cinnamon
- ½ tsp Ground nutmeg Freshly grated adds deeper warmth
- ¼ tsp Salt
Wet Ingredients
- 2 Large eggs Room temperature binds better
- ½ cup Unsweetened applesauce Acts as a fat replacer and binder
- ⅓ cup Maple syrup Pure, not pancake syrup
- ⅓ cup Plain Greek yogurt Full-fat gives the best texture; use dairy-free yogurt for a dairy-free version
- 1 tsp Vanilla extract
Mix-Ins
- 1 cup Apple, peeled and finely diced Honeycrisp or Granny Smith hold up well during baking
- ¼ cup Chopped walnuts Optional; omit for nut-free bars
Instructions
- Preheat the oven to 350°F. Line an 8×8-inch baking pan with parchment paper, leaving some overhang on the sides for easy removal.
- Whisk the dry ingredients. In a medium bowl, whisk together the gluten-free flour, protein powder, baking powder, cinnamon, nutmeg, and salt until evenly combined and free of clumps.
- Mix the wet ingredients. In a separate bowl, whisk together the eggs, applesauce, maple syrup, Greek yogurt, and vanilla extract until smooth and slightly frothy.
- Combine wet and dry. Pour the wet ingredients into the dry ingredients and stir until just combined. A few small lumps are fine; do not overmix.
- Fold in the apple and walnuts. Gently fold in the diced apple and walnuts, if using, until evenly distributed.
- Spread into the pan. Transfer the thick batter to the prepared pan and spread it evenly with a spatula.
- Bake for 25–30 minutes. Bake until the center is set, the edges pull slightly away from the pan, and a toothpick inserted in the center comes out clean.
- Cool completely before cutting. Let the bars cool in the pan for at least 30 minutes, ideally up to an hour, then lift them out using the parchment and cut into 12 bars.