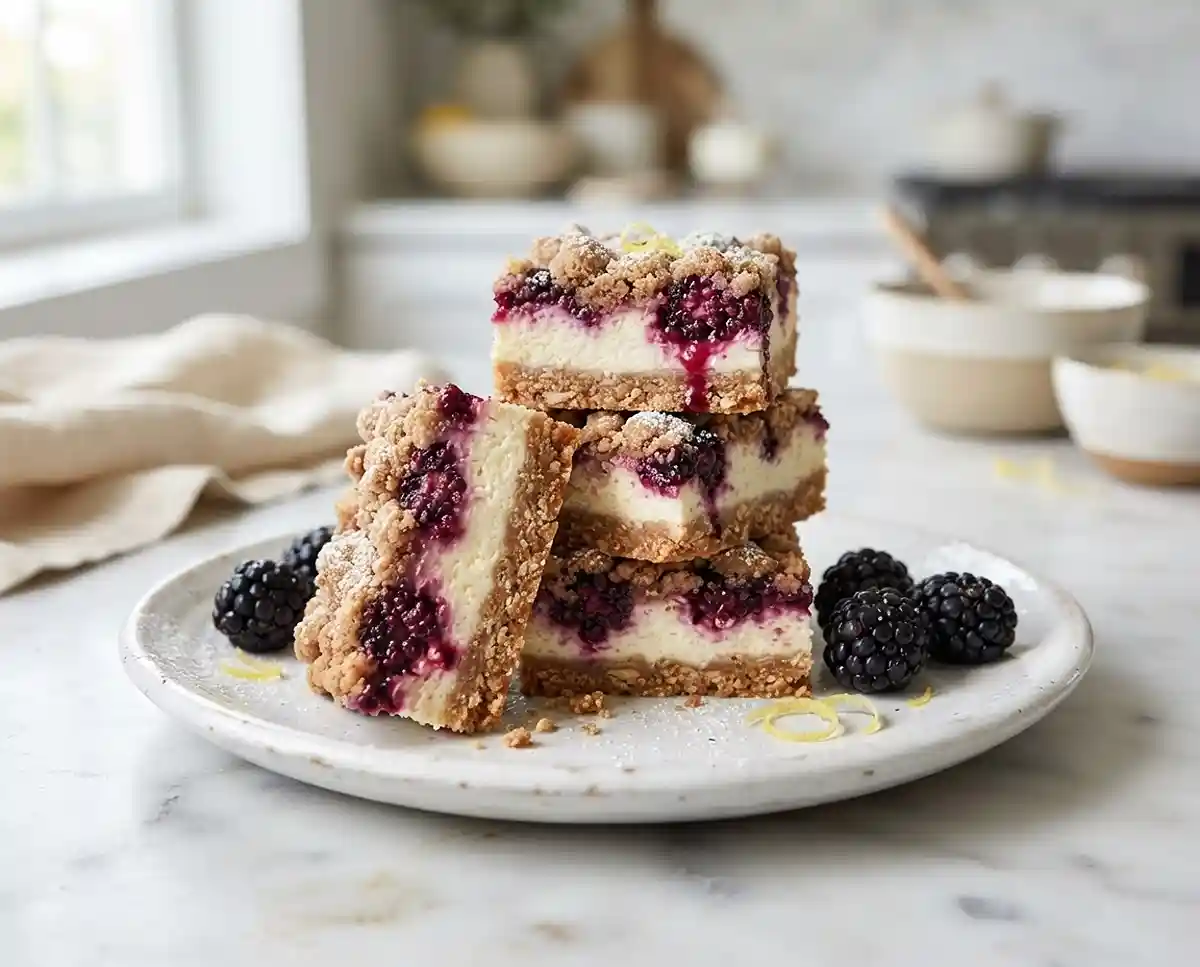
Blackberry Cheesecake Oat Bars
Step-by-step gluten-free blackberry cheesecake oat bars with a buttery oat crust, creamy filling, and fresh berry topping. Includes storage tips and substitutions.
The first time I made gluten-free oat bars for a Fourth of July cookout, I was convinced I’d ruined them. The crust looked crumbly, the cheesecake layer was wobbly, and I nearly skipped chilling them altogether.
I’m so glad I didn’t. After two hours in the fridge, those gluten-free blackberry cheesecake oat bars sliced cleanly, held their layers, and vanished from the dessert table faster than anything else I’d brought.
What makes this recipe stand out isn’t just the flavor — it’s how forgiving it is. You don’t need specialty flours or xanthan gum. Certified gluten-free oats do all the heavy lifting for both the crust and the crumble. Well… that’s the kind of shortcut I wish I’d discovered years earlier. Can a bar dessert really be this simple and still look bakery-worthy? Keep reading — you’ll see it can.
Why You’ll Love This Gluten-Free Blackberry Cheesecake Oat Bars Recipe
- Layered texture in every bite: The oat crust bakes up firm and golden, the cheesecake layer is as fluffy as clouds, and the blackberry filling adds a jammy, tart contrast.
- Beginner-friendly: No stand mixer needed, no complicated techniques — just two bowls and a baking pan.
- Naturally gluten-free: Built entirely on certified gluten-free oats, so no specialty flour blends required.
- Works for any occasion: Equally at home on a holiday dessert spread or packed into a lunchbox as a snack bar.
The Secret to Perfect Gluten-Free Blackberry Cheesecake Oat Bars
- Certified gluten-free oats are non-negotiable: Regular oats are processed in facilities that handle wheat. Using certified GF oats eliminates cross-contamination risk — a critical point for anyone with celiac disease, as noted by trusted celiac research from Beyond Celiac.
- Cornstarch binds the crust: Without gluten’s natural structure, cornstarch steps in to hold the oat mixture together and prevent crumbling after baking.
- Room-temperature cream cheese is essential: Cold cream cheese won’t beat smooth — you’ll end up with lumps in the cheesecake layer. Pull it from the fridge at least an hour before baking.
- The two-stage chill matters: Cooling the pan for a full hour before refrigerating — then refrigerating for at least two hours before slicing — is what gives you those clean, sharp bar edges.
Table of Contents
Ingredients
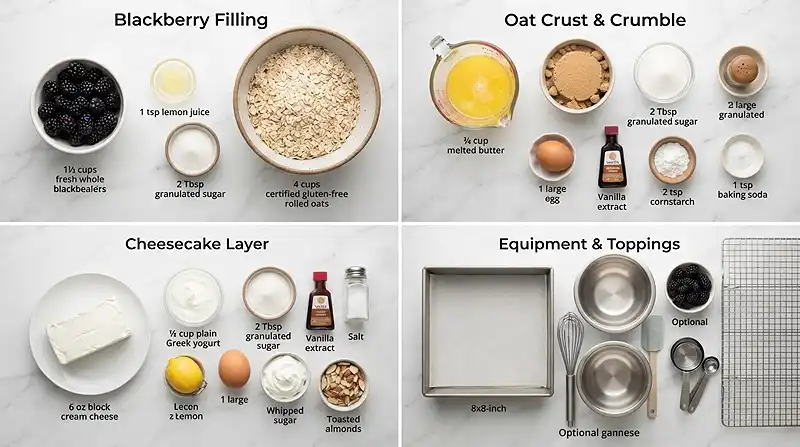
Blackberry Filling
- 1½ cups fresh blackberries
- 1 teaspoon fresh lemon juice
- 2 tablespoons granulated sugar
Oat Crust & Crumble
- 4 cups certified gluten-free old-fashioned rolled oats
- ¾ cup salted butter, melted
- ¾ cup packed light brown sugar
- 2 tablespoons granulated sugar
- 1 large egg
- 2 teaspoons vanilla extract
- 2 teaspoons ground cinnamon
- 2 teaspoons cornstarch (binds without gluten)
- 1 teaspoon certified gluten-free baking soda
Cheesecake Layer
- 6 ounces cream cheese, softened
- ¼ cup plain Greek yogurt (adds tang and lightness)
- 2 tablespoons granulated sugar
- 1 large egg
- 1 teaspoon vanilla extract
- Pinch of fine sea salt
Optional Toppings
- Fresh blackberries
- Lemon zest
- Powdered sugar
- Whipped cream
- Chopped toasted almonds
Instructions
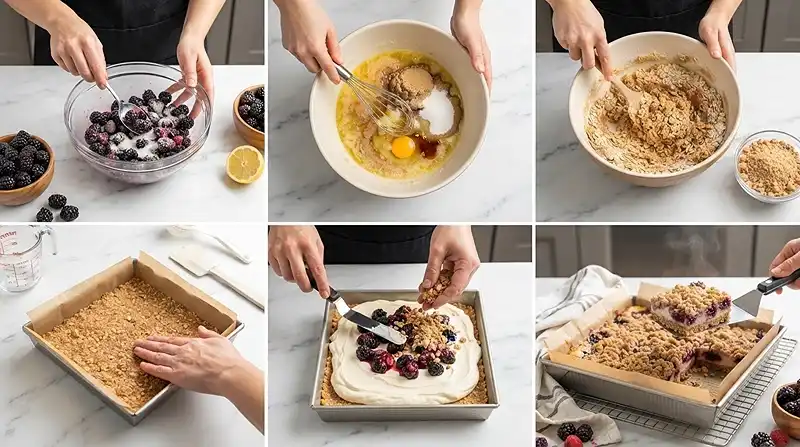
Step 1 — Prep Your Pan and Oven
Preheat the oven to 350°F (175°C). Line an 8×8-inch baking pan with parchment paper, leaving an overhang on at least two sides for easy removal later.
Step 2 — Macerate the Blackberries
In a small bowl, toss the blackberries with the lemon juice and 2 tablespoons of granulated sugar. Set aside while you prepare the other components — the sugar will draw out the berry juices and create a syrupy filling.
Step 3 — Mix the Oat Base
In a large mixing bowl, whisk together the melted butter, brown sugar, and 2 tablespoons of granulated sugar until smooth and glossy. Add 1 egg and 2 teaspoons of vanilla extract, then whisk until fully combined.
Stir in the gluten-free oats, cinnamon, cornstarch, and baking soda until a thick, shaggy crumble forms. Don’t overmix — you want texture, not a paste.
Step 4 — Form the Crust
Reserve 1 cup of the oat mixture and set it aside for the topping. Firmly press the remaining oat mixture into the bottom of the prepared pan in an even layer — use the flat base of a measuring cup to compact it tightly.
Pro Tip: A well-packed crust is what holds the layers together. Press firmly and evenly all the way into the corners.
Step 5 — Make the Cheesecake Layer
In a separate bowl, beat the softened cream cheese, Greek yogurt, 2 tablespoons of granulated sugar, and the pinch of salt until completely smooth with no lumps. Add the egg and 1 teaspoon vanilla extract, then beat until the mixture is creamy and ribbony.
Pro Tip: Stop and scrape down the bowl sides at least once mid-beating to catch any unmixed cream cheese hiding at the edges.
Step 6 — Layer Everything
Spread the cheesecake mixture evenly over the pressed oat crust. Spoon the blackberry mixture evenly over the cheesecake layer, distributing the berries and their syrup across the entire surface.
Sprinkle the reserved cup of oat mixture over the top to create a rustic crumble. Don’t worry about covering every spot — the gaps let the blackberries peek through beautifully.
Step 7 — Bake and Cool
Bake for 35–40 minutes, or until the topping is lightly golden and the cheesecake layer is set with just a slight jiggle in the very center. The edges should look firm and the crumble should have a warm, nutty aroma.
Cool in the pan for 1 hour on a wire rack. Then lift the bars out using the parchment overhang, transfer to the rack, and refrigerate for at least 2 hours before slicing. This patience is what gives you clean, bakery-style cuts.
Make It Your Own
You know… one of the best things about this base recipe is how well it adapts to whatever fruit you have on hand. Raspberries, blueberries, or sliced strawberries all work beautifully in place of the blackberries — just keep the same maceration ratio of sugar and lemon juice. Stone fruits like peaches or cherries work too, though you’ll want to dice them small so the filling stays even.
For a dairy-free version, swap the cream cheese for a plant-based block-style cream cheese — the kind that comes in a foil-wrapped bar, not a tub. Coconut cream yogurt works well in place of the Greek yogurt. The texture will be slightly softer, but the flavor is still deeply satisfying. If you enjoy experimenting with gluten-free snack bars, my cinnamon sugar peach snack cake uses a similar fruit-forward approach and is another great starting point.
To add a protein boost, stir 2 tablespoons of unflavored collagen peptides into the cheesecake layer before spreading — it dissolves completely and you won’t taste it. This is especially useful if you’re serving these bars as a post-workout snack rather than a dessert. The Greek yogurt already adds a protein bump, so the bars are more nutrient-dense than they look.
For a nuttier crust, replace 1 cup of the rolled oats with almond flour. This deepens the flavor and adds a slightly denser bite to the base. Just be aware it will affect the crumble texture — the topping will be finer and less chunky. Either way, you’ll end up with a bar that works beautifully alongside a cup of tea or coffee.
Common Problems & Solutions
Problem: The bars are falling apart when I slice them.
Make sure you refrigerated for the full 2 hours before cutting. Man, oh man… this is the step most people skip, and it’s the single biggest cause of crumbly bars. The cheesecake layer needs that chill time to fully firm up and bond with the crust.
Problem: The cheesecake layer has lumps.
This almost always comes from cold cream cheese. The fat in cream cheese doesn’t emulsify smoothly below room temperature, leaving lumps no matter how long you beat it. Pull your cream cheese out at least 60 minutes before you start, or microwave it in 10-second bursts until just softened.
Problem: The crust is gummy or undercooked.
Gumminess usually means the oats weren’t packed tightly enough before baking, or the butter ratio was off. Double-check that you’re using old-fashioned rolled oats — quick oats absorb liquid differently and can turn dense and gummy in baked applications. Also confirm your oven temperature with an oven thermometer, since many ovens run cool.
Problem: The filling is watery.
If your blackberries release too much liquid, the cheesecake layer can get soggy. Try macerating the berries, then draining off about half the accumulated syrup before spooning them on top. The bars will still have plenty of blackberry flavor without the excess moisture. According to authoritative baking guidance from Serious Eats, macerating and partially draining fruit is a standard technique for keeping baked bars structurally sound.
Storage & Meal Prep
| Method | Duration | Notes |
|---|---|---|
| Counter | 2–3 days | Airtight container; only in cool environments below 70°F |
| Fridge | 5–7 days | Airtight container; bring to room temp 20 min before serving |
| Freezer | 2–3 months | Wrap individually in plastic wrap, then place in a freezer bag |
To reheat from frozen, thaw a bar in the fridge overnight and let it come to room temperature before serving. You can also microwave for 20–25 seconds on 50% power if you prefer a slightly warm bar — the cheesecake layer softens back to a creamy texture quickly.
For meal prep, slice the full batch after chilling, wrap each bar individually, and freeze in portions. This makes it easy to pull one out the night before for a grab-and-go breakfast or snack. No-waste tip: crumble any broken bars over Greek yogurt or vanilla ice cream instead of tossing them.
Blackberry Cheesecake Oat Bars FAQs
Can I use frozen blackberries instead of fresh?
Yes, frozen blackberries work in this recipe. Thaw them completely and drain off the excess liquid before macerating. Skipping the drain step can make the filling watery and prevent the cheesecake layer from setting properly.
How do I know when the bars are done baking?
The bars are done when the crumble topping is lightly golden and the cheesecake layer has a slight jiggle only in the very center — not across the whole surface. The edges should look fully set. If the top is browning too fast, tent loosely with foil for the last 10 minutes.
What’s the best way to get clean slices?
Refrigerate for the full 2 hours minimum before slicing. Use a sharp knife and wipe the blade clean between each cut. For the cleanest results, chill the bars overnight — the extra time firms up every layer significantly.
Why did my oat crust turn out too dry and crumbly?
A dry crust usually means the butter wasn’t fully incorporated, or the oat mixture was pressed too loosely into the pan. Press firmly and evenly using the flat base of a measuring cup. Also confirm you measured the melted butter after melting, not before — the volume difference matters here.
Can I double this recipe for a larger crowd?
Yes. Double all ingredients and bake in a 9×13-inch pan. Increase baking time by 8–12 minutes and check for doneness using the jiggle test. The chill time remains the same — at least 2 hours before slicing.
Serving Suggestions
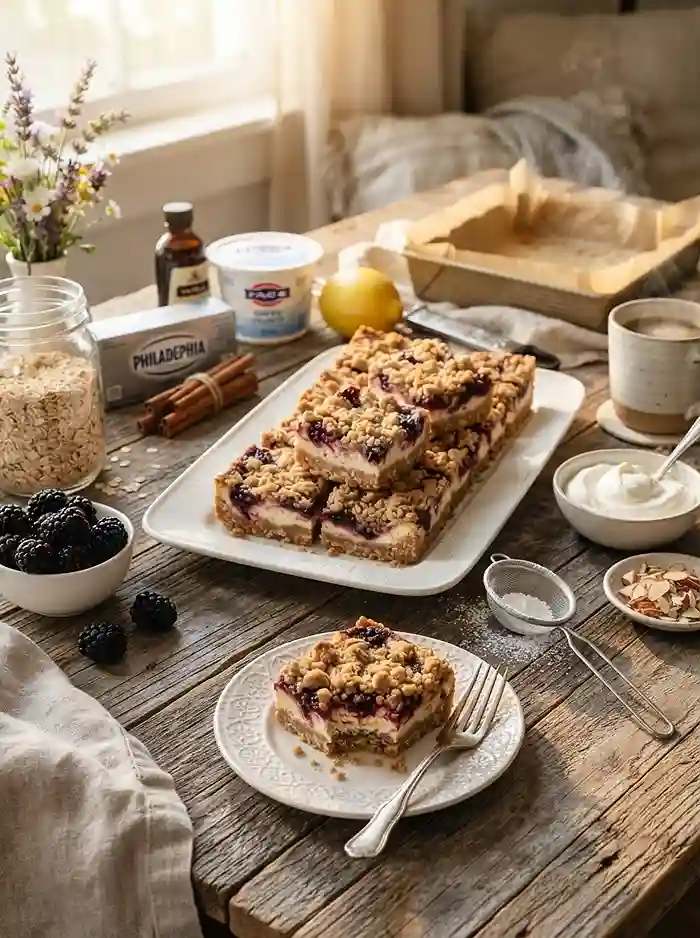
These bars are rich enough to stand alone, but they pair beautifully with a scoop of vanilla bean ice cream or a dollop of lightly sweetened whipped cream. A dusting of powdered sugar and a few fresh blackberries on top turns them into a genuinely eye-catching dessert platter.
For a Thanksgiving or holiday dessert spread, slice them into smaller rectangles and arrange on a board alongside other finger desserts — they hold their shape well at room temperature for up to two hours, which makes them stress-free for entertaining.
If you love baking with simple, whole-ingredient bases, my gluten-free cloud bread and gluten-free cottage cheese bread wrap are two more recipes that prove you don’t need complicated flour blends to get great results.
If you’re new to gluten-free baking and want to understand how different ingredients behave, those recipes are a great place to build your foundational skills before tackling more layered desserts like these bars.
Give these gluten-free blackberry cheesecake oat bars a try this week and let me know how they turn out in the comments below. I’d love to hear what fruit variations you tested or any tweaks you made. If you loved the recipe, sharing it to Pinterest helps other gluten-free bakers find it too — and that community means everything to me.
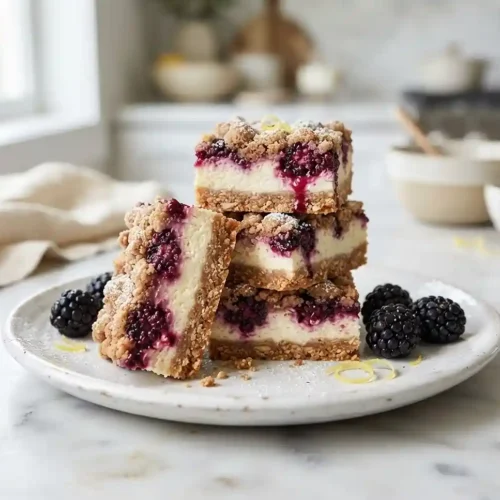
Blackberry Cheesecake Oat Bars
Equipment
- 8×8-inch baking pan
- Parchment paper
- Large mixing bowl
- Small mixing bowl
- Whisk
- Hand mixer or electric mixer
- Measuring cups and spoons
- Wire cooling rack
- Measuring cup (for pressing crust)
Ingredients
Blackberry Filling
- 1 ½ cups fresh blackberries
- 1 teaspoon fresh lemon juice
- 2 tablespoons granulated sugar
Oat Crust & Crumble
- 4 cups certified gluten-free old-fashioned rolled oats
- ¾ cup salted butter melted
- ¾ cup light brown sugar packed
- 2 tablespoons granulated sugar
- 1 large egg
- 2 teaspoons vanilla extract
- 2 teaspoons ground cinnamon
- 2 teaspoons cornstarch binds without gluten
- 1 teaspoon certified gluten-free baking soda
Cheesecake Layer
- 6 ounces cream cheese softened
- ¼ cup plain Greek yogurt adds tang and lightness
- 2 tablespoons granulated sugar
- 1 large egg
- 1 teaspoon vanilla extract
- 1 pinch fine sea salt
Optional Toppings
- fresh blackberries optional
- lemon zest optional
- powdered sugar optional
- whipped cream optional
- chopped toasted almonds optional
Instructions
- Preheat the oven to 350°F (175°C). Line an 8×8-inch baking pan with parchment paper, leaving an overhang for easy removal.
- Toss the blackberries with the lemon juice and 2 tablespoons of sugar. Let them sit while preparing the remaining ingredients.
- Whisk together the melted butter, brown sugar, and granulated sugar. Add the egg and vanilla extract. Stir in the gluten-free oats, cinnamon, cornstarch, and baking soda until a thick crumble forms.
- Reserve 1 cup of the oat mixture. Firmly press the remaining mixture into the prepared pan to form an even crust.
- Beat the softened cream cheese, Greek yogurt, sugar, and salt until smooth. Add the egg and vanilla extract and beat until creamy.
- Spread the cheesecake mixture over the crust. Spoon the blackberry mixture evenly on top, then sprinkle with the reserved oat crumble.
- Bake for 35–40 minutes until the topping is lightly golden and the center has a slight jiggle. Cool for 1 hour, then refrigerate for at least 2 hours before slicing into bars.