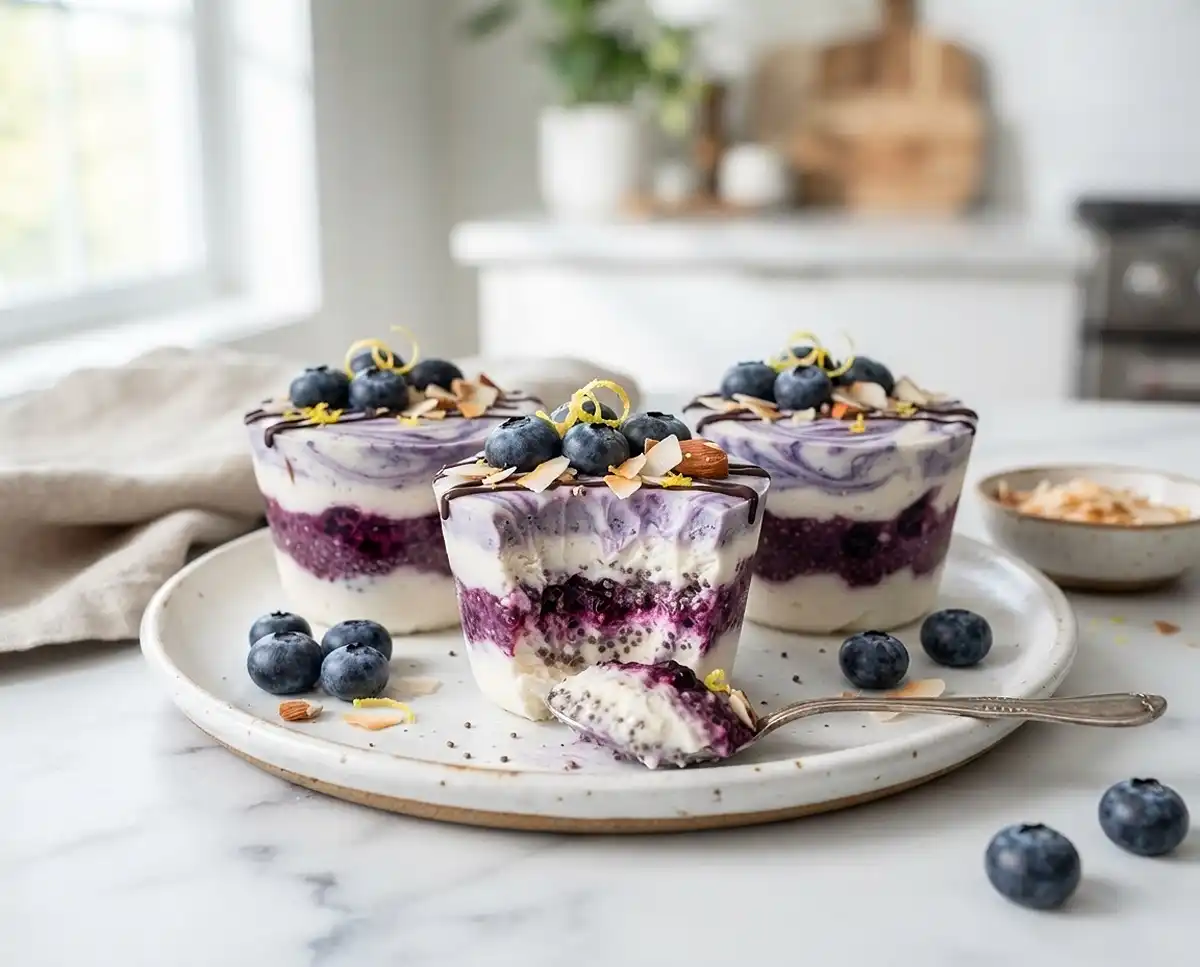
Blueberry Coconut Chia Freezer Cups
Step-by-step gluten-free blueberry coconut chia freezer cups with a creamy coconut layer and jam-like filling. Make ahead and freeze for up to 3 months.
The first time I made these, it was the week before the Fourth of July and I desperately needed something cold, beautiful, and fuss-free for a backyard gathering. I had a pint of blueberries, a can of coconut milk, and exactly zero desire to turn on the oven.
What came out of that muffin pan was something I still make on rotation all summer long. Gluten-free blueberry coconut chia freezer cups look impressive, but the whole process takes maybe 30 minutes of actual hands-on time.
Can you really make a make-ahead dessert this good with just a handful of pantry staples? These prove you absolutely can.
Why You’ll Love This Blueberry Coconut Chia Freezer Cups Recipe
- Texture that surprises: The blueberry chia layer sets like a lush, jammy gel, while the coconut layer firms up smooth and creamy — cool and satisfying like a tropical popsicle in cup form.
- Genuinely easy: No baking, no blender required, and no special equipment beyond a muffin pan.
- Naturally dairy-free friendly: Swap Greek yogurt for coconut yogurt and the whole recipe stays completely dairy-free.
- Make-ahead magic: Freeze a full batch on Sunday and you’ve got grab-and-go treats all week.
The Secret to Perfect Gluten-Free Blueberry Coconut Chia Freezer Cups
- Cook the blueberries first: Warming them with maple syrup and lemon juice releases natural pectin, which helps the chia seeds set into a thick, cohesive filling rather than a watery puddle.
- Let the chia mixture rest: Stirring the chia seeds in off the heat and waiting 10–15 minutes lets them hydrate fully. Skipping this step leads to seeds that never gel properly.
- Use full-fat canned coconut milk: The higher fat content means a creamier, firmer coconut layer that doesn’t turn icy. Light coconut milk will freeze gritty and hard.
- Silicone liners make removal effortless: Paper liners stick. Silicone liners flex and pop the cups out cleanly every single time.
Table of Contents
Ingredients
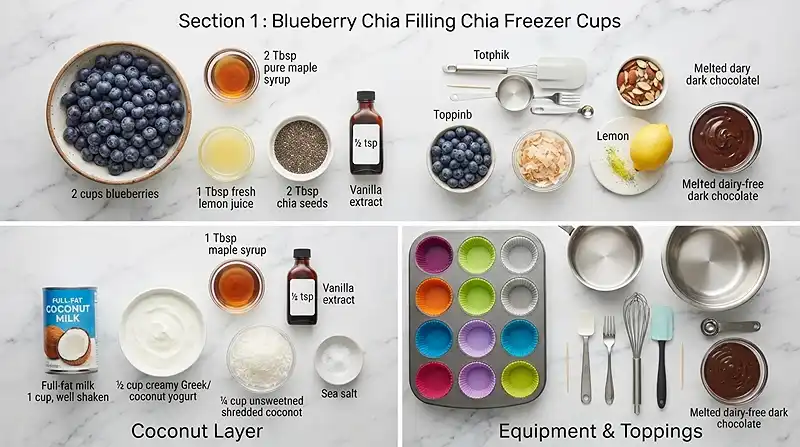
Blueberry Chia Filling
| Ingredient | Amount | Notes |
|---|---|---|
| Fresh or frozen blueberries | 2 cups | Frozen work perfectly — no need to thaw |
| Pure maple syrup | 2 tablespoons | Adds sweetness without refined sugar |
| Fresh lemon juice | 1 tablespoon | Brightens the berry flavor |
| Chia seeds | 2 tablespoons | The natural thickener — no gelatin needed |
| Vanilla extract | ½ teaspoon | Pure extract, not imitation |
Coconut Layer
| Ingredient | Amount | Notes |
|---|---|---|
| Full-fat canned coconut milk, well shaken | 1 cup | Full-fat only for best texture |
| Plain Greek yogurt or dairy-free coconut yogurt | ½ cup | Either version works beautifully |
| Pure maple syrup | 1 tablespoon | |
| Vanilla extract | ½ teaspoon | |
| Unsweetened shredded coconut | ¼ cup | Adds texture and subtle sweetness |
| Sea salt | Pinch | Balances the sweetness |
Chia seeds bring more than thickening power here. According to Harvard Health’s guide to chia seed nutrition, they’re packed with fiber, plant-based omega-3 fatty acids, and antioxidants — making these cups a genuinely nourishing treat, not just a pretty one.
Instructions
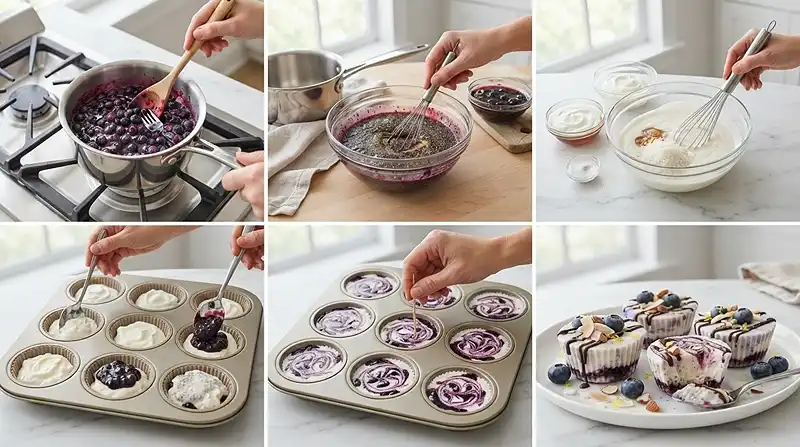
Make the Blueberry Chia Filling
- Cook the blueberries. Add the 2 cups of blueberries, 2 tablespoons of maple syrup, and 1 tablespoon of lemon juice to a small saucepan over medium heat. Cook for 5–7 minutes, stirring occasionally, until the berries soften and release their deep violet juices.
- Mash lightly. Use a fork to lightly mash the blueberries, leaving some pieces intact for texture. You want a chunky, rustic consistency — not a smooth puree.
- Add chia seeds and vanilla. Remove the pan from heat. Stir in the 2 tablespoons of chia seeds and ½ teaspoon of vanilla extract. Let the mixture sit for 10–15 minutes, stirring once or twice, until it thickens into a jam-like consistency. Pro Tip: The mixture will look thin at first — don’t rush it. Give the chia seeds their full rest time.
Make the Coconut Layer
- Whisk the coconut mixture. In a separate bowl, whisk together 1 cup of coconut milk, ½ cup of Greek yogurt or coconut yogurt, 1 tablespoon of maple syrup, ½ teaspoon of vanilla, ¼ cup of shredded coconut, and a pinch of sea salt until smooth. The mixture should look creamy and slightly thick.
Assemble and Freeze
- Prep the muffin pan. Line a 12-cup muffin pan with silicone liners or parchment liners. Silicone is strongly preferred — the cups pop out without tearing.
- Add the first coconut layer. Spoon a small layer of the coconut mixture into each cup, covering the bottom evenly.
- Add the blueberry chia layer. Spoon the blueberry chia mixture on top of the coconut base in each cup.
- Top with remaining coconut mixture. Add the remaining coconut mixture over the blueberry layer, leaving a little space at the top of each cup for expansion during freezing.
- Swirl for effect (optional). Drag a toothpick or small spoon through the layers in a gentle figure-eight motion to create a marbled look. Pro Tip: Don’t over-swirl — two or three passes is enough to get that beautiful ribbon effect.
- Freeze until firm. Place the pan in the freezer for 4–6 hours, or until the cups are completely solid all the way through.
- Soften before serving. Let the freezer cups sit at room temperature for 5–10 minutes before eating. This brings them to a creamy, scoopable texture — still cold, but not tooth-shatteringly hard.
Make It Your Own
Well… one of the things I love most about this recipe is how forgiving it is. Swap the blueberries for the same amount of fresh or frozen strawberries, raspberries, or a mixed berry blend and the filling works just as well. The pectin levels in these fruits are similar, so your chia layer will still set up beautifully.
To keep this fully dairy-free, replace the Greek yogurt with an equal amount of plain coconut yogurt. The coconut layer will be slightly softer but just as creamy. This is also the version I’d recommend if you’re making these as a gluten free dairy free freezer cups option for guests with multiple dietary needs.
For a tropical twist, stir a tablespoon of lime juice and a pinch of lime zest into the coconut layer before assembling. The citrus cuts through the richness in a way that feels almost resort-worthy. You can also fold in a few tablespoons of diced mango alongside the blueberries in the filling for a fruit-forward variation.
If you’d like a richer, more dessert-forward version of this blueberry coconut chia pudding, add an extra tablespoon of maple syrup to the coconut layer and sprinkle a few cacao nibs on top before freezing. They add a satisfying little crunch that plays beautifully against the smooth coconut cream.
Common Problems & Solutions
Problem: The blueberry chia layer didn’t thicken. This almost always means the chia seeds didn’t get enough resting time. Give the mixture a full 15 minutes off the heat, stirring once or twice to prevent clumping. If it still looks thin, stir in an additional half teaspoon of chia seeds and wait another 5 minutes.
Problem: The coconut layer is icy instead of creamy. This is a fat issue. Light coconut milk doesn’t have enough fat to freeze smoothly — it forms larger ice crystals. Always use full-fat canned coconut milk, well-shaken so the cream and liquid are fully combined before you measure.
Man, oh man… Problem: The cups won’t release from the pan cleanly. Paper liners bond to the frozen mixture as moisture from the filling soaks through. If you’re stuck with paper liners, run the outside of the muffin pan briefly under cold water to help release the cups without tearing them apart. Better yet, invest in a silicone muffin pan or silicone liners — it makes a real difference.
Problem: The layers didn’t stay separate — they mixed together. This happens when the chia layer is still warm when you assemble the cups. Let both the blueberry mixture and the coconut mixture come to room temperature (or chill the blueberry layer in the fridge for 10 minutes) before layering. Cool mixtures stay distinct and give you that beautiful striped effect.
Storage & Meal Prep
| Method | Duration | Notes |
|---|---|---|
| Freezer | Up to 3 months | Wrap individually in plastic wrap or store in an airtight container |
| Fridge (thawed) | 3–4 days | Transfer to the fridge the night before; texture softens to a pudding-like consistency |
| Counter | 30–45 minutes max | For softening before serving only — these are not shelf-stable |
These cups are a natural for batch cooking. Make a double batch on a Sunday, wrap each cup individually, and store them in a zip-top freezer bag labeled with the date. They’re grab-and-go all week with zero effort.
If you thaw a cup overnight in the fridge, it transforms into a thick, spoonable blueberry coconut chia pudding — equally good, just a different texture. No reheating needed, and nothing goes to waste since the leftovers are just as good in their thawed form.
Blueberry Coconut Chia Freezer Cups FAQs
Can I use frozen blueberries instead of fresh?
Yes, frozen blueberries work just as well as fresh in this recipe. You do not need to thaw them first — simply add them directly to the saucepan. Frozen berries often release more juice during cooking, which can actually make the chia filling even more vibrant in color and flavor.
How do I make these fully dairy-free?
Replace the Greek yogurt with an equal amount of plain dairy-free coconut yogurt. Every other ingredient in this recipe is already dairy-free, so this single swap is all you need. The coconut layer will be slightly softer but just as creamy and satisfying.
What’s the best way to store these freezer cups long-term?
Wrap each cup individually in plastic wrap, then place them in an airtight freezer-safe container or zip-top bag. Stored this way, they keep well for up to 3 months without freezer burn. Label the bag with the date so you always know what you have on hand.
Why did my chia layer stay runny and never firm up?
The most common cause is not giving the chia seeds enough time to hydrate. After stirring them in off the heat, the mixture needs a full 10–15 minutes to thicken into a jam-like consistency. Stirring once or twice during that rest period helps prevent the seeds from clumping together at the bottom without absorbing the liquid.
Can I make these without a muffin pan?
Yes. Small paper or silicone dessert cups work well as an alternative. You can also use a mini loaf pan lined with parchment and slice the frozen block into individual portions after it sets. Silicone ice cube trays in larger sizes are another creative option for bite-sized versions.
Serving Suggestions
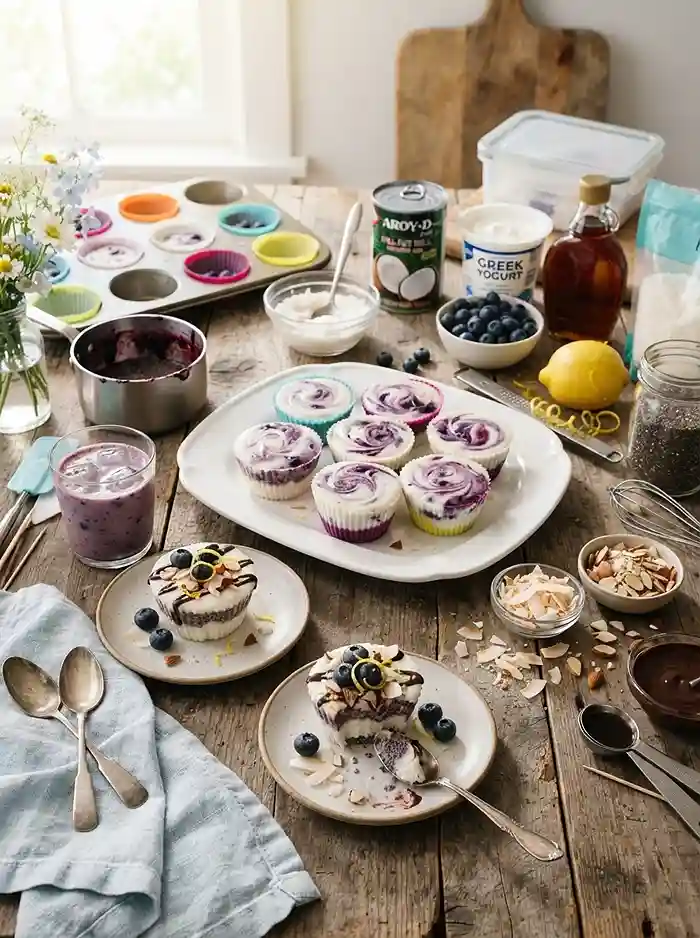
Serve these straight from the freezer after a 5–10 minute rest on the counter. They pair beautifully with a drizzle of honey or a sprinkle of extra shredded coconut and a few fresh blueberries on top for presentation.
You know… these cups have become my go-to contribution for summer potlucks and holiday weekend cookouts. They travel well straight from the freezer in a cooler, and they look striking on a dessert table without any extra effort.
If you’re building out a full spread of gluten-free sweet treats, try serving these alongside a slice of gluten-free berry chantilly cake for a berry-forward dessert duo that covers everyone at the table. Or for something rich and fudgy to contrast the light, cool cups, the gluten-free salted tahini brownie bites are an incredible pairing.
And if you need a satisfying savory main to balance out the sweets, these gluten-free beef taco rice stuffed peppers are a crowd-pleaser that rounds out any gathering beautifully.
Conclusion
These gluten-free blueberry coconut chia freezer cups are the kind of recipe that earns a permanent spot in your rotation. They’re genuinely simple, naturally nourishing, and beautiful enough to share.
If you give them a try, I’d love to hear how they turned out. Drop a comment below, leave a rating, and let me know if you made any fun variations — I’m always curious what creative swaps readers come up with. And if you loved them, sharing on Pinterest helps other gluten-free families find this recipe too.
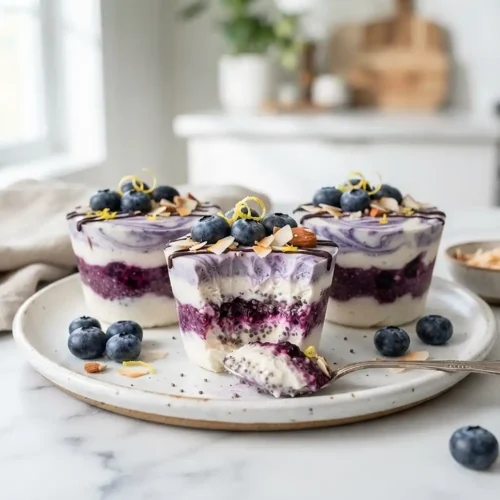
Gluten-Free Blueberry Coconut Chia Freezer Cups
Equipment
- 12-cup muffin pan
- Silicone liners or parchment liners
- Small saucepan
- Mixing bowl
- Whisk
- Fork
- Toothpick or small spoon
Ingredients
Blueberry Chia Filling
- 2 cups Fresh or frozen blueberries Frozen work perfectly; no need to thaw
- 2 tablespoons Pure maple syrup Adds sweetness without refined sugar
- 1 tablespoon Fresh lemon juice Brightens the berry flavor
- 2 tablespoons Chia seeds Natural thickener; no gelatin needed
- ½ teaspoon Vanilla extract Pure extract, not imitation
Coconut Layer
- 1 cup Full-fat canned coconut milk Well shaken; full-fat only for the best texture
- ½ cup Plain Greek yogurt or dairy-free coconut yogurt Use coconut yogurt for a fully dairy-free version
- 1 tablespoon Pure maple syrup
- ½ teaspoon Vanilla extract
- ¼ cup Unsweetened shredded coconut Adds texture and subtle sweetness
- 1 pinch Sea salt Balances the sweetness
Instructions
- Add the blueberries, maple syrup, and lemon juice to a small saucepan over medium heat. Cook for 5–7 minutes, stirring occasionally, until the berries soften and release their juices.
- Lightly mash the blueberries with a fork, leaving some pieces intact for a chunky, rustic texture rather than a smooth puree.
- Remove the saucepan from the heat and stir in the chia seeds and vanilla extract. Let the mixture rest for 10–15 minutes, stirring once or twice, until it thickens to a jam-like consistency.
- In a separate bowl, whisk together the coconut milk, Greek yogurt or coconut yogurt, maple syrup, vanilla, shredded coconut, and sea salt until smooth and creamy.
- Line a 12-cup muffin pan with silicone liners or parchment liners. Silicone liners are preferred because they make the frozen cups easier to remove.
- Spoon a small, even layer of the coconut mixture into the bottom of each muffin cup.
- Spoon the blueberry chia mixture over the coconut base in each cup.
- Add the remaining coconut mixture over the blueberry layer, leaving a little space at the top of each cup for expansion during freezing.
- Optionally drag a toothpick or small spoon through the layers in a gentle figure-eight motion two or three times to create a marbled effect.
- Freeze the muffin pan for 4–6 hours, or until the cups are completely firm throughout.
- Let the frozen cups sit at room temperature for 5–10 minutes before serving so they become creamy and scoopable while remaining cold.