
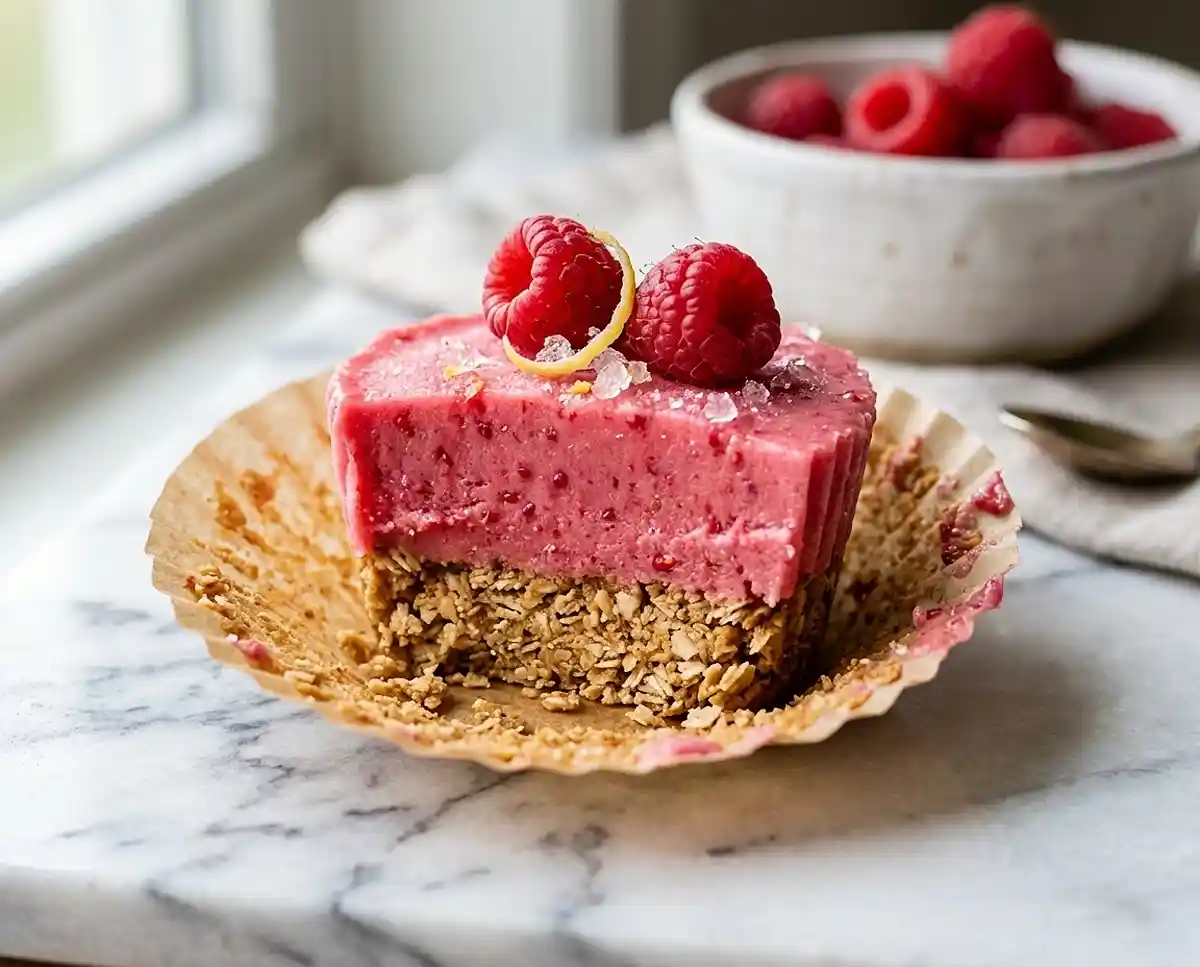
Dairy-Free Raspberry Lemonade Freezer Cups
Make gluten-free dairy-free raspberry lemonade freezer cups with a simple oat crust and creamy coconut filling. Step-by-step instructions, make-ahead friendly.
Last July, I made these for a backyard barbecue and genuinely forgot to tell anyone they were gluten-free and dairy-free. Nobody noticed — they just kept grabbing them off the tray until the platter was empty.
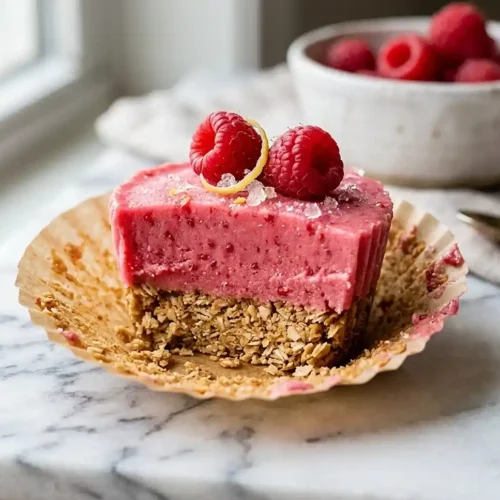
These gluten-free dairy-free raspberry lemonade freezer cups are the kind of summer treat that feels indulgent but comes together with a blender and a muffin pan. The tart raspberry lemonade filling sits on a pressed oat crust that’s chewy, slightly nutty, and holds together straight out of the freezer.
Table of Contents
Why You’ll Love This Raspberry Lemonade Freezer Cups
- Bright, tangy flavor — fresh lemon juice and raspberries create a filling that tastes like sunshine and tastes like the best lemonade stand you ever visited as a kid.
- No baking required — the crust is pressed raw, and the filling goes straight from the blender to the freezer. Start to finish takes about 15 minutes of active time.
- Naturally free of the top allergens — no gluten, no dairy, no refined sugar. Sweetened only with pure maple syrup.
- Make-ahead champion — these keep in the freezer for up to two months, making them ideal for prepping before a holiday weekend or a week of hot summer days.
The Secret to Perfect Gluten-Free Dairy-Free Raspberry Lemonade Freezer Cups
- Full-fat coconut milk is the key to creaminess. The high fat content in canned full-fat coconut milk mimics the richness of cream in a traditional frozen dessert. Lite coconut milk produces an icy, thin filling instead of a smooth, scoopable texture.
- Press the crust firmly. The oat-almond crust needs to be compacted tightly into the liner. Use the back of a measuring spoon or the bottom of a small glass to press it flat — a loose crust crumbles when you unmold the cups.
- Strain for smoothness. Running the raspberry mixture through a fine-mesh sieve removes the seeds and creates a silky, vibrant filling. This one step elevates the texture from homemade to genuinely impressive. According to nutrition research on raspberries, they’re also packed with fiber and vitamin C, so you’re not sacrificing any nutritional benefit by straining.
- Let them thaw briefly before serving. Five to ten minutes at room temperature softens the filling just enough that you get a creamy bite rather than a rock-solid one. Patience here makes a real difference in the eating experience.
Ingredients
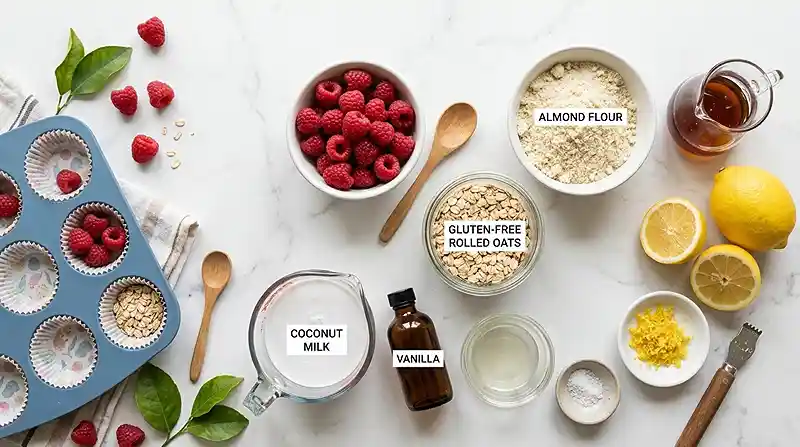
For the Raspberry Lemonade Layer
- 2 cups fresh or frozen raspberries
- 1/4 cup pure maple syrup
- 1/4 cup fresh lemon juice
- 1 teaspoon finely grated lemon zest
- 1/2 cup full-fat canned coconut milk
- 1 teaspoon vanilla extract
For the Crust
- 1 cup certified gluten-free rolled oats
- 1/2 cup almond flour
- 2 tablespoons pure maple syrup
- 2 tablespoons melted coconut oil
- Pinch of salt
Ingredient note: Be sure your rolled oats are labeled “certified gluten-free.” Oats are naturally gluten-free but are frequently processed in facilities that handle wheat. The certification matters for anyone with celiac disease or a serious sensitivity.
Instructions
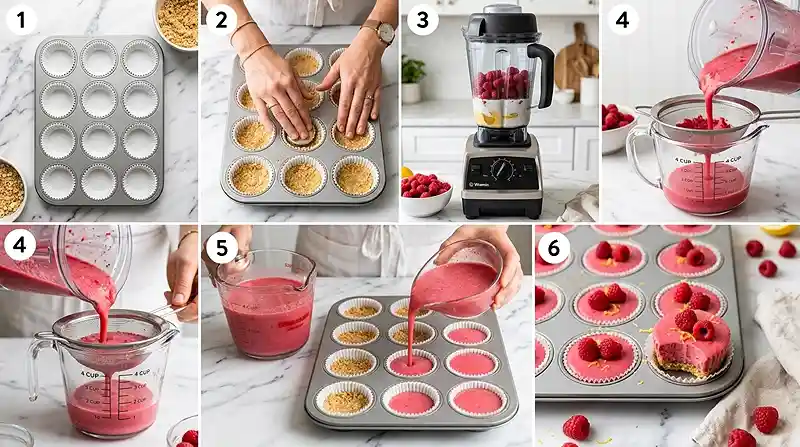
- Prep the pan. Line a 12-cup muffin pan with silicone liners or paper liners. Silicone liners release the frozen cups most easily — if using paper, just peel carefully after the brief thaw.
- Mix the crust. Add the certified gluten-free rolled oats, almond flour, maple syrup, melted coconut oil, and salt to a bowl. Stir until the mixture resembles coarse, damp crumbs that hold together when pinched.
- Press the crust. Divide the oat mixture evenly among the 12 liners. Press firmly into the bottoms using the back of a measuring spoon. The crust should feel compact and even, not loose.
- Blend the filling. Add the raspberries, maple syrup, lemon juice, lemon zest, coconut milk, and vanilla to a blender. Blend until completely smooth, about 30-45 seconds.
- Strain for a seedless texture. Pour the raspberry mixture through a fine-mesh sieve over a bowl, pressing gently with a spatula to push the liquid through and leave the seeds behind. This step is optional but highly recommended.
- Fill the cups. Pour the raspberry lemonade mixture evenly over the pressed crusts. The filling should reach nearly to the top of each liner.
- Freeze until firm. Freeze for 4-6 hours, or until completely solid. The filling will shift from a bright pink liquid to a deeply colored, opaque frozen layer — that’s your visual cue that they’re ready.
- Serve. Remove the cups from the freezer and let them sit at room temperature for 5-10 minutes before serving. Garnish with fresh raspberries and a little lemon zest if desired. Keep any leftovers frozen in an airtight container.
Pro Tip: If you want a swirled or layered look, pour half the filling, freeze for 1 hour until partially set, then pour the remaining filling over the top. The layers will stay distinct.
Make It Your Own
You know… the beauty of this chilled summer treat is how forgiving it is with swaps. Strawberries or blackberries work equally well in place of raspberries — just keep the total fruit amount at 2 cups. Strawberry lemonade cups have a milder, sweeter flavor that tends to be a bigger hit with younger kids.
If almond flour isn’t available, use oat flour made from certified gluten-free oats instead. The crust will be slightly softer and less chewy, but it still holds together well when frozen. Sunflower seed flour is another nut-free swap that works for school-safe treats.
For a sweeter, more dessert-forward filling, add one extra tablespoon of maple syrup to the blend. If you prefer a tangier, more lemonade-forward flavor, add an extra teaspoon of lemon juice and increase the zest to 1.5 teaspoons. Tasting the filling before you pour it lets you dial it in exactly.
Man, oh man… if you want to turn these into a showstopper for a summer gathering, double the batch and serve them on a chilled platter with a dusting of freeze-dried raspberry powder. They look absolutely striking and taste like a fancy frozen dessert bar made them.
Common Problems & Solutions
Problem: The crust crumbles when you unmold the cups. The mixture wasn’t pressed firmly enough before freezing. Solution: Re-press it using the back of a spoon with real downward pressure — the oats and almond flour need compression to bind. Adding a few extra drops of coconut oil also helps the crust hold together.
Problem: The filling is icy and grainy instead of creamy. Lite coconut milk was used instead of full-fat. Solution: Swap to full-fat canned coconut milk and make sure it’s well-shaken before measuring. The higher fat content is what prevents large ice crystals from forming during freezing.
Problem: The raspberry flavor tastes muted after freezing. Cold temperatures dull flavor perception, which is why frozen desserts need bolder seasoning than room-temperature ones. Solution: Add an extra teaspoon of lemon juice and a touch more maple syrup to the filling before pouring. Lemon zest also amplifies fruit flavor without adding sweetness.
Problem: The cups won’t release cleanly from the liner. They may not be fully frozen yet, or the liner is sticking. Solution: Give them the full 6 hours in the freezer — under-frozen cups tear apart when unmolded. According to frozen dessert technique guides, silicone molds release frozen treats far more reliably than paper, so that’s worth the small investment if you make freezer desserts often.
Storage & Meal Prep
| Method | Duration | Notes |
|---|---|---|
| Counter | 10-15 minutes | For serving only — do not store at room temperature |
| Freezer (in pan) | Up to 1 week | Cover pan tightly with plastic wrap |
| Freezer (airtight container) | 2-3 months | Wrap individually to prevent sticking |
Once fully frozen, transfer the cups to a zip-top freezer bag or airtight container with parchment paper between layers. This prevents them from fusing together and makes grabbing one at a time much easier.
These are a fantastic make-ahead option for summer entertaining. Make a double batch on a Sunday and you’ll have a ready-to-serve raspberry lemonade dessert on hand for two full months of warm evenings.
Your Questions Answered
Can I use frozen raspberries instead of fresh?
Yes — frozen raspberries work perfectly and are often the better choice. They’re picked at peak ripeness and can be blended straight from frozen with no thawing required.
How long do these freezer cups last in the freezer?
Stored in an airtight container with parchment between layers, these cups keep well for up to 2-3 months. For best flavor and texture, enjoy within the first 4-6 weeks.
Can I make these nut-free?
Yes. Replace the almond flour with certified gluten-free oat flour or sunflower seed flour in equal amounts. The crust will be slightly softer but still holds together well when frozen.
Why did my filling turn icy instead of creamy?
Lite coconut milk was likely used instead of full-fat. Full-fat canned coconut milk has enough fat to prevent large ice crystals from forming, giving you a smooth, creamy frozen texture.
Do I have to strain out the raspberry seeds?
No, straining is optional. The cups taste great with seeds in — straining just gives the filling a smoother, more polished texture. If you prefer a more rustic result, skip that step entirely.
Serving Suggestions
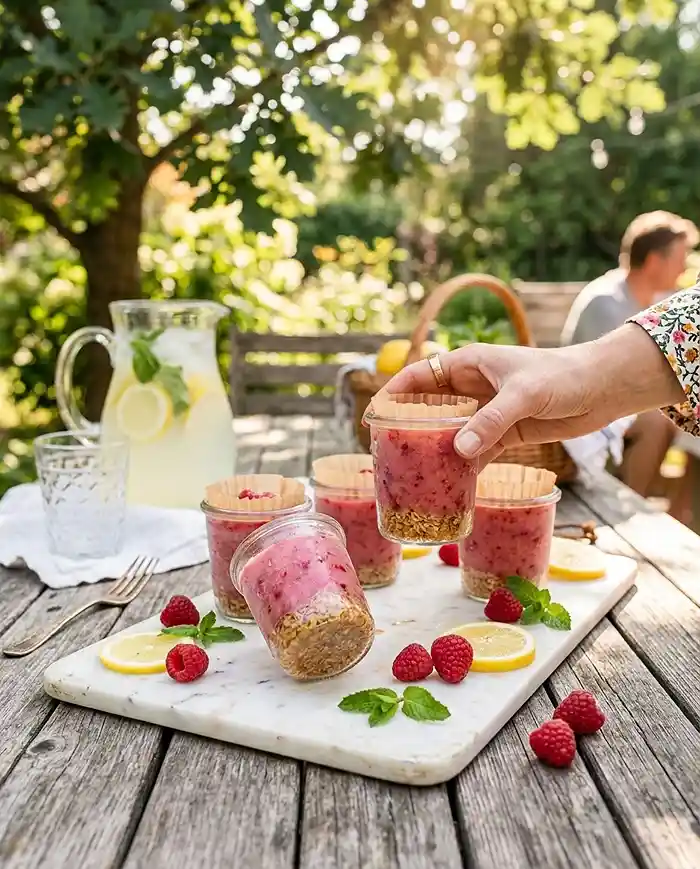
These gluten-free dairy-free freezer cups are a natural fit for Memorial Day cookouts, Fourth of July spreads, and any summer gathering where you need a no-fuss dessert that travels well and looks put-together.
Pair them on a dessert table alongside these brown butter peach cobbler blondies for a full summer dessert spread that covers both frozen and baked options.
After a savory dinner like this garlic parmesan chicken corn skillet, one of these tart, icy cups is the kind of light finish that leaves everyone satisfied without feeling heavy.
If you try these raspberry lemonade freezer cups, I’d love to hear what fruit swaps you tried or how your family reacted. Leave a comment below, rate the recipe, and if you save it to Pinterest it helps other families find a frozen treat they can actually eat.
Gluten-Free Dairy-Free Raspberry Lemonade Freezer Cups
Equipment
- 12-cup muffin pan
- Silicone or paper liners
- Mixing bowl
- Blender
- Fine-mesh sieve
- Spatula
Ingredients
For the Raspberry Lemonade Layer
- 2 cups fresh or frozen raspberries
- ¼ cup pure maple syrup
- ¼ cup fresh lemon juice
- 1 teaspoon lemon zest finely grated
- ½ cup full-fat canned coconut milk
- 1 teaspoon vanilla extract
For the Crust
- 1 cup certified gluten-free rolled oats
- ½ cup almond flour
- 2 tablespoons pure maple syrup
- 2 tablespoons coconut oil melted
- salt pinch
For Serving
- fresh raspberries for garnish, optional
- lemon zest for garnish, optional
Instructions
- Line a 12-cup muffin pan with silicone liners or paper liners.
- Add the certified gluten-free rolled oats, almond flour, maple syrup, melted coconut oil, and salt to a bowl. Stir until the mixture resembles coarse, damp crumbs that hold together when pinched.
- Divide the oat mixture evenly among the 12 liners. Press firmly into the bottoms with the back of a measuring spoon until compact and even.
- Add the raspberries, maple syrup, lemon juice, lemon zest, coconut milk, and vanilla to a blender. Blend until completely smooth, about 30–45 seconds.
- Pour the raspberry mixture through a fine-mesh sieve over a bowl, pressing gently with a spatula to remove the seeds. Straining is optional but recommended for a smoother filling.
- Pour the raspberry lemonade mixture evenly over the pressed crusts, filling each liner nearly to the top.
- Freeze for 4–6 hours, or until completely firm.
- Remove the cups from the freezer and let them sit at room temperature for 5–10 minutes before serving. Garnish with fresh raspberries and lemon zest if desired. Keep leftovers frozen in an airtight container.


![Gluten-Free Bao Buns [Steamed Chinese Baozi]](https://www.grainlesslife.com/wp-content/uploads/2025/12/Gluten-Free-Bao-Buns-Steamed-Chinese-Baozi-768x614.webp "Gluten-Free Bao Buns [Steamed Chinese Baozi] 11")