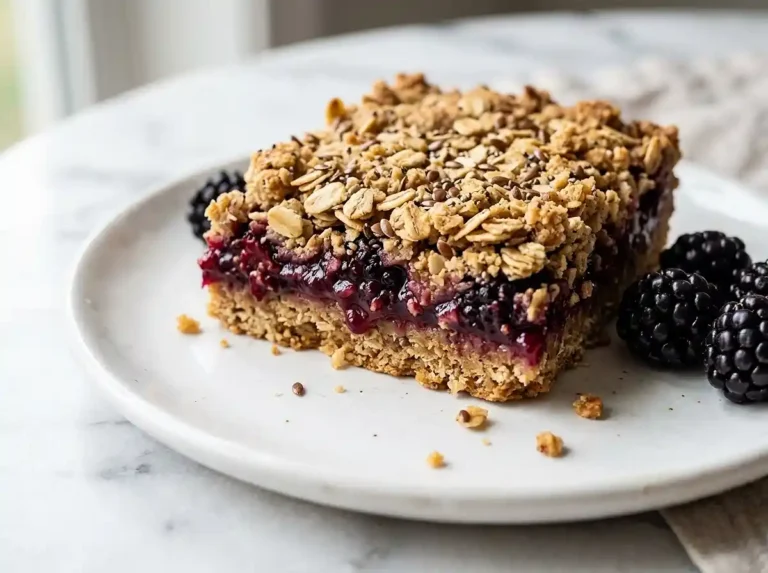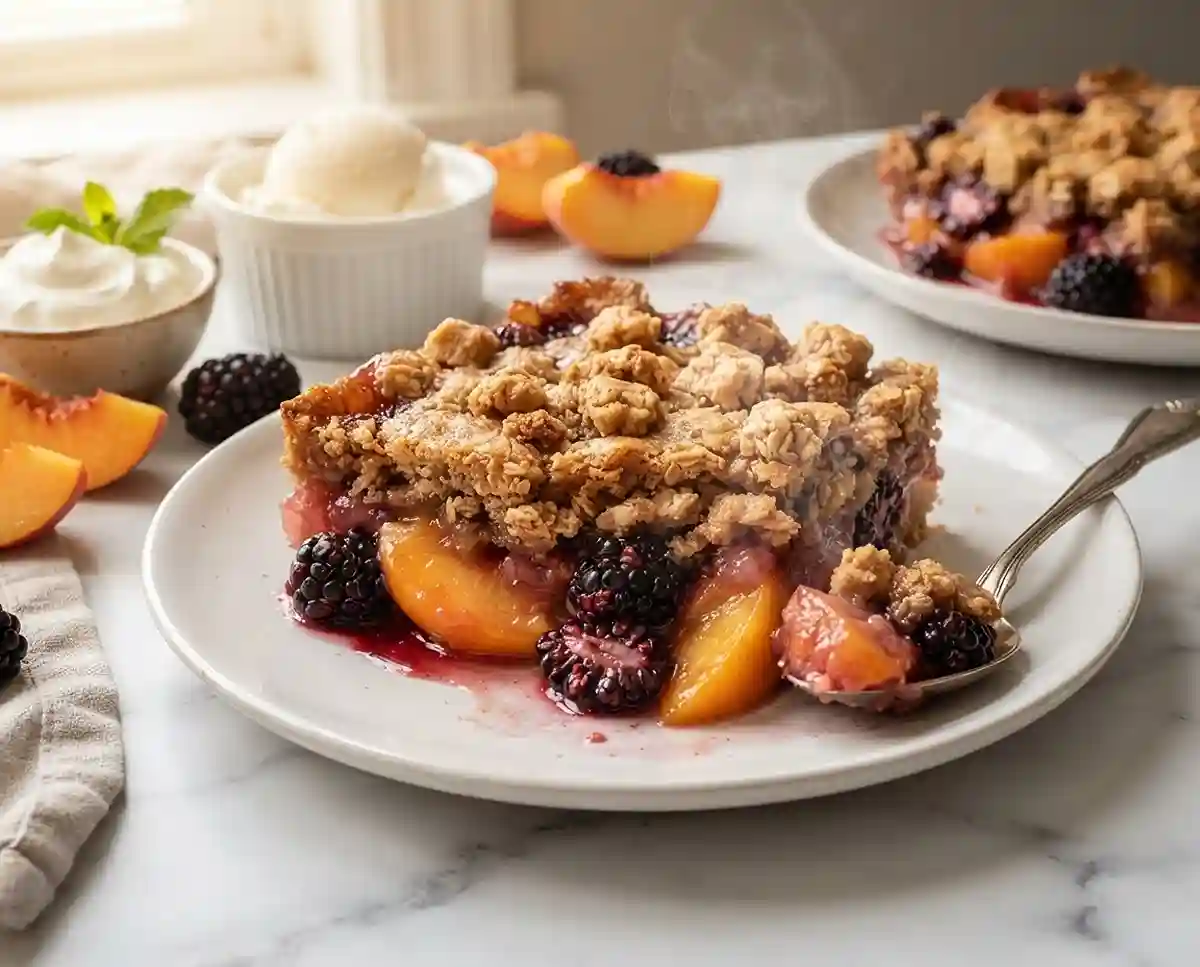
Gluten-Free Peach and Blackberry Crisp
A simple gluten-free peach and blackberry crisp with a golden oat topping. Step-by-step instructions, substitution tips, and storage guide included.
The summer my daughter was diagnosed with celiac disease, I was determined to make her a fruit crisp for the Fourth of July — the kind my mom used to pull from the oven every August, steaming and golden, smelling like brown sugar and warm stone fruit. My first attempt with a rice flour topping came out pale, powdery, and sad. She ate it politely. We both knew.
That failure pushed me to rethink the whole approach, and this gluten-free peach and blackberry crisp recipe is what I landed on after a summer of testing. The topping uses certified GF oats and a proper gluten-free all-purpose flour blend — and the result is a deep golden, crumbly crust that shatters like a proper crisp should.
Well… it’s one of those recipes that makes people forget they’re eating something gluten-free at all. Have you ever watched someone go back for a third serving and then ask, surprised, “wait, this is gluten-free?” That reaction never gets old.
Why You’ll Love This Gluten-Free Peach and Blackberry Crisp
- Texture that rivals any wheat-based crisp: The topping bakes into crunchy, caramel-edged clusters — as crisp and satisfying as shortbread crumble, with none of the grittiness gluten-free baking sometimes brings.
- Straightforward enough for beginners: No mixer, no special technique, no chilling required. If you can cut butter and toss fruit in a bowl, you can make this.
- Works with fresh or thawed frozen fruit: Peak-season peaches and blackberries are ideal, but this recipe adapts well to frozen fruit in the off-season.
- Naturally crowd-friendly: The recipe serves 8 and bakes in a single dish, which makes it ideal for summer gatherings, potlucks, or a Sunday family dinner.
The Secret to Perfect Gluten-Free Peach and Blackberry Crisp
- Cold butter is everything: Warm or softened butter blends into the dry ingredients instead of forming clusters. You want pea-sized pieces of cold butter throughout the topping — those create the pockets of crunch and richness as they melt in the oven.
- Don’t press the topping down: Sprinkling rather than packing the topping keeps air circulating as it bakes, which is what produces a genuinely crunchy result rather than a dense, chewy layer.
- The cardamom and nutmeg are not optional flavor-wise: Most crisp recipes stop at cinnamon, but the cardamom adds a floral, slightly citrusy depth that makes the filling taste more complex. The freshly grated nutmeg amplifies the stone fruit without announcing itself.
- Let it rest before serving: The 30-minute cooling period lets the fruit juices thicken into a glossy sauce. Cut in too early and you’ll have a runny filling — the crisp needs that rest to set properly. According to Serious Eats’ deep dive into fruit crisps, resting time is one of the most consistently skipped and most consequential steps in any baked fruit dessert.
Table of Contents
Ingredients
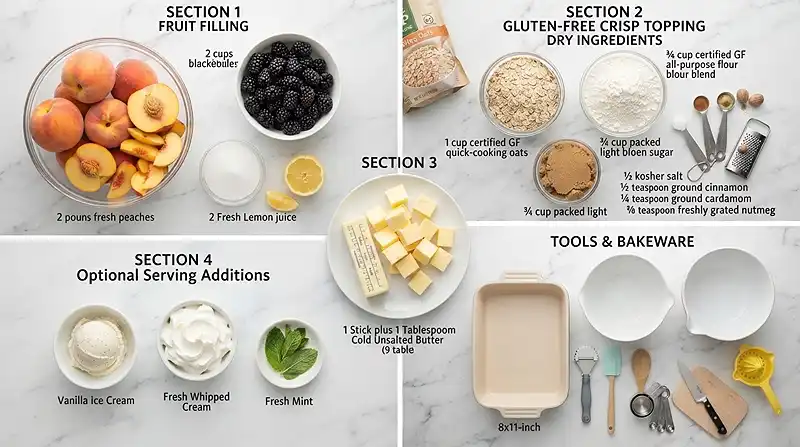
Fruit Filling
| Ingredient | Amount | Notes |
|---|---|---|
| Firm ripe peaches, halved, pitted, cut into ½-inch wedges | 2 pounds | Firm peaches hold their shape better during baking |
| Fresh blackberries | 2 cups | Frozen work too — no need to thaw first |
| Granulated sugar | ½ cup | Adjust slightly if fruit is very sweet or tart |
| Fresh lemon juice | 2 teaspoons | Brightens the filling and balances sweetness |
Gluten-Free Crisp Topping
| Ingredient | Amount | Notes |
|---|---|---|
| Certified gluten-free quick-cooking oats | 1 cup | Must be certified GF — standard oats risk cross-contamination |
| Certified gluten-free all-purpose flour | ¾ cup | A blend with xanthan gum produces the best crumble texture |
| Packed light brown sugar | ¾ cup | Packed tightly for accurate measure |
| Kosher salt | ½ teaspoon | Balances sweetness throughout the topping |
| Ground cinnamon | ½ teaspoon | — |
| Ground cardamom | ¼ teaspoon | Adds floral depth; don’t skip it |
| Freshly grated nutmeg | ⅛ teaspoon | Freshly grated is noticeably more fragrant than pre-ground |
| Cold unsalted butter, cubed | 1 stick plus 1 tablespoon (9 tablespoons total) | Keep refrigerated until the moment you use it |
Optional for Serving
- Vanilla ice cream
- Whipped cream
- Fresh mint leaves
Instructions
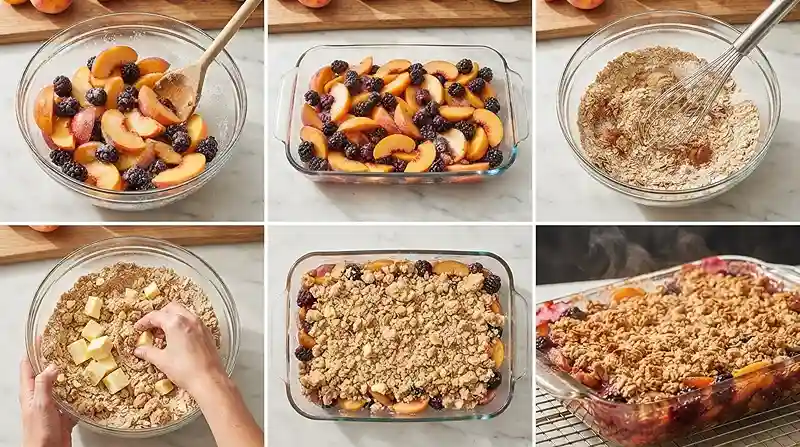
- Preheat the oven. Set the oven to 375°F (190°C) and allow it to fully preheat before the crisp goes in. An accurate oven temperature is what gives you a deeply golden topping without burning the edges of the fruit.
- Prepare the fruit filling. In a large bowl, gently toss 2 pounds of peach wedges and 2 cups of fresh blackberries with ½ cup granulated sugar and 2 teaspoons of fresh lemon juice. Toss until the fruit is evenly coated — you should see the sugar beginning to draw out the fruit juices within a minute or two.
- Transfer to the baking dish. Pour the fruit mixture into an 8×11-inch baking dish and spread it into an even layer. An even layer ensures the filling cooks uniformly and gives the topping consistent support across the whole surface.
- Mix the dry topping ingredients. In a medium bowl, combine 1 cup certified GF quick-cooking oats, ¾ cup certified GF all-purpose flour, ¾ cup packed light brown sugar, ½ teaspoon kosher salt, ½ teaspoon cinnamon, ¼ teaspoon cardamom, and ⅛ teaspoon freshly grated nutmeg. Stir until evenly mixed — you should smell the warm spice combination immediately.
- Work in the cold butter. Add 9 tablespoons of cold cubed butter to the dry ingredients. Using your fingertips, a pastry cutter, or two forks, work the butter into the mixture until coarse, crumbly clusters form with pea-sized pieces of butter still visible. Work quickly so the heat from your hands doesn’t melt the butter.
Pro Tip: If your kitchen is warm, refrigerate the topping mixture for 10 minutes before adding it to the dish. Cold butter going into the oven is what creates those distinct, crunchy clusters.
- Add the topping. Evenly sprinkle the crumble over the fruit layer without pressing it down. Leave it loose — compacting it will prevent the steam from escaping and you’ll lose that signature crunch.
- Bake. Place the dish in the preheated oven and bake for 55–60 minutes. The crisp is done when the topping is deep golden brown and the fruit filling is visibly bubbling around the edges — not just a bubble or two, but actively rolling bubbles that tell you the juices have thickened.
- Rest before serving. Allow the crisp to cool for 30 minutes before scooping. The filling will look loose straight from the oven, but it thickens significantly as it cools. Serve warm with vanilla ice cream, whipped cream, or fresh mint if desired.
Make It Your Own
You know… one of the things I love most about a crisp is how forgiving it is as a base recipe. If blackberries aren’t available, blueberries or raspberries work at the same quantity. Raspberries will make the filling slightly more tart, so consider reducing the lemon juice to 1 teaspoon.
For a dairy-free version, replace the cold butter with an equal amount of solid coconut oil or a cold vegan butter stick. Coconut oil works well but produces a slightly denser topping — still crunchy, just a little less crumbly. Keep it cold the same way you would regular butter.
If you’d like to try an easy gluten-free peach blackberry crisp with added texture, stir ¼ cup of chopped pecans or sliced almonds into the topping before baking. Nuts add a roasted, buttery crunch that deepens as they toast in the oven. This is also a good way to stretch the topping slightly if you’re feeding a larger group.
For a lower-sugar version, reduce the granulated sugar in the filling to ¼ cup if your peaches are particularly ripe and sweet — very ripe stone fruit needs less help. You can also swap the brown sugar in the topping for coconut sugar at a 1:1 ratio for a slightly more caramel-forward flavor. Pair this with our gluten-free apple pie chia oat cups if you’re building a full spread of warm, spiced gluten-free fruit desserts.
Common Problems & Solutions
Problem: The topping isn’t getting golden. Extend the bake time by 5–10 minutes and check again. Every oven runs slightly differently, and a true deep golden brown can take up to 65 minutes. If the edges are browning faster than the center, tent the dish loosely with foil for the last 10 minutes to even out the color.
Problem: The filling is watery even after cooling. This usually means the fruit released more liquid than expected — common with very ripe or frozen fruit. Next time, toss the fruit with the sugar 15 minutes before baking and drain any pooled liquid before transferring it to the dish. The 30-minute rest after baking is also essential — if you scoop too early, the filling won’t have time to thicken. The Kitchn’s guide to thickening fruit fillings offers additional techniques worth bookmarking.
Problem: The topping baked into a dense, chewy layer instead of crunchy clusters. Two likely causes: the butter was too warm when it went in, or the topping was pressed down before baking. Start with butter cold from the fridge, work quickly, and sprinkle the topping loosely over the fruit without any patting or packing.
Man, oh man… the first time I overbaked this crisp by 20 minutes trying to get the top darker, I ended up with blackberries that had turned to a thick, jammy paste and peaches that had completely dissolved. The filling still tasted good — but the texture was entirely gone. A deep golden color at 55–60 minutes is the target; don’t chase a darker shade.
Problem: The topping tastes flat or bland. Gluten-free flours can mute flavor slightly compared to wheat flour. Make sure you’re using fresh spices — ground cinnamon and cardamom lose potency quickly once opened. Also check that your salt is fully incorporated into the dry mix before the butter goes in, since salt does a lot of work balancing the sweetness of the brown sugar.
Storage & Meal Prep
| Method | Duration | Notes |
|---|---|---|
| Counter | Up to 1 day | Cover loosely; the topping stays crunchier at room temp |
| Fridge | 4–5 days | Cover tightly; topping will soften slightly |
| Freezer | 2–3 months | Freeze in individual portions; thaw overnight in fridge |
To reheat from the fridge, place individual portions in a 350°F oven for 10–15 minutes. This restores most of the topping’s crunch — far better than the microwave, which makes the oats soft and steamy.
For a no-waste move, leftover crisp crumbles beautifully over vanilla yogurt or oatmeal the next morning. The flavors deepen overnight and it’s genuinely a great breakfast — just scoop directly from the fridge and spoon over whatever you’re eating.
Gluten-Free Peach and Blackberry Crisp FAQs
Can I use frozen peaches and blackberries?
Yes — frozen fruit works well in this crisp. Do not thaw before using, as the extra moisture from thawing can make the filling watery. Add 5 minutes to the bake time and confirm the filling is actively bubbling around the edges before pulling it from the oven.
How do I know when the crisp is done baking?
The crisp is ready when two things are true: the topping is deep golden brown across the surface, and the fruit filling is actively bubbling around the edges. If only one of those conditions is met, keep baking in 5-minute increments. The bubbling is the most reliable indicator that the filling has cooked through and begun to thicken.
What’s the best gluten-free flour for the topping?
A certified gluten-free all-purpose flour blend that already contains xanthan gum gives the best crumble structure. Blends without xanthan gum can produce a topping that falls apart or turns to powder during baking. Bob’s Red Mill 1-to-1 and King Arthur Measure for Measure are reliable choices — just confirm the certified GF label before buying.
Can I make this crisp ahead of time?
You can assemble the fruit filling and the topping separately up to 24 hours in advance, then refrigerate them in separate containers. Combine and bake just before serving for the crunchiest topping. Alternatively, bake the full crisp ahead and reheat at 350°F for 15 minutes — it won’t be quite as crispy as fresh, but it reheats well.
Why did my crisp topping turn out gummy?
Gumminess in the topping almost always means the butter was too soft when worked into the dry ingredients, or the topping was packed down before baking. Use cold butter straight from the fridge, work quickly with your fingertips, and sprinkle the mixture loosely over the fruit without pressing. Pea-sized butter pieces in the unbaked topping are what create crunch as they melt.
Serving Suggestions
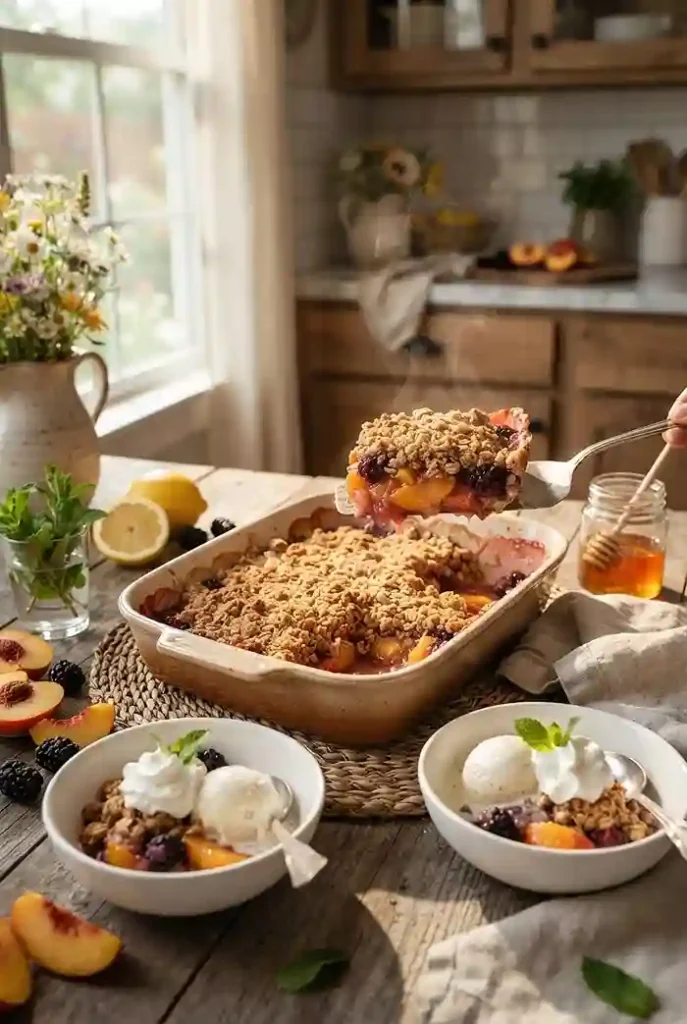
This crisp is at its best served warm, straight from the dish, with a generous scoop of vanilla ice cream melting into the fruit filling. The contrast between the cold cream and the bubbling, spiced peaches is the kind of thing that makes a summer dinner feel like a special occasion.
It’s become our go-to dessert for Labor Day weekend — easy enough to make in a vacation rental kitchen and impressive enough that nobody misses the gluten. If you’re building out a full gluten-free dessert table, our gluten-free maple pecan peach crumble cake pairs beautifully with this crisp and keeps the stone fruit theme going.
For something a little different, serve it alongside our gluten-free cottage cheese chocolate chip cookie dough for a no-bake contrast that rounds out any summer spread.
If you make this recipe, I’d genuinely love to hear how it turned out — drop a comment below with your fruit combo or any tweaks you made. Save it to Pinterest for your next summer gathering, and if you share a photo, tag me so I can see it.
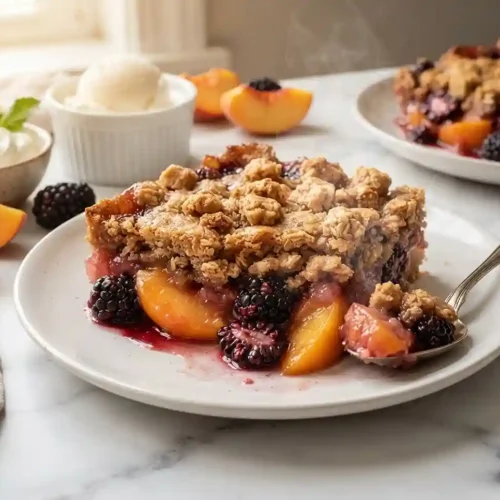
Gluten-Free Peach and Blackberry Crisp Recipe
Equipment
- 8×11-inch baking dish
- Large mixing bowl
- Medium mixing bowl
- Pastry cutter or two forks
- Measuring cups and spoons
- Oven
Ingredients
Fruit Filling
- 2 pounds firm ripe peaches halved, pitted, cut into ½-inch wedges
- 2 cups fresh blackberries frozen can be used without thawing
- ½ cup granulated sugar adjust to taste
- 2 teaspoons fresh lemon juice
Gluten-Free Crisp Topping
- 1 cup certified gluten-free quick-cooking oats
- ¾ cup certified gluten-free all-purpose flour blend with xanthan gum preferred
- ¾ cup packed light brown sugar
- ½ teaspoon kosher salt
- ½ teaspoon ground cinnamon
- ¼ teaspoon ground cardamom
- ⅛ teaspoon freshly grated nutmeg
- 1 stick plus 1 tablespoon cold unsalted butter cubed (9 tablespoons total)
Optional for Serving
- vanilla ice cream optional
- whipped cream optional
- fresh mint leaves optional
Instructions
- Preheat the oven to 375°F (190°C).
- In a large bowl, toss the peaches, blackberries, granulated sugar, and lemon juice until evenly coated.
- Transfer the fruit mixture to an 8×11-inch baking dish and spread into an even layer.
- In a medium bowl, combine the gluten-free oats, gluten-free flour, brown sugar, kosher salt, cinnamon, cardamom, and nutmeg.
- Cut the cold butter into the dry ingredients using your fingertips, a pastry cutter, or two forks until coarse crumbs with pea-sized butter pieces form.
- Evenly sprinkle the topping over the fruit without pressing it down.
- Bake for 55–60 minutes, until the topping is deep golden brown and the filling is bubbling around the edges.
- Cool for 30 minutes before serving. Serve warm with vanilla ice cream, whipped cream, or fresh mint if desired.