Gluten-Free Ninja Creami Protein Ice Cream
Make gluten-free Ninja Creami protein ice cream with cottage cheese and chocolate milk. High-protein, easy steps, and mix-in ideas included.
The first time I made protein ice cream in my Ninja Creami, I skipped the blending step and just poured everything straight into the pint. After 24 hours of freezing, I hit spin—and ended up with a chunky, icy mess that not even my kids would touch.
That failure taught me everything. Now, this gluten-free Ninja Creami protein ice cream comes out smooth and creamy every single time. It takes about five minutes of hands-on work, and the result is like soft-serve that actually belongs in a scoop shop.
Have you ever thought you’d see the day when a high-protein dessert tastes this good? This recipe uses real ingredients—cottage cheese, chocolate milk, and protein powder—blended silky smooth and spun into something that feels like a genuine treat.
Table of Contents
Why You’ll Love This Gluten-Free Ninja Creami Protein Ice Cream
- Smooth, rich texture — blending the base before freezing eliminates icy chunks, giving you a result as fluffy as soft-serve clouds straight from the machine.
- Beginner-friendly — three simple steps, one blender, and one Ninja Creami. No special skills needed.
- High protein, no guilt — each serving packs serious protein from cottage cheese and protein powder, making it a dessert that actually supports your goals.
- Naturally gluten-free — the base is free of gluten-containing ingredients, and optional gluten-free sandwich cookies make the mix-in version safe for celiac and gluten-sensitive households.
The Secret to Perfect Gluten-Free Ninja Creami Protein Ice Cream
- Blend everything smooth first. Cottage cheese has curds that will freeze into unpleasant lumps if not fully blended. A 60-second blend in a high-powered blender emulsifies the mixture so the Creami can do its job properly.
- Full 18-24 hour freeze is non-negotiable. Shorter freeze times result in a soft, under-processed pint that the machine can’t spin correctly. Give it the full time.
- The re-spin is where magic happens. Adding just 1 tablespoon of chocolate milk before the re-spin adds moisture and helps the machine whip the ice cream into that signature creamy consistency.
- Crush mix-ins before adding. Whole cookies added to the mix-in function can damage the blade. Pre-crushing your gluten-free sandwich cookies into fine pieces ensures an even, safe mix-in every time.
Ingredients
Serves 2
| Ingredient | Amount | Notes |
|---|---|---|
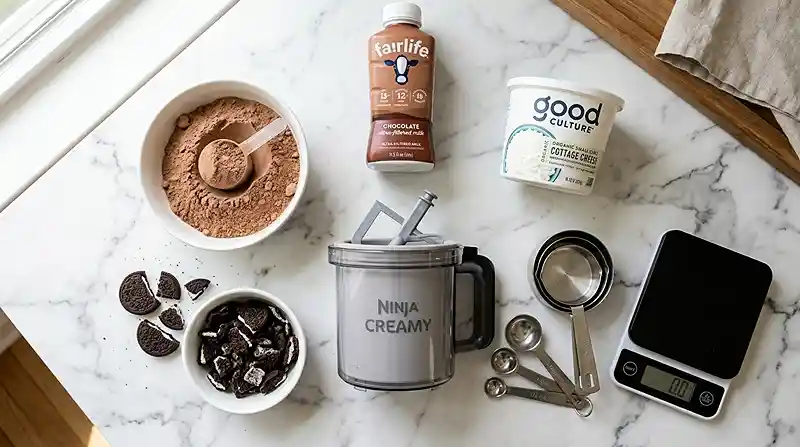
| Chocolate protein powder | ¼ cup | Use a gluten-free certified brand for safety |
| 2% cottage cheese | ½ cup | Good Culture brand recommended for smooth blending |
| Fairlife chocolate milk | 1 cup | Or chocolate milk of choice; Fairlife adds extra protein |
| Gluten-free chocolate sandwich cookies, crushed | 4 cookies | Optional mix-in; crush before adding |
Instructions
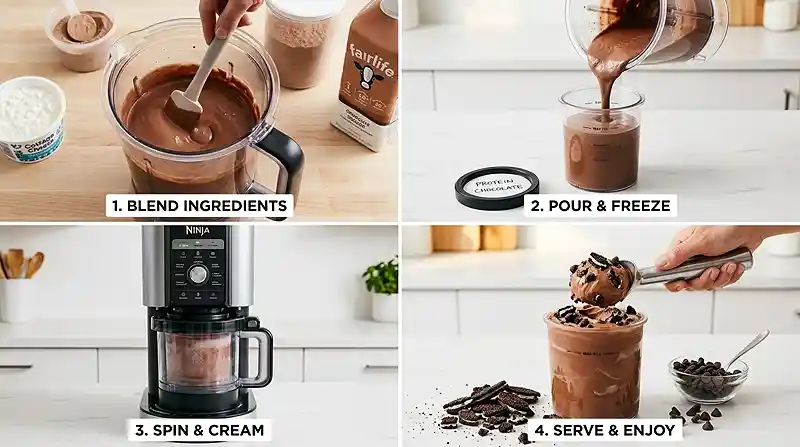
- Blend the base. Add the chocolate protein powder, cottage cheese, and Fairlife chocolate milk to a blender. Blend on high for about 60 seconds until the mixture is completely smooth with no visible curds.
- Freeze. Pour the blended mixture into your Ninja Creami pint container. Snap on the lid and place it on a level surface in your freezer. Freeze for 18-24 hours—the full freeze time matters, so plan ahead.
- Spin and re-spin. Remove the lid and attach the container to the Ninja Creami machine. Select the “Ice Cream” setting and let it run. Once finished, add 1 tablespoon of chocolate milk directly to the pint, then hit “Re-spin.” The second spin produces that smooth, creamy texture you’re after.
- Optional mix-in step. If you’re adding gluten-free chocolate sandwich cookies, crush all 4 cookies into small crumbles first. After the re-spin, create a small well in the center of the ice cream and pour in the crushed cookies. Select the “Mix-In” function and let the machine do the rest.
Make It Your Own
Well… the beauty of this recipe is how endlessly customizable it is. If you’re dairy-free, swap the cottage cheese for a thick dairy-free yogurt like coconut-based skyr, and use oat milk or almond milk in place of the Fairlife chocolate milk. The texture will be slightly lighter, but still surprisingly creamy after the re-spin.
You can swap the chocolate protein powder for vanilla, peanut butter, or even a mocha-flavored variety. Each swap creates a completely different flavor profile. Vanilla protein paired with almond milk makes a great base for fruit mix-ins like strawberries or blueberries.
For a higher-protein version, add 1 tablespoon of unflavored collagen powder to the blend. According to UCLA Health’s guide to cottage cheese nutrition, the casein protein in cottage cheese digests slowly, helping you feel satisfied longer—pairing it with fast-digesting whey protein powder covers both bases.
If you want a sweeter base without extra calories, add a teaspoon of pure maple syrup or a few drops of liquid stevia to the blender. Both dissolve completely into the mixture and won’t affect the freeze or spin. You can also try our cottage cheese chocolate chip cookie dough as a mix-in inspiration for another high-protein cottage cheese treat.
Common Problems & Solutions
Problem: The ice cream looks like powdery snow after the first spin.
Solution: Add the tablespoon of chocolate milk and hit re-spin immediately. This is completely normal, especially with lower-fat and higher-protein recipes. The re-spin with added liquid is the fix—never skip it.
Problem: The base has visible white lumps after freezing.
Solution: The cottage cheese wasn’t fully blended before freezing. Blend for a full 60 seconds next time on the highest setting. Once frozen with lumps, there’s no going back—this is one step you can’t rush.
Man, oh man—a gummy, dense texture is one of the most frustrating outcomes. Problem: The result is gummy or overly dense.
Solution: The pint may not have frozen long enough. Even at 16 hours, the mixture may not be hard enough for the machine to process correctly. Always hit the 18-hour minimum, and 24 hours is ideal for best results.
Problem: The cookies turned into mush instead of chunks.
Solution: Crush them finer and add them after the re-spin, not before. Whole or large pieces of cookies can clog the mix-in blade. Small, fine crumbles work with the machine rather than against it.
Check that your cookies are certified gluten-free if you’re cooking for someone with celiac disease. Healthline’s registered dietitian review of cottage cheese is a good reminder that ingredient quality matters across every component of a high-protein recipe.
Storage & Meal Prep
| Method | Duration | Notes |
|---|---|---|
| Counter | Up to 15 minutes | Let it soften slightly before scooping after re-freeze |
| Freezer (in Creami pint) | Up to 4 days | Cover with the lid; re-spin with 1 tbsp milk before eating again |
| Freezer (long-term) | Up to 2 months | Transfer to an airtight freezer-safe container; quality may decrease slightly |
This ice cream is absolutely best fresh out of the machine. If you store leftovers in the Creami pint and re-freeze, just add 1 tablespoon of chocolate milk before running the re-spin function again—it restores the texture beautifully.
Meal prep tip: prepare two or three pint bases at once and keep them in the freezer. When a craving hits, you’re one spin away from dessert. No separate prep needed on the day you want it.
Your Questions Answered
Can the Ninja Creami make protein ice cream?
Yes — the Ninja Creami was practically made for protein ice cream. The machine processes dense, frozen protein-rich bases into smooth, scoopable ice cream. Blend your base thoroughly before freezing for the best results.
Can I use protein powder in my Ninja Creami?
Absolutely. Blend the protein powder fully into your liquid base before freezing so it dissolves completely. Undissolved powder creates a chalky texture. A quality chocolate protein powder blends smoothly and adds great flavor.
Can you make Ninja Creami ice cream without protein powder?
Yes. The cottage cheese and Fairlife chocolate milk already provide solid protein on their own. You can skip the powder and increase the cottage cheese to 3/4 cup to maintain thickness and creaminess.
How do you store leftover Ninja Creami protein ice cream?
Store leftovers in the Creami pint with the lid on for up to 4 days in the freezer. When ready to eat again, add 1 tablespoon of chocolate milk and run the re-spin function to restore the creamy texture.
Is the Ninja Creami worth it for protein ice cream?
For anyone who makes protein ice cream regularly, yes. The machine turns a simple blended base into genuinely scoopable, creamy ice cream. If high-protein desserts are part of your weekly routine, it pays for itself quickly.
Serving Suggestions
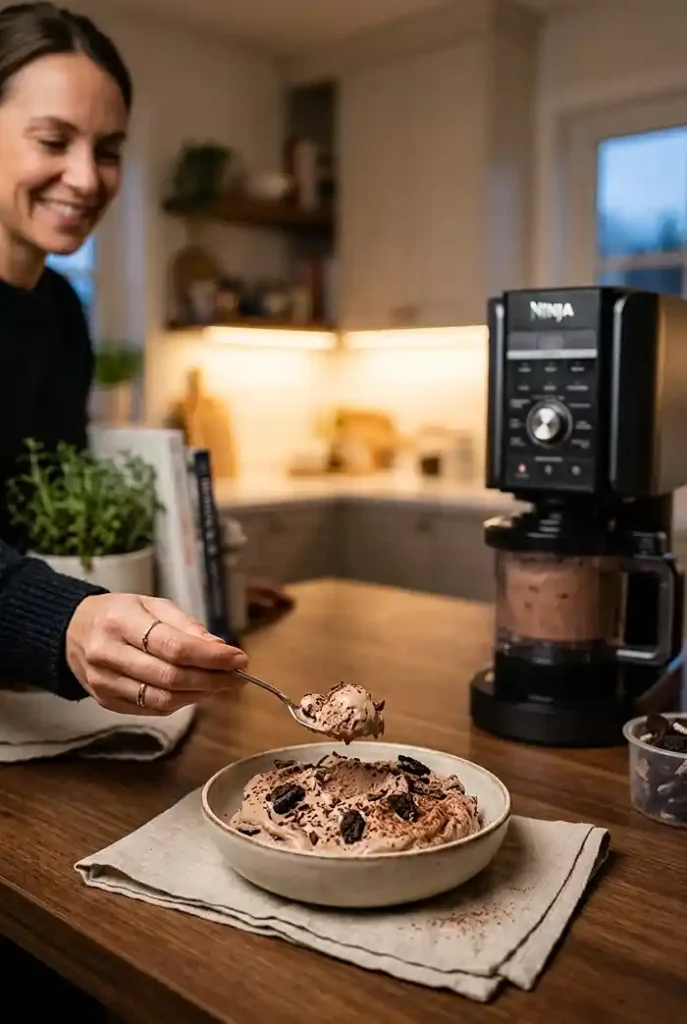
You know… this ice cream shines brightest when you keep the toppings simple. A drizzle of sugar-free chocolate sauce, a sprinkle of crushed gluten-free pretzels, or a spoonful of peanut butter pressed into the top right before serving are all you need.
It’s also an outstanding option for summer Fourth of July gatherings—serve it in small cups alongside a tray of toppings and let everyone build their own bowl. Kids go absolutely wild for the mix-in function when they realize they can customize their own flavor.
For more gluten-free dessert inspiration that pairs beautifully with this ice cream theme, check out our gluten-free maple pecan peach crumble cake or these easy gluten-free apple pie chia oat cups for a lighter companion treat.
Give this recipe a try and let me know in the comments how it turned out—especially which mix-ins you used! If you loved it, save it to Pinterest so it’s always easy to find when the next craving hits. Snap a photo and tag us; seeing your creations genuinely makes our day.

Gluten-Free Ninja Creami Protein Ice Cream
Equipment
- Ninja Creami
- Ninja Creami pint container
- Blender
- Measuring cups
- Measuring spoons
Ingredients
- ¼ cup Chocolate protein powder Use a certified gluten-free brand
- ½ cup 2% cottage cheese Good Culture recommended
- 1 cup Fairlife chocolate milk Or chocolate milk of choice
- 4 cookies Gluten-free chocolate sandwich cookies Crushed; optional mix-in
- 1 tablespoon Chocolate milk For re-spin
Instructions
- Add the chocolate protein powder, cottage cheese, and chocolate milk to a blender. Blend on high for about 60 seconds until completely smooth.
- Pour the mixture into a Ninja Creami pint container, secure the lid, and freeze on a level surface for 18 to 24 hours.
- Place the frozen pint into the Ninja Creami and run the Ice Cream program. Add 1 tablespoon of chocolate milk, then run the Re-spin function for a smooth, creamy texture.
- If using cookies, crush them into fine crumbles. After the re-spin, create a well in the center of the ice cream, add the cookie crumbs, and use the Mix-In function.