Gluten-Free Steel Cut Oats Preparation
Learn how gluten-free steel cut oats preparation works step by step, with tips on texture, toppings, storage, and avoiding cross-contamination.
Oats have a complicated reputation in the gluten-free world, and I learned that the hard way. The first time I made gluten-free steel cut oats preparation part of my morning routine, I grabbed a bag off the shelf without checking the label — and paid for it by noon. That one mistake taught me more about certified gluten-free sourcing than any article ever did.
Once I sorted out the certification issue and figured out the right water ratio, everything changed. Steel-cut oats went from an occasional weekend experiment to the breakfast I rely on most — especially on cold January mornings when the family needs something that actually sticks.
Table of Contents
Why You’ll Love This Steel Cut Oats Recipe
- Creamy, chewy texture — steel-cut oats hold their shape in a way rolled oats simply can’t, giving each spoonful a satisfying bite rather than a soft mush
- Straightforward and beginner-friendly — six steps, one pot, no special equipment required
- Dairy-free as written — unsweetened almond milk keeps it plant-based without sacrificing creaminess
- Endlessly customizable — the base recipe works as a blank canvas for any season, any topping, any craving
The Secret to Perfect Gluten-Free Steel Cut Oats Preparation
- Certification is non-negotiable. Regular oats are naturally gluten-free, but they’re almost always processed in facilities that also handle wheat, barley, and rye. According to trusted celiac research from the Celiac Disease Foundation, cross-contact is the primary risk for people with celiac disease — which is why buying certified gluten-free steel-cut oats specifically is essential, not optional.
- The water-to-oat ratio controls everything. A 3:1 ratio (3 cups water to 1 cup oats) produces oats that are tender and creamy without turning to paste. Go higher and they turn soupy; go lower and they stay chewy in the wrong way.
- Adding almond milk at the end — not the beginning — makes the difference. Dairy and non-dairy milks can scorch when simmered for 20+ minutes. Stirring in the almond milk during the final 2–3 minutes creates a velvety finish without any risk of burning.
- Low, patient heat beats high and fast. Steel-cut oats need time to hydrate fully. A rolling boil will make the outside of each grain soft while the center stays hard. Low-and-slow is the only reliable path to creamy oats all the way through.
Ingredients

Serves 4
| Ingredient | Amount | Notes |
|---|---|---|
| Certified gluten-free steel-cut oats | 1 cup | Look for the certified GF symbol on the bag — not just “oats” |
| Water | 3 cups | Use filtered water if your tap water is heavily chlorinated |
| Unsweetened almond milk | ½ cup | Added at the end for creaminess; any non-dairy milk works |
| Salt | ¼ teaspoon | Essential — it rounds out the flavor and reduces perceived bitterness |
| Pure maple syrup | 1 tablespoon | Adjust to taste; honey works too |
| Vanilla extract | 1 teaspoon | Use pure vanilla, not imitation |
| Ground cinnamon | ½ teaspoon | |
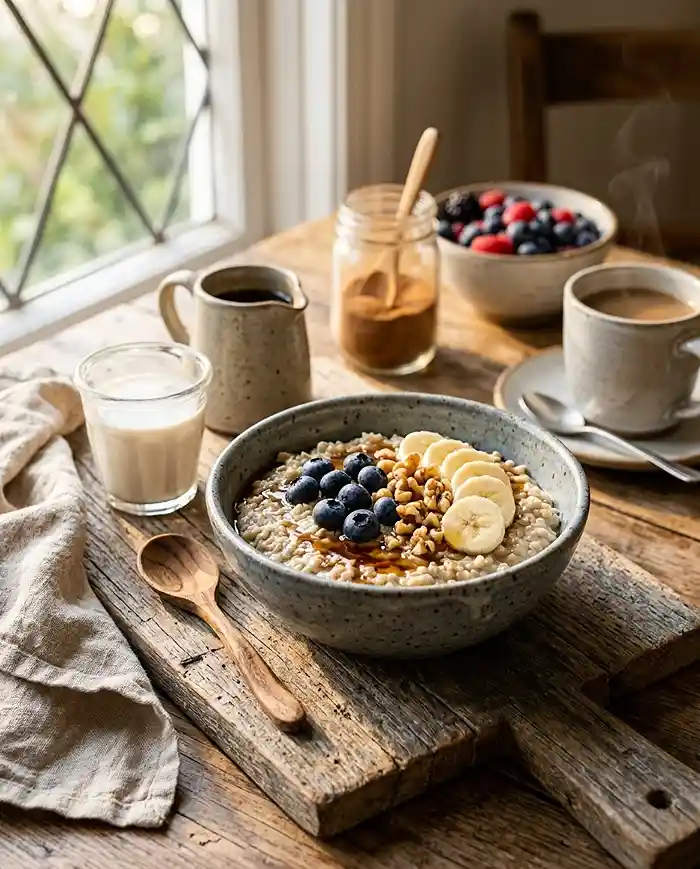
| Fresh berries, banana, nuts, or seeds | For topping | Add after serving for best texture |
Instructions
- Bring the water and salt to a boil in a medium saucepan over medium-high heat. Using a heavier-bottomed saucepan here helps distribute heat evenly and reduces the risk of hot spots that scorch the oats later.
- Stir in the certified gluten-free steel-cut oats. Use a wooden spoon or silicone spatula to stir them in immediately so they don’t clump at the bottom. You’ll hear a satisfying sizzle as the oats hit the hot water.
- Reduce the heat to low and simmer uncovered for 20–25 minutes, stirring occasionally, until the oats are tender and creamy. Stir every 5 minutes or so — this prevents sticking and helps the oats cook evenly. At the 20-minute mark, taste a spoonful; the oats should be chewy but not hard in the center.
- Stir in the almond milk, maple syrup, vanilla, and cinnamon. Pour everything in at once and stir to combine. The pot will bubble briefly as the cooler milk hits the hot oats — that’s normal.
- Cook for another 2–3 minutes until creamy and heated through. The finished oats should coat the back of a spoon like warm porridge — thick enough to hold toppings, loose enough to stir. Pro Tip: If the oats thicken too much, splash in a few tablespoons of warm water and stir over low heat until the texture opens back up.
- Divide into bowls and add your favorite toppings. Serve warm immediately for the best texture. Fresh berries on top add a brightness that cuts through the warm, cinnamon-forward base — like a burst of cold spring air on a cozy morning.
Make It Your Own
The steel-cut oats base in this recipe is genuinely neutral enough to go in almost any direction. For a warmer, spiced version, add a pinch of ground cardamom and a grating of fresh nutmeg alongside the cinnamon. It turns into something that feels more like chai than breakfast cereal.
You know… one of my most-requested variations is a savory bowl. Skip the maple syrup, vanilla, and cinnamon entirely, and stir in a soft-poached egg, a drizzle of sesame oil, and sliced scallions at the end. It sounds unusual, but savory steel-cut oats have a devoted following for a reason — they’re deeply satisfying in a way sweet oats sometimes aren’t.
If you want steel cut quick oats speed without switching products, try the overnight soak method. Cover the raw oats with the full amount of cold water the night before, then drain and simmer the next morning. Pre-soaked oats cook in 10–12 minutes instead of 20–25, and the texture is nearly identical.
For a richer, more indulgent bowl, swap the almond milk for full-fat coconut milk. The result is noticeably creamier — almost like a rice pudding in texture — and pairs especially well with mango and toasted coconut flakes on top.
Common Problems & Solutions
Problem: The oats are gummy and sticky instead of creamy.
Solution: You likely stirred too aggressively or kept the heat too high. Stir gently and only as often as needed to prevent sticking. Vigorous stirring breaks down the grain structure and releases excess starch, which is what causes that gluey texture.
Problem: The oats are still hard in the center after 25 minutes.
Solution: Add ¼ cup of warm water, stir, and continue simmering on low for another 5 minutes with the lid partially on. Hardness in the center usually means the heat was too high, which cooked the outside faster than the inside could hydrate.
Man, oh man… the cross-contamination question is the one I get most often, and it genuinely matters. Problem: You bought “gluten-free oats” but still reacted.
Solution: Check that the bag carries a third-party certification logo, not just a manufacturer claim. The comprehensive oats guidance from Beyond Celiac explains exactly what certification standards to look for and why some people with celiac disease react even to labeled gluten-free oats.
Problem: The oats scorched on the bottom of the pan.
Solution: Reduce the heat immediately and switch to a heavier-bottomed pot next time. Thin saucepans have hot spots that burn oats quickly. If scorching happens mid-cook, do not stir the burned layer up — pour the oats gently into a clean pot and continue from there.
Storage & Meal Prep
| Method | Duration | Notes |
|---|---|---|
| Counter | Up to 2 hours | Oats thicken as they cool; cover to prevent a skin from forming |
| Fridge | 5 days | Store in an airtight container; they thicken considerably overnight |
| Freezer | Up to 3 months | Portion into silicone muffin trays, freeze solid, then transfer to a bag |
To reheat refrigerated oats, add 2–3 tablespoons of water or almond milk per serving and warm over low heat, stirring until the texture loosens back to your liking. The microwave works too — 90 seconds on medium power with a splash of liquid, stirring halfway through.
This recipe is a genuine meal-prep champion. Make a full batch on Sunday, portion it into individual jars, and breakfast is handled for the entire week. Add toppings fresh each morning so they don’t go soggy in the fridge.
Your Questions Answered
Can I make gluten-free steel cut oats in a slow cooker?
Yes. Combine the oats, water, salt, and cinnamon in the slow cooker and cook on low for 7 to 8 hours. Stir in the almond milk, maple syrup, and vanilla in the morning before serving.
How do I stop steel cut oats from getting too thick after cooking?
Add 2 to 3 tablespoons of warm water or milk per serving while reheating over low heat, stirring until the texture loosens. Steel-cut oats absorb liquid as they sit, so reheating without added liquid always results in a thick, dense texture.
What makes oats not gluten-free?
Oats are naturally gluten-free but are almost always processed in facilities that handle wheat, barley, and rye. Cross-contact during processing is the main risk. Always choose certified gluten-free steel-cut oats with a third-party certification logo on the packaging.
Why did my steel cut oats turn out watery?
The most likely cause is a higher-than-recommended water ratio or insufficient cooking time. Continue simmering uncovered on low heat, stirring occasionally, until the excess liquid cooks off and the oats reach a thick, creamy consistency.
Can I prep steel cut oats ahead of time?
Yes. Cook a full batch, portion into airtight containers, and refrigerate for up to 5 days. Reheat with a splash of water or almond milk over low heat or in the microwave for 90 seconds, stirring halfway through.
Serving Suggestions

These oats are filling enough to stand alone, but they pair well with a side of scrambled eggs or a small glass of orange juice for a complete morning spread. For a Thanksgiving or Christmas morning when the house is full and you need something warm and low-effort, a double batch of these oats in the slow cooker is exactly what the occasion calls for.
If you’re building out a full gluten-free breakfast-to-dinner routine, our gluten-free chicken main course recipe is a satisfying dinner option that matches the same wholesome, unfussy philosophy as this oatmeal.
For a fun, no-cook gluten-free snack the kids can help assemble, the gluten-free banana sushi recipe uses similar simple ingredients and works well as an afternoon treat after a warm oatmeal breakfast.
And if you want to round out the week with a hearty plant-based lunch, our gluten-free vegetarian black bean burrito is a crowd-pleaser that works for the whole family.
Try this recipe this week and let me know how it goes in the comments — especially if you tried the savory bowl version or the overnight soak shortcut. If it earned a regular spot in your breakfast rotation, sharing it on Pinterest helps other gluten-free families find it too.

Simple Gluten-Free Steel Cut Oats Preparation Guide
Equipment
- Medium saucepan
- Wooden spoon or silicone spatula
- Measuring cups
- Measuring spoons
- Serving bowls
Ingredients
Steel Cut Oats
- 1 cup Certified gluten-free steel-cut oats Look for a certified gluten-free symbol on the packaging
- 3 cups Water Use filtered water if desired
- ½ cup Unsweetened almond milk Added near the end; any non-dairy milk can be used
- ¼ teaspoon Salt
- 1 tablespoon Pure maple syrup Adjust to taste; honey can also be used
- 1 teaspoon Vanilla extract Pure vanilla preferred
- ½ teaspoon Ground cinnamon
- For topping Fresh berries, banana, nuts, or seeds Add after serving for best texture
Instructions
- Bring the water and salt to a boil in a medium saucepan over medium-high heat.
- Stir in the certified gluten-free steel-cut oats.
- Reduce the heat to low and simmer uncovered for 20–25 minutes, stirring gently every few minutes, until the oats are tender and creamy.
- Stir in the almond milk, maple syrup, vanilla, and cinnamon.
- Cook for another 2–3 minutes until creamy and heated through. If the oats become too thick, stir in a few tablespoons of warm water.
- Divide the oats between four bowls and add fresh berries, banana, nuts, seeds, or other desired toppings. Serve warm.