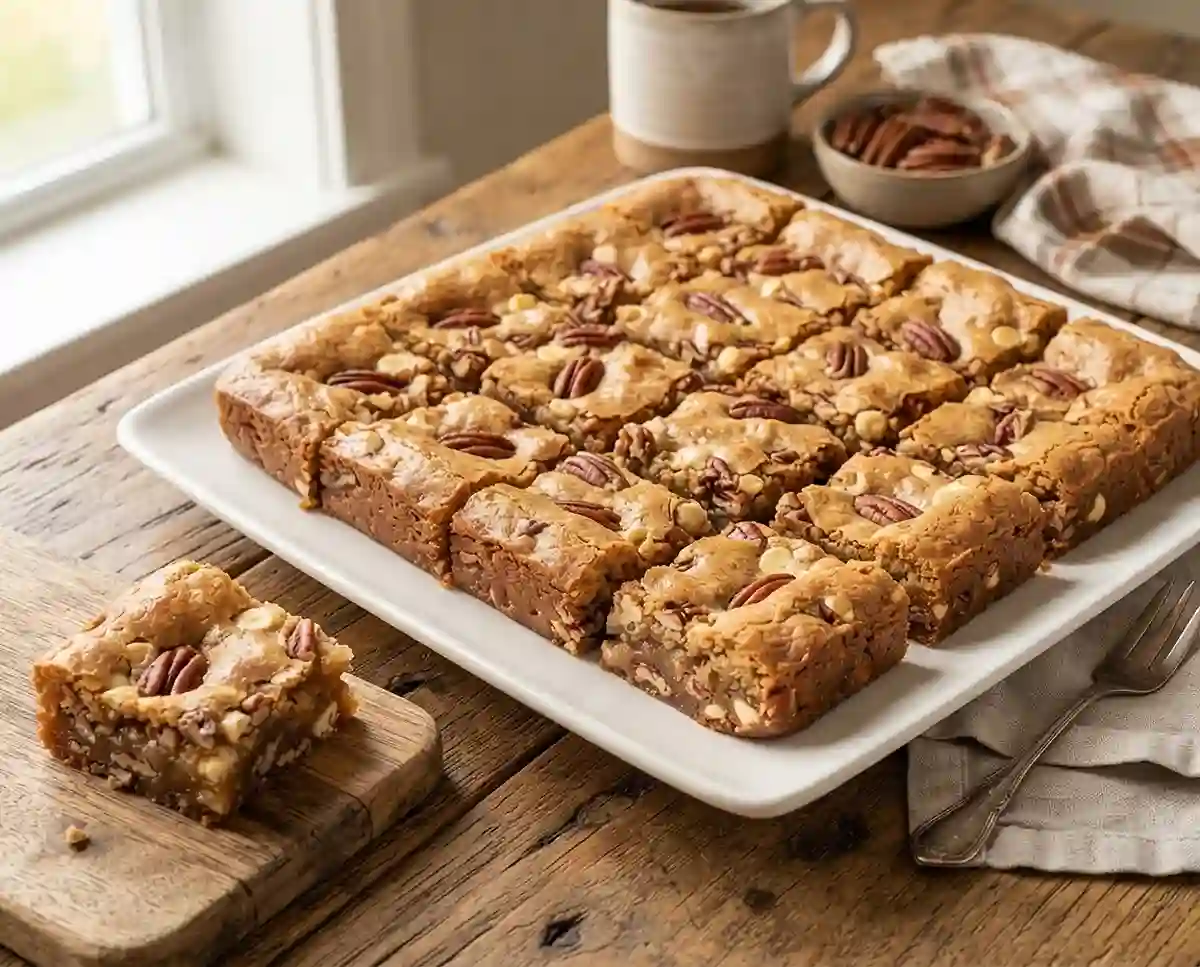
Maple Pecan Blondie Bars
Gluten-free maple pecan blondie bars were the first thing I brought to a Labor Day cookout after going gluten-free, and I was genuinely nervous nobody would touch them.
I’d tested the recipe twice that week—once with the wrong flour blend that turned them gummy, and once where I overbaked them into dry, crumbly squares. Third time, I nailed it, and they vanished before the burgers were off the grill.
What is it about the combination of brown butter, maple syrup, and toasted pecans that makes a whole room stop and ask, “Wait, what did you bring?” That’s the magic this recipe delivers every single time.
Well… if you’ve been searching for a gluten-free bar that tastes indulgent without a complicated technique, you’ve landed in the right place.
Why You’ll Love These Gluten-Free Maple Pecan Blondie Bars
- Fudgy, chewy center with golden edges: these bars set up like a cross between a brownie and a soft cookie—dense and rich, with a slight pull when you bite in.
- One bowl, beginner-friendly: no mixer needed, no chilling the dough, and the whole thing comes together in about 10 minutes of prep.
- Naturally adaptable: dairy-free swap is easy, the white chocolate chips are optional, and the bars work equally well as a dessert or an afternoon snack.
- A go-to maple fall baking recipe: the warm cinnamon and maple combination makes these feel like autumn in bar form, and they hold up beautifully for days.
The Secret to Perfect Gluten-Free Maple Pecan Blondie Bars
- Whisk the wet ingredients until glossy and smooth: combining the melted butter, brown sugar, and maple syrup thoroughly before adding the eggs creates an emulsified base that gives blondies their signature chewy, fudgy texture—not cakey.
- Stir dry ingredients in until just combined: overworking gluten-free flour develops a gummy, dense crumb. Fold gently until no dry streaks remain and stop. Thirty extra strokes can be the difference between chewy and gluey.
- Don’t skip the parchment overhang: gluten-free baked goods are more fragile when warm. Letting the bars cool completely in the pan before lifting with the parchment prevents cracking and keeps the edges intact.
- Bake to the edge, not the center: the center will look slightly underdone at 25 minutes. That’s correct. It firms up as it cools, giving you that fudgy interior. If you wait until the center looks fully set in the oven, the bars will be dry. According to trusted celiac research from the Celiac Disease Foundation, certified gluten-free flour blends vary in starch content, which can affect bake times—always check your edges first.
Table of Contents
Ingredients
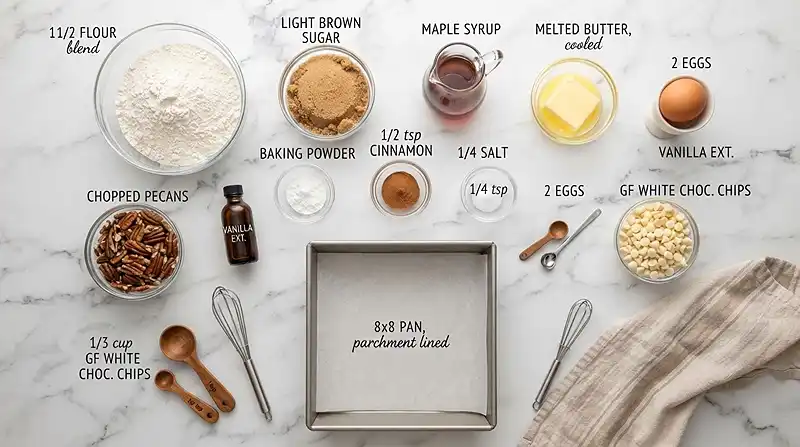
Wet Ingredients
- 1/2 cup unsalted butter, melted
- 3/4 cup light brown sugar, packed
- 1/4 cup pure maple syrup
- 2 large eggs
- 1 tsp vanilla extract
Dry Ingredients
- 1 1/2 cups gluten-free all-purpose flour
- 1/2 tsp baking powder
- 1/2 tsp ground cinnamon
- 1/4 tsp salt
Mix-Ins
- 3/4 cup chopped pecans
- 1/3 cup gluten-free white chocolate chips, optional
Note on gluten-free flour: a 1:1 blend that includes xanthan gum works best here. If your blend doesn’t contain xanthan gum, add 1/4 tsp separately to help bind the bars and prevent crumbling.
Instructions
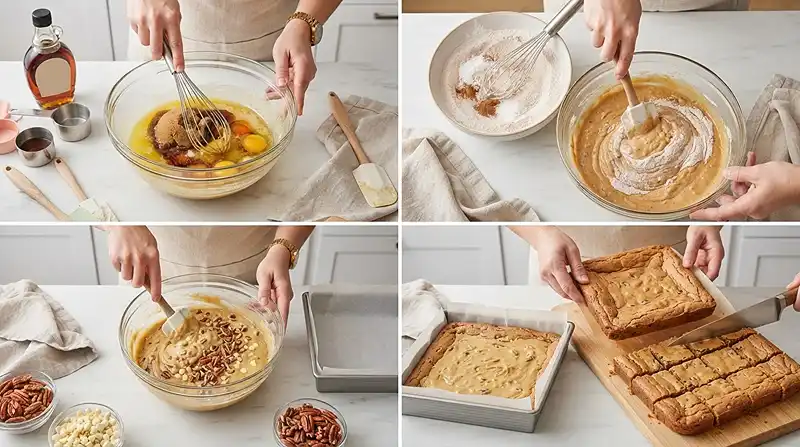
- Preheat the oven to 350°F. Line an 8×8-inch baking pan with parchment paper, leaving some overhang on the sides for easy removal later.
- In a large bowl, whisk together the melted butter, brown sugar, and maple syrup until the mixture is smooth and glossy—it should look like a thick, amber caramel sauce.
- Add the eggs and vanilla extract and whisk until fully combined. The batter will lighten slightly in color and thicken a little at this stage.
- In a separate bowl, whisk together the gluten-free flour, baking powder, cinnamon, and salt until evenly mixed.
- Gradually stir the dry ingredients into the wet mixture until just combined. Stop as soon as no dry streaks remain—do not overmix.
- Fold in the chopped pecans and white chocolate chips if using. The batter will be thick and a little sticky, which is exactly right.
- Spread the batter evenly into the prepared pan and smooth the top with a spatula. It doesn’t need to be perfectly flat, but even distribution helps the bars bake uniformly.
- Bake for 25–30 minutes, or until the edges are lightly golden and pulling away from the pan. The center should look just barely set.
- Let the blondies cool completely in the pan before lifting them out using the parchment overhang. Cutting too soon leads to crumbling.
- Cut into 16 bars and serve.
Pro Tip
For clean, bakery-style cuts, refrigerate the fully cooled bars for 30 minutes before slicing. A sharp knife wiped clean between cuts gives you neat edges every time.
Make It Your Own
To make these dairy-free, swap the unsalted butter for melted refined coconut oil or a high-quality vegan butter. Refined coconut oil won’t add coconut flavor, which keeps the maple and pecan notes front and center. If you use vegan butter, look for one with a similar fat content to dairy butter for the best texture.
You know… skipping the white chocolate chips won’t hurt the recipe at all—the bars are rich and satisfying without them. But if you want something a bit more dessert-forward, dark chocolate chips or chopped dark chocolate work beautifully as a swap and pair especially well with the maple.
For a nut-free version, replace the pecans with toasted pumpkin seeds or sunflower seeds. They add crunch without the allergen concern, and the slight earthiness actually complements the brown sugar base quite nicely.
Want to lean into the easy dessert bars angle for entertaining? Press a few whole pecan halves into the top of the batter before baking for a more finished, bakery-style presentation. These easy gluten-free maple pear coconut yogurt parfaits make a wonderful companion dessert if you’re building a full fall spread.
Common Problems and Solutions
Problem: Bars came out gummy or undercooked in the center. Pull them from the oven when the edges are golden and set, even if the center still looks soft. Gluten-free bars continue cooking from residual heat after they leave the oven. Gumminess after cooling usually means the flour blend had too much starch and needed slightly longer—try 3–5 extra minutes next time.
Man, oh man… Problem: Bars crumbled apart when cutting. This almost always means they were cut too soon. Gluten-free baked goods need to cool completely before slicing because there’s no gluten network to hold them together while warm. Give the pan at least 45 minutes at room temperature, or speed it up with a 20-minute rest in the fridge.
Problem: Bars turned out cakey instead of fudgy. A cakey texture usually means the eggs were over-whipped or the flour was measured too heavy. Spoon your gluten-free flour into the measuring cup and level it off rather than scooping directly—scooping compacts the flour and adds 15–20% more than the recipe needs.
Problem: Bars are dry and crumbly after day two. Store them in an airtight container with a small piece of bread or a damp paper towel nearby to maintain moisture. According to food science guidance from the FDA’s food storage resources, airtight storage significantly slows moisture loss in baked goods—even a loosely sealed bag makes a noticeable difference.
Storage and Meal Prep
| Method | Duration | Notes |
|---|---|---|
| Counter | 2–3 days | Airtight container; keep away from direct sunlight |
| Fridge | 5–7 days | Bring to room temperature before serving for best texture |
| Freezer | 2–3 months | Wrap bars individually in plastic wrap, then store in a freezer bag |
To refresh refrigerated bars, let them sit at room temperature for 20–30 minutes, or warm individually in the microwave for 10–12 seconds. They’ll return to that soft, fudgy texture almost instantly.
For a no-waste bonus, crumble any leftover bars over vanilla ice cream or layer them into a parfait jar with coconut yogurt for an entirely new dessert with zero extra effort.
Maple Pecan Blondie Bars FAQs
Can I make these blondie bars ahead of time?
Yes, these bars actually improve after resting overnight. The maple flavor deepens and the texture becomes even fudgier. Bake them the day before, cool completely, cover tightly, and store at room temperature until ready to serve.
How do I know when the blondies are done baking?
The edges should be lightly golden and pulling slightly away from the pan. The center will look just barely set and may jiggle slightly when you shake the pan gently. Do not wait for the center to look fully firm in the oven or the bars will overbake and dry out as they cool.
What is the best gluten-free flour for blondie bars?
A 1:1 gluten-free all-purpose flour blend that already contains xanthan gum gives the best results. Blends without xanthan gum produce crumbly bars that fall apart when cut. Avoid single-flour substitutes like almond flour or oat flour alone, as they change the texture significantly.
Why did my blondies turn out cakey instead of fudgy?
A cakey texture usually comes from over-measuring the flour or over-mixing the batter. Spoon the flour into your measuring cup and level it off rather than scooping directly from the bag. Also stop stirring the moment no dry streaks remain—extra mixing develops the starches and makes the bars lighter and less dense.
Can I double the recipe for a larger batch?
Yes, double all ingredients and bake in a 9×13-inch pan instead. Add 5 to 8 minutes to the bake time and start checking for doneness at the 30-minute mark. The edges should be golden and set before you pull the pan from the oven.
Serving Suggestions
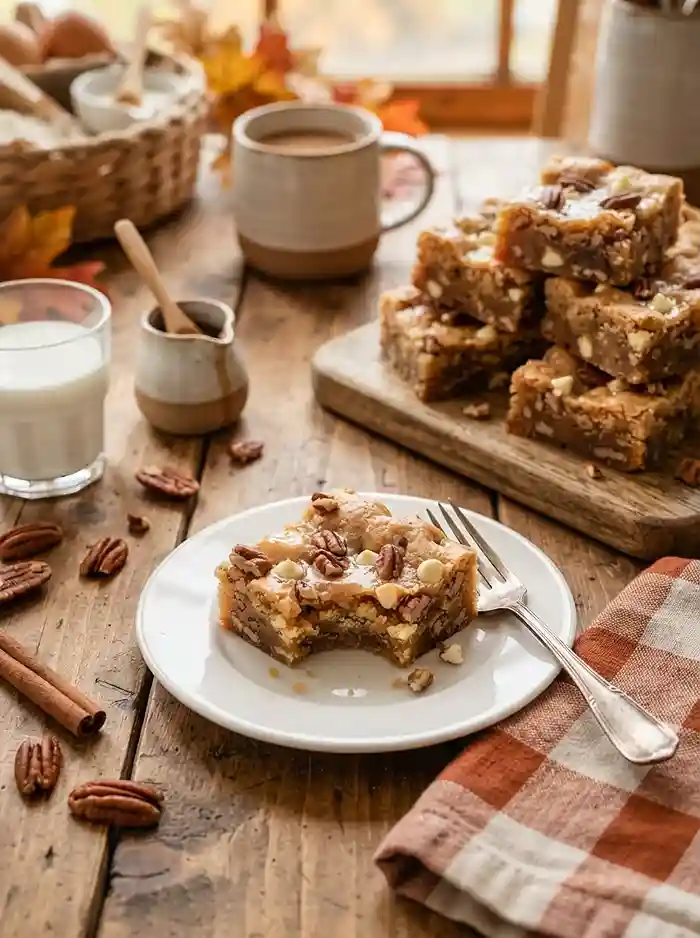
These bars are wonderful on their own, but they genuinely shine served slightly warm with a scoop of vanilla ice cream or a drizzle of extra maple syrup pooling around the edges like warm caramel.
They’re a natural fit for a Thanksgiving dessert table—easy to make the day before, simple to transport, and crowd-pleasing enough that nobody will guess they’re gluten-free.
For a full gluten-free spread, pair these alongside a hearty savory dish like this Mediterranean salad with chickpeas or explore more ways to use pantry staples with these gluten-free recipes with chickpeas that round out any occasion beautifully.
If you make these bars, I’d love to hear how they turned out—drop a comment below with any swaps you tried or a star rating if you have a minute. And if you’re sharing to Pinterest, these bars photograph beautifully stacked with a dusting of cinnamon on top.
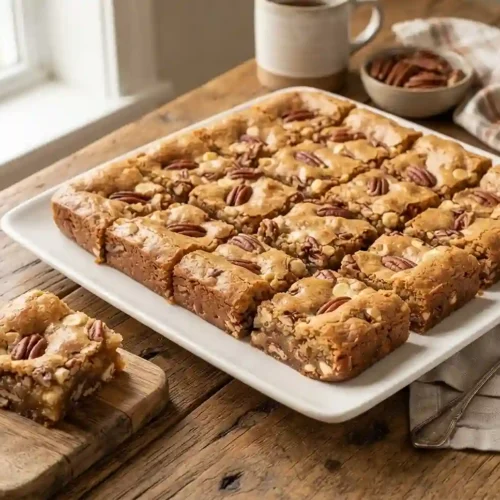
Gluten-Free Maple Pecan Blondie Bars
Equipment
- 8×8-inch baking pan
- Parchment paper
- Large mixing bowl
- Separate mixing bowl
- Whisk
- Spatula
Ingredients
Wet Ingredients
- ½ cup unsalted butter melted
- ¾ cup light brown sugar packed
- ¼ cup pure maple syrup
- 2 large eggs
- 1 tsp vanilla extract
Dry Ingredients
- 1 ½ cups gluten-free all-purpose flour a 1:1 blend with xanthan gum works best
- ½ tsp baking powder
- ½ tsp ground cinnamon
- ¼ tsp salt
Mix-Ins
- ¾ cup chopped pecans
- ⅓ cup gluten-free white chocolate chips optional
Instructions
- Preheat the oven to 350°F. Line an 8×8-inch baking pan with parchment paper, leaving some overhang on the sides for easy removal.
- In a large bowl, whisk together the melted butter, brown sugar, and maple syrup until smooth and glossy.
- Add the eggs and vanilla extract and whisk until fully combined. The batter will lighten slightly and thicken.
- In a separate bowl, whisk together the gluten-free flour, baking powder, cinnamon, and salt until evenly mixed.
- Gradually stir the dry ingredients into the wet mixture until just combined. Stop as soon as no dry streaks remain and do not overmix.
- Fold in the chopped pecans and white chocolate chips, if using. The batter will be thick and slightly sticky.
- Spread the batter evenly into the prepared pan and smooth the top with a spatula.
- Bake for 25–30 minutes, or until the edges are lightly golden and pulling away from the pan. The center should look just barely set.
- Let the blondies cool completely in the pan before lifting them out using the parchment overhang.
- Cut into 16 bars and serve.