No Bake Chocolate Oat Bars
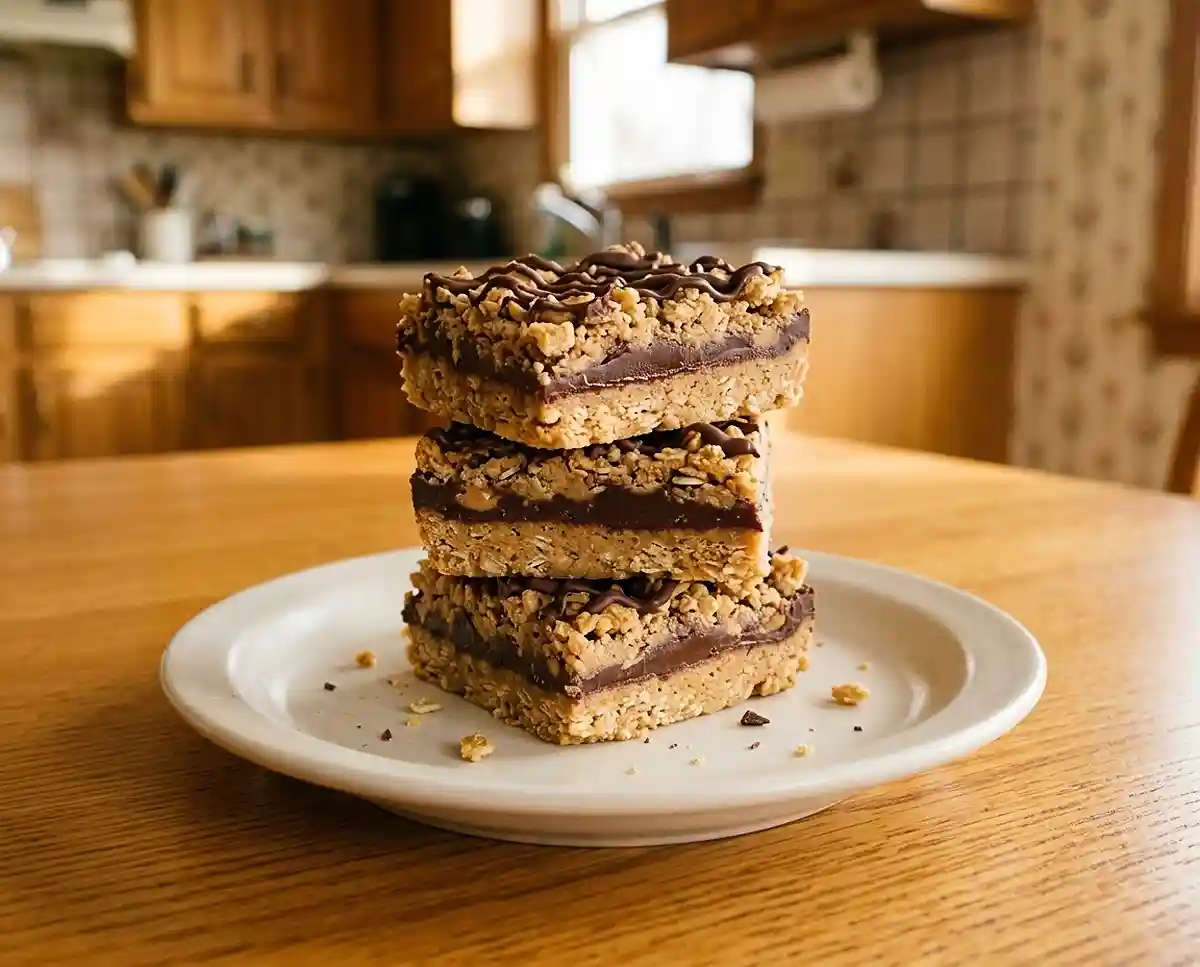
Make gluten-free no bake chocolate oat bars with just 5 ingredients. Get the step-by-step recipe, storage tips, and fixes for crumbly or soft bars.
The first time I made gluten-free no bake chocolate oat bars, I was rushing to finish a dessert for a school bake sale and my oven had just quit. I stirred together what was in the pantry, hoped for the best, and ended up with a pan of oat crumbs. Lesson learned: I had skipped the chilling time and pressed the base too lightly.
Craving something rich, chocolatey, and easy to make? Explore these no bake gluten free snacks for more effortless treats that satisfy sweet cravings without turning on the oven. You might discover a few delicious 5-ingredient favorites you’ll wish you had tried sooner!
Why You’ll Love These Gluten-Free No Bake Chocolate Oat Bars
- Texture and flavor: Chewy, buttery oats surround a smooth chocolate peanut butter center that melts like fudge.
- Difficulty level: Beginner-friendly. If you can melt butter and stir a pot, you can make these, and no oven is involved.
- Unique advantages: Kid-friendly, easy to adjust for dairy-free eaters, and a handy make-ahead dessert.
- When they work best: Hot summer days, potlucks, lunchbox treats, and any night you want something sweet without turning on the oven.
The Secret to Perfect Gluten-Free No Bake Chocolate Oat Bars
The secret is a sticky brown sugar and butter base that sets firm in the fridge, paired with a chocolate layer that stays easy to slice. Here’s what makes it work.
- Butter and brown sugar act as glue: Dissolving the sugar into melted butter creates a syrupy coating. As it chills, the butter solidifies and locks the oats together, which solves the crumbly texture many gluten-free bars have.
- Cooking the oats briefly: Stirring quick oats over low heat for 2–3 minutes coats every flake and softens it slightly. That keeps the bars chewy instead of dry or gritty.
- Peanut butter in the chocolate: Melting peanut butter into the chips gives you a layer that stays tender when cold. Your knife glides through without the chocolate shattering.
- Short microwave bursts: Heating in 20–30-second intervals keeps the chocolate from scorching or turning grainy.
Table of Contents
Ingredients
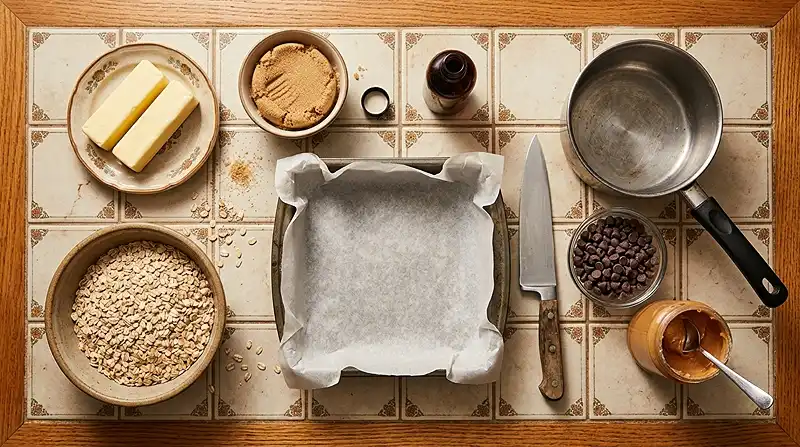
This recipe makes 16 bars in an 8 × 8-inch pan.
For the Oat Base
- 1 cup (2 sticks) unsalted butter, melted
- ½ cup packed light brown sugar
- 2 teaspoons pure vanilla extract labeled gluten-free (optional)
- 3 cups quick oats, certified gluten-free
For the Chocolate Layer
- 1 cup semi-sweet chocolate chips, labeled gluten-free
- ½ cup creamy peanut butter, labeled gluten-free
Check every label before you start. The Celiac Disease Foundation’s trusted celiac label-reading guide explains that oats labeled gluten-free contain less than 20 ppm of gluten, and that some people with celiac disease may still react to a protein in oats called avenin.
If you’re newly diagnosed, talk with your doctor or dietitian before adding oats. This Beyond Celiac guidance on certified gluten-free oats explains why professionals often suggest waiting until celiac disease is under control.
Instructions
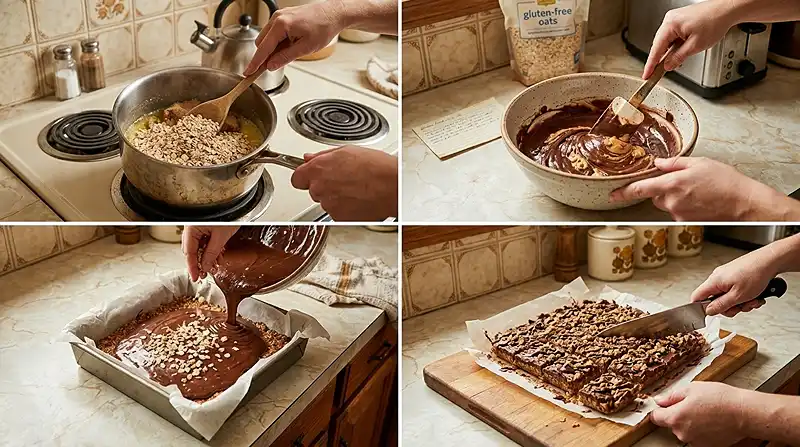
Hands-on time is short, but the chilling time matters, so plan ahead.
Prep and Melt
- Prepare the pan. Line an 8 × 8-inch square baking dish with parchment paper, leaving some overhang for easy removal. If using foil, lightly grease it. Pro Tip: Press the parchment into the corners so the slab lifts out with sharp edges.
- Melt the chocolate mixture. Combine the chocolate chips and peanut butter in a microwave-safe bowl. Microwave in 20–30-second intervals, stirring between each, until smooth and glossy. Alternatively, melt them together using a double boiler, then set aside.
Make and Layer the Bars
- Make the oat mixture. Add the melted butter and brown sugar to a large saucepan over medium heat. Stir until the butter melts and the sugar dissolves into a smooth syrup.
- Add the oats. Reduce the heat to low. Stir in the vanilla extract, if using, and the certified gluten-free quick oats. Cook for 2–3 minutes, stirring constantly, until the oats are evenly coated and smell lightly toasty. Pro Tip: Keep stirring so the sugar doesn’t scorch on the bottom of the pan.
- Press the first layer. Transfer half of the oat mixture to the prepared pan. Spread it evenly and press firmly into the bottom. Pro Tip: Use the bottom of a measuring cup, because a firmly packed base is your best defense against crumbling.
- Add the chocolate layer. Pour about three-quarters of the melted chocolate-peanut butter mixture over the oat base. Gently spread it into an even layer.
- Add the remaining oats. Sprinkle the remaining oat mixture over the chocolate layer. Press gently to create an even top.
- Finish with chocolate. Drizzle the remaining chocolate-peanut butter mixture over the bars.
Chill and Slice
- Chill. Refrigerate for 2–3 hours, or overnight, until completely firm and set.
- Slice and serve. Lift the chilled slab out using the parchment paper. Cut into 16 bars with a sharp knife, wiping the blade between cuts. Store in an airtight container in the refrigerator.
Make It Your Own
Dairy-free: Swap the unsalted butter for firm dairy-free butter sticks in the same amount, and choose dairy-free semi-sweet chips labeled gluten-free. Firm sticks work best because soft tub spreads carry more water and can leave the base softer. Check the label on any substitute, since not every dairy-free product is also gluten-free.
Nut-free: Replace the creamy peanut butter with sunflower seed butter labeled gluten-free. You know… I tried this for a classroom treat, and the bars set just as firmly. They’ll taste more like chocolate fudge than classic chocolate peanut butter bars.
Darker chocolate: Use dark chocolate chips instead of semi-sweet for a deeper, less sweet chocolate fudge flavor. Dark chips can melt a little thicker, so spread the layer quickly. Just make sure the bag says gluten-free.
Old-fashioned oats: I don’t recommend swapping these in for the quick oats. The larger flakes stay chewier and don’t pack as tightly, so the base can turn loose. Quick oats give the tight, even crumb that makes these dessert recipes so easy to slice.
No vanilla: The vanilla extract is optional, so leave it out if your pantry is bare. The bars will taste a little less rounded but will set exactly the same.
Common Problems & Solutions
Problem: The bars crumble when I cut them. Press the first oat layer firmly into the pan and chill the bars for the full 2–3 hours, or overnight. The butter and brown sugar binder only holds once it’s cold and compacted, so rushing either step leaves loose oats.
Problem: The bars feel soft or greasy. Chill them longer and keep them in the fridge until serving. Butter is the main glue here, and it softens quickly at room temperature, so a warm kitchen can make a set bar go slack.
Problem: The chocolate turned grainy or stiff. Melt it in 20–30-second intervals, stirring between each, and keep water out of the bowl. Chocolate scorches fast in the microwave, and even a drop of water can make it tighten into a thick paste.
Problem: The chocolate layer cracks when I slice. Man, oh man… this one frustrated me early on. Let the slab sit at room temperature for 5 minutes, then cut with a sharp knife wiped clean between cuts. Cold chocolate is brittle, and a short rest softens it just enough to slice cleanly.
Storage & Meal Prep
| Method | Duration | Notes |
|---|---|---|
| Counter | 2-3 days | Airtight container |
| Fridge | 5-7 days | Bring to room temp |
| Freezer | 2-3 months | Wrap individually |
Because butter softens in warm rooms, the fridge is the safest home for these bars, and counter storage works best in a cool kitchen. These bars need no reheating, just a few minutes on the counter to take the chill off.
Frozen bars thaw quickly in the fridge. Any crumbs left from slicing make a great topping for yogurt or vanilla ice cream, so nothing goes to waste.
Your Questions Answered
Can I make these bars dairy-free?
Yes, you can. Swap the unsalted butter for firm dairy-free butter sticks in the same amount, and use dairy-free chocolate chips labeled gluten-free. Soft tub spreads hold more water, so they can leave the bars softer.
How do I know my oats are really gluten-free?
Look for oats labeled certified gluten-free on the package. Regular oats are often processed near wheat, barley, and rye, which can cause cross-contact. If you have celiac disease, check with your doctor or dietitian before adding oats to your diet.
What’s the best way to cut clean bars?
Chill the slab until completely firm, then cut with a sharp knife. Lift it out using the parchment overhang and wipe the blade between cuts. If the chocolate cracks, let the slab sit at room temperature for 5 minutes first.
Why did my bars turn out soft?
Soft bars usually need more chilling time or a firmer press. Refrigerate for the full 2–3 hours, or overnight, and press the first oat layer firmly into the pan. Warm kitchens also soften the butter, so keep the bars in the fridge until serving.
Serving Suggestions
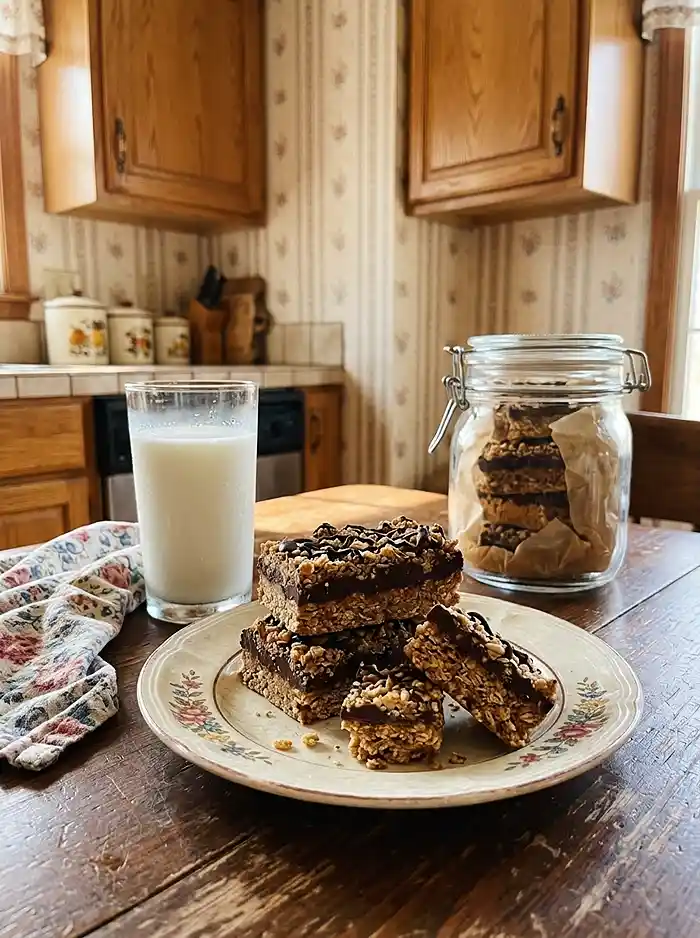
Serve these bars cold with a glass of milk or a hot cup of coffee. They also earn a spot on a Fourth of July dessert table, tucked beside a bowl of fresh berries.
For a full spread, add flourless oatmeal cookie bars and oatmeal cookie dough balls. Chocolate lovers will also enjoy this gluten-free copycat Heavenly Hunks recipe.
Give these bars a try and let me know how they turned out in the comments, including any swaps you made. Your notes help other families figure out what works in their kitchens.
If the pan disappears fast at your house, leave a star rating and pin the recipe to your Pinterest dessert board so you can find it again.
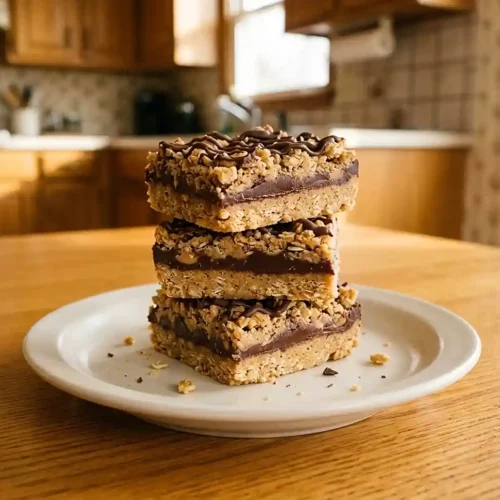
Gluten-Free No Bake Chocolate Oat Bars
Equipment
- 8 × 8-inch Square Baking Dish
- Parchment paper
- Large saucepan
- Microwave-safe bowl
- Measuring cups
- Measuring spoons
- Spatula
- Sharp knife
- Microwave or Double Boiler
Ingredients
For the Oat Base
- 1 cup Unsalted butter 2 sticks, melted
- ½ cup Light brown sugar Packed
- 2 teaspoons Pure vanilla extract Labeled gluten-free; optional
- 3 cups Quick oats Certified gluten-free
For the Chocolate Layer
- 1 cup Semi-sweet chocolate chips Labeled gluten-free
- ½ cup Creamy peanut butter Labeled gluten-free
Instructions
- Line an 8 × 8-inch square baking dish with parchment paper, leaving some overhang for easy removal. If using foil, lightly grease it. Press the parchment into the corners for clean edges.
- Combine the chocolate chips and peanut butter in a microwave-safe bowl. Microwave in 20–30-second intervals, stirring between each, until smooth and glossy. Alternatively, melt them together using a double boiler, then set aside.
- Add the melted butter and brown sugar to a large saucepan over medium heat. Stir until the butter melts and the sugar dissolves into a smooth syrup.
- Reduce the heat to low. Stir in the vanilla extract, if using, and the certified gluten-free quick oats. Cook for 2–3 minutes, stirring constantly, until the oats are evenly coated and smell lightly toasty. Keep stirring to prevent the sugar from scorching.
- Transfer half of the oat mixture to the prepared pan. Spread it evenly and press firmly into the bottom using the bottom of a measuring cup to create a compact base.
- Pour about three-quarters of the melted chocolate-peanut butter mixture over the oat base. Gently spread it into an even layer.
- Sprinkle the remaining oat mixture over the chocolate layer. Press gently to create an even top.
- Drizzle the remaining chocolate-peanut butter mixture over the bars.
- Refrigerate for 2–3 hours, or overnight, until completely firm and set.
- Lift the chilled slab out using the parchment paper. Cut into 16 bars with a sharp knife, wiping the blade between cuts. Store in an airtight container in the refrigerator.