Raspberry Swirl Cheesecake Brownie Bars
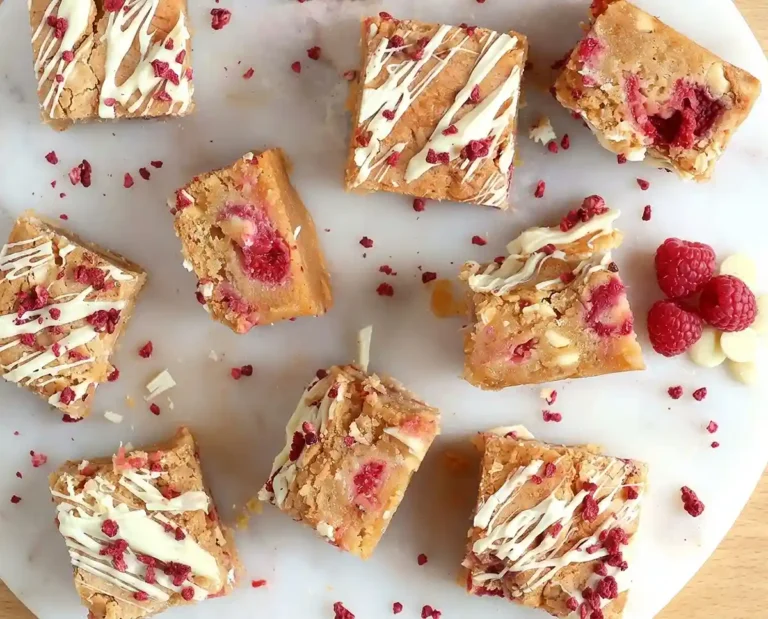
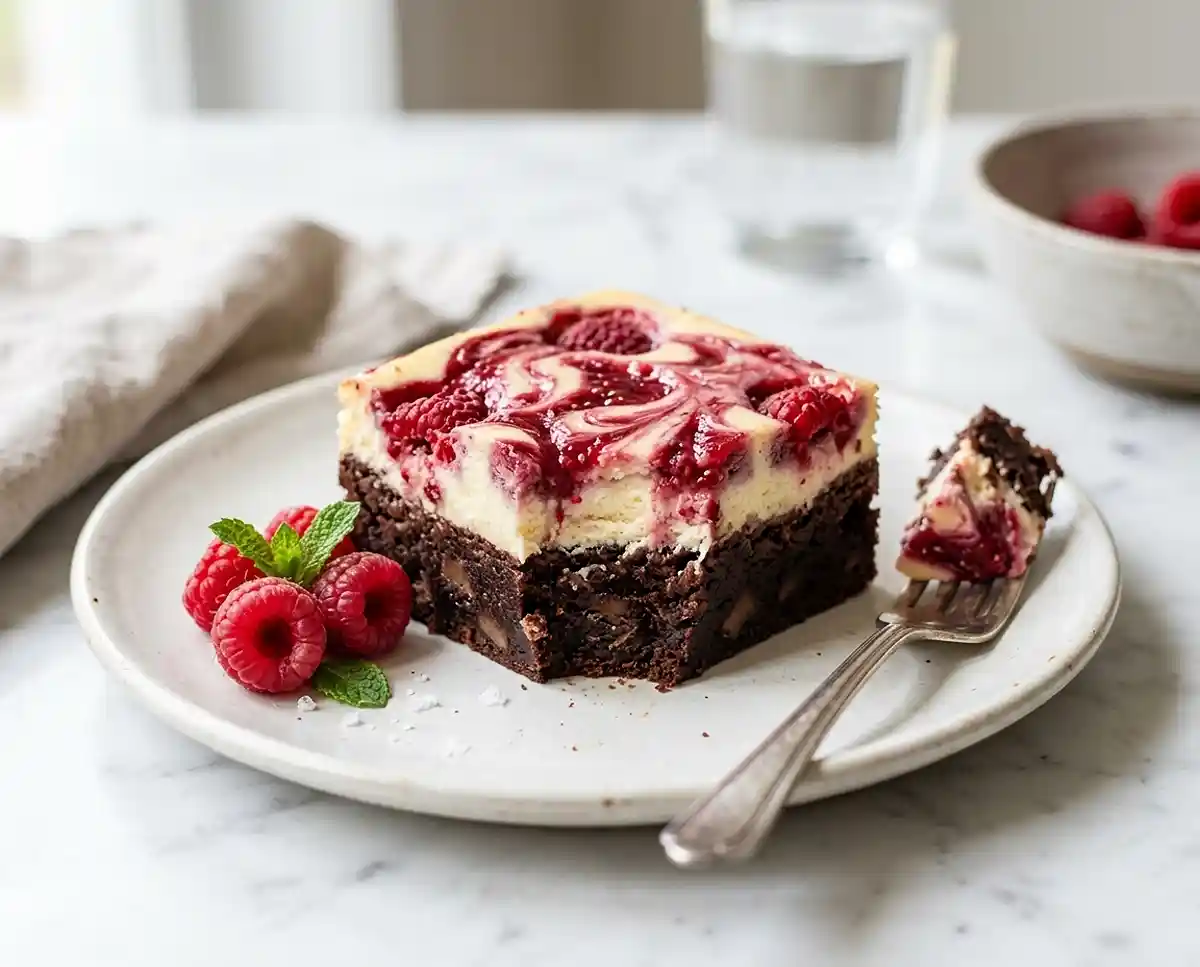
Fudgy gluten-free brownie bars layered with white chocolate cheesecake and a fresh raspberry swirl — rich, gorgeous, and ready in under an hour.
I still remember pulling my first batch of Raspberry Swirl Cheesecake Brownie Bars out of the oven and genuinely not believing they were gluten-free. I’d been testing brownie recipes for weeks at that point — some too cakey, some that crumbled the second you touched them — and this one finally came out with that fudgy, dense center that clings to your fork exactly the way a real brownie should.
Well… I almost didn’t share this recipe because it looks so much harder than it actually is. Three layers sounds intimidating, but every single one is a simple mix-and-pour situation. The brownie batter takes about ten minutes. The cheesecake layer is just cream cheese beaten smooth with a few add-ins. And the raspberry ripple? Mashed berries, a spoonful of sugar, and a teaspoon of cornflour.
Table of Contents
Why You’ll Love These Raspberry Swirl Cheesecake Brownie Bars
- Three distinct textures in every bite: A fudgy, cocoa-rich brownie base gives way to a creamy white chocolate cheesecake layer, finished with tart raspberry swirls that pop against the sweetness — it’s like biting into a chocolate truffle wrapped in a berry-streaked cloud.
- Easier than it looks: Each layer is a simple mix-and-pour process with no tempering, no water baths, and no specialty techniques. If you can melt butter and beat cream cheese, you can make these brownie bars.
- Naturally gluten-free: Only 60g of gluten-free flour in the entire recipe — the structure comes primarily from eggs and chocolate, so there’s no gummy or gritty texture to work around.
- Crowd-ready from one pan: Yields clean, sliceable squares from a single 20cm tin, making it a crowd favorite dessert for potlucks, holiday cookie trays, or weeknight indulgence.
The Secret to Fudgy Raspberry Swirl Cheesecake Brownie Bars
- Blooming the cocoa in melted butter is the technique that separates a mediocre brownie from a deeply chocolatey one. When cocoa powder hits hot fat, its flavor compounds become fat-soluble and disperse more evenly through the batter. You’ll notice the color deepens from dusty brown to almost black — that’s flavor being unlocked at a molecular level.
- Whisking eggs and sugar until tripled in volume creates the lift and structure that replaces the gluten network. According to baking science research from the King Arthur Baking team, this aeration is critical for brownies that hold their shape without being dense or gummy. The pale, ribbony egg mixture traps air pockets that give the brownie its characteristic fudgy-yet-sliceable texture.
- Cornflour in both the cheesecake and the raspberry ripple acts as a gentle stabilizer. It absorbs excess moisture during baking so the cheesecake sets firmly without cracking, and it thickens the raspberry swirl just enough to keep it from bleeding into the cheesecake layer.
- A two-hour refrigerated set after baking allows the cheesecake proteins and the chocolate fats to firm up completely. Cutting before this step leads to smeared layers and messy slices — patience here is non-negotiable.
Ingredients
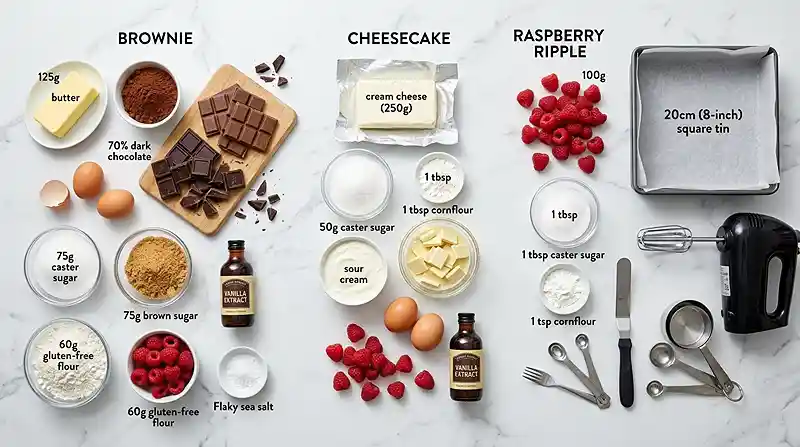
Brownie Layer
- 125g butter (1/2 cup plus 1 tablespoon)
- 25g cocoa powder (1/4 cup)
- 90g 70% dark chocolate
- 35g milk chocolate
- 2 large eggs
- 75g caster sugar (1/4 cup plus 2 tablespoons)
- 75g brown sugar (1/4 cup plus 2 tablespoons)
- 1 teaspoon vanilla
- 60g gluten-free cake flour or gluten-free all-purpose flour blend (1/2 cup)
- 50g fresh raspberries
- Pinch of flaky sea salt
White Chocolate Cheesecake Layer
- 250g cream cheese, room temperature
- 50g caster sugar (1/4 cup)
- 1 tablespoon cornflour
- 60g sour cream (1/4 cup)
- 80g gluten-free white chocolate, melted and cooled
- 2 large eggs
- 50g fresh raspberries
- 1 teaspoon vanilla extract
Raspberry Ripple
- 100g fresh raspberries
- 1 tablespoon caster sugar
- 1 teaspoon cornflour
A note on the white chocolate: verify that your brand is gluten-free. Most major brands are, but some cheaper bars contain barley malt or are processed on shared lines. The Celiac Disease Foundation’s gluten-free food guide is a trustworthy resource for checking ingredient labels when you’re unsure.
Step-by-Step Instructions
Build the Brownie Base
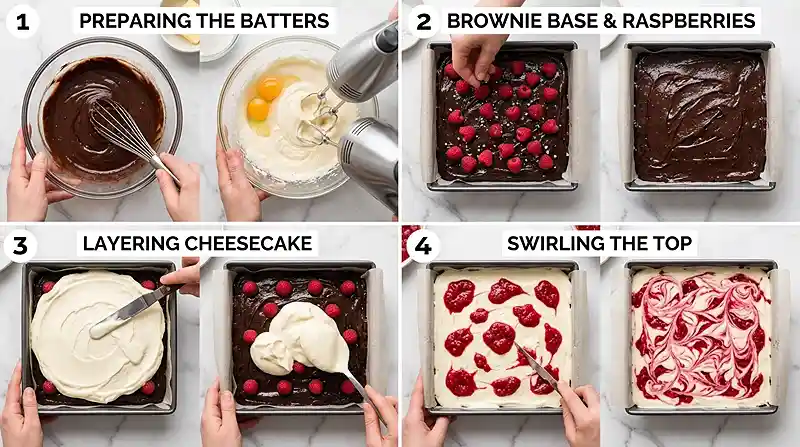
Step 1 — Prepare your tin and preheat the oven. Preheat the oven to 160 degrees Celsius. Grease and line a 20cm square tin with baking paper, allowing a 2cm overhang on two opposite sides so you can lift the finished bars out cleanly later.
Step 2 — Bloom the cocoa and melt the chocolate. Melt the 125g butter in a medium saucepan over low heat. Remove from the heat and immediately whisk in the 25g cocoa powder — the residual heat will bloom the cocoa, turning it glossy and deeply fragrant. Add the 90g dark chocolate and 35g milk chocolate to the hot mixture and stir slowly until completely melted and smooth. Set aside to cool slightly.
Step 3 — Whisk the eggs and sugar. In a separate bowl, use a hand mixer to whisk the 2 large eggs, 1 teaspoon vanilla, 75g caster sugar, and 75g brown sugar until the mixture has tripled in volume and turned pale and ribbony. This takes about 3-4 minutes on medium-high speed. When you lift the beaters, the batter should fall in a thick ribbon that holds its shape on the surface for a few seconds before dissolving.
Step 4 — Combine and pour. Slowly pour the cooled chocolate mixture into the egg mixture and fold gently with a spatula — you want to preserve as much of that trapped air as possible. Fold in the 60g gluten-free flour until just combined with no dry streaks remaining. Pour into your prepared tin, scatter the 50g fresh raspberries and flaky sea salt over the top, and set aside.
Build the Cheesecake Layer
Step 5 — Beat the cream cheese base. Beat the 250g room-temperature cream cheese with a hand mixer until smooth and creamy, about 1-2 minutes. Add the 50g caster sugar and beat until combined, scraping the bowl once.
Step 6 — Add the remaining cheesecake ingredients. Add the 1 tablespoon cornflour, 1 teaspoon vanilla extract, 60g sour cream, and 80g melted and cooled gluten-free white chocolate. Beat until smooth and uniform. Then fold in the 2 large eggs gently until just combined — overmixing here incorporates too much air, which causes cracking during baking.
Step 7 — Layer the cheesecake over the brownie. Spoon the cheesecake mixture carefully over the brownie batter in large dollops. Use an offset spatula to gently spread it into an even layer without mixing the two batters together. Scatter the 50g fresh raspberries on top.
Create the Raspberry Swirl
Step 8 — Make the ripple. Mash the 100g fresh raspberries with a fork, keeping some chunky pieces for texture. Stir in the 1 tablespoon caster sugar and 1 teaspoon cornflour until combined.
Step 9 — Swirl and bake. Dollop the raspberry mixture randomly over the cheesecake layer. Use the tip of a knife or a toothpick to drag through the dollops in gentle figure-eight motions, creating organic ripples. Don’t over-swirl — three or four passes is plenty. Bake for 30-35 minutes until the cheesecake layer is just set and lightly golden around the edges. The center should still have the slightest wobble when you gently shake the tin.
Step 10 — Cool and chill. Allow the bars to cool completely in the tin at room temperature. Then refrigerate for at least 2 hours — this is when the cheesecake fully sets and the brownie fudginess develops. To cut clean slices, dip a sharp straight-edged knife in boiling water and wipe it dry before each cut.
Pro Tip: That slight wobble in the center is exactly what you want. Cheesecake continues to set as it cools, and overbaking at this stage turns the creamy layer rubbery and dry.
Make It Your Own
Swap the berry: Blackberries, blueberries, or even a chunky strawberry mash all work in the ripple layer. Keep the weight at 100g and adjust the sugar by taste — strawberries may need less, while blueberries might need a tiny squeeze of lemon to brighten them up. These raspberry cheesecake brownies become entirely different desserts with a simple fruit swap.
Go dairy-free: Replace the cream cheese with a plant-based alternative like Violife, swap the sour cream for coconut cream, and use dairy-free white chocolate. Man, oh man… the dairy-free version is surprisingly close to the original when the cream cheese is beaten until genuinely smooth. The texture shifts slightly, but the layers still hold and the flavor still delivers.
Skip the white chocolate cheesecake: If you just want a fudgy raspberry brownie bar, pour only the brownie batter into the tin, add the raspberry ripple directly on top, and bake for 22-25 minutes. You’ll get a simpler but still stunning two-layer bar.
Add crunch: Press 30g of roughly chopped toasted hazelnuts or pecans into the brownie batter before adding the cheesecake layer. The nuts add a butterscotch-like toastiness that pairs beautifully with the tart raspberries and the rich chocolate.
Common Problems and How to Fix Them
Problem: The cheesecake layer cracked on top. Your oven temperature was likely too high, or the eggs were overmixed into the cheesecake batter. Fold the eggs in gently and bake at exactly 160 degrees Celsius — cheesecake needs low, even heat. Small cracks are cosmetic and won’t affect the taste, but the raspberry swirl hides most imperfections anyway.
Problem: The brownie layer is gummy and underbaked. You know… this is the most common issue with gluten-free brownies, and it almost always comes down to skipping the egg-whisking step. That tripled, ribbony egg mixture is what gives the brownie its structure without gluten. If the eggs aren’t aerated enough, the center stays wet and dense even after the full bake time.
Problem: The layers mixed together into one muddy mess. You spread the cheesecake too aggressively over the brownie batter. Dollop first, then use a light touch with the offset spatula — think of it as floating the cheesecake on top rather than pressing it down. If the brownie batter is still warm, cool it for 10 minutes before adding the cheesecake layer so the batters stay distinct.
Problem: The raspberry ripple disappeared during baking. The cornflour in the ripple mixture is what keeps it visible. If you skipped it, the raspberry juices thin out in the oven and absorb into the cheesecake. Make sure to stir the 1 teaspoon cornflour thoroughly into the mashed berries before dolloping, and keep your swirl strokes minimal — over-swirling blends the colors together.
Storage and Meal Prep
| Method | Duration | Notes |
|---|---|---|
| Counter | Up to 4 hours | Covered, for serving only |
| Refrigerator | Up to 5 days | Airtight container, layers between parchment |
| Freezer | Up to 3 months | Wrap individual bars in plastic, then foil |
These bars actually taste better cold from the fridge — the brownie layer becomes even fudgier and the cheesecake firms into something close to a frozen truffle filling. If you want to serve them at room temperature, pull them from the fridge 15-20 minutes before cutting.
For freezing, slice the bars first, wrap each one individually in plastic wrap, then store them together in a zip-top bag. Thaw in the fridge overnight or on the counter for about 30 minutes. The cheesecake layer thaws beautifully without weeping or separating.
Your Questions Answered
Can I use frozen raspberries instead of fresh?
Yes, but thaw and drain them first. Frozen raspberries release significantly more liquid as they thaw, and that extra moisture can make the brownie layer soggy and prevent the cheesecake from setting properly. Pat them dry with a paper towel before scattering or mashing.
How do I know when the bars are done baking?
Look for lightly golden edges on the cheesecake layer and a very slight wobble in the center when you gently shake the tin. The cheesecake continues to firm up as it cools and refrigerates. If the center is completely still and puffed, you’ve overbaked — it’ll still taste good but the texture will be drier.
What’s the best gluten-free flour for the brownie layer?
A fine-textured gluten-free cake flour or a quality all-purpose blend with xanthan gum included, like Bob’s Red Mill 1-to-1 or King Arthur Measure for Measure. Since the recipe only calls for 60g of flour, the brand matters less here than in a cake — the eggs and chocolate do most of the structural work.
Why did my brownie layer sink after cooling?
Some settling is completely normal and expected — the aerated egg mixture deflates slightly as it cools, which actually creates that dense, fudgy texture you want. If it sinks dramatically, the eggs may not have been whisked long enough. Aim for a full triple in volume before adding the chocolate.
Can I make these bars ahead for a party?
Absolutely — and you should. These brownie bars are a crowd favorite dessert precisely because they’re better after a full overnight rest in the fridge. The flavors meld, the layers firm up, and slicing is cleaner. Make them the day before and store covered in the fridge until you’re ready to serve.
When to Serve These
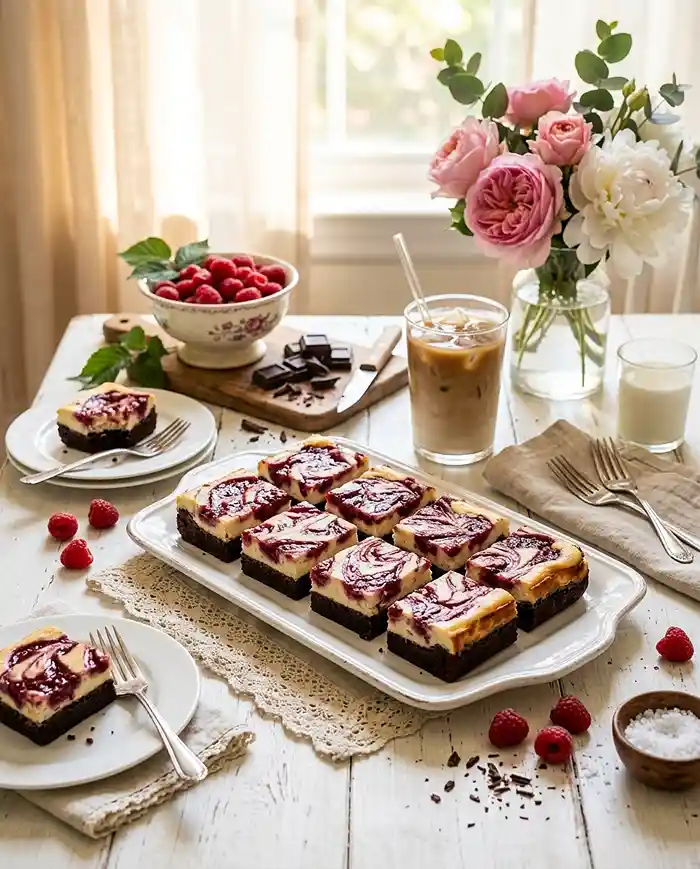
These Raspberry Swirl Cheesecake Brownie Bars are the kind of dessert that earns you a reputation at Thanksgiving, when the dessert table is already crowded and you need something that stands out without requiring a fork and plate.
They slice into clean, portable squares that look stunning arranged on a platter. Pair them with a cup of strong coffee, a scoop of vanilla ice cream, or alongside something light and fruity like gluten-free blueberry lemon coconut pops for contrast. If you’re building a full spread, start with gluten-free hot honey goat cheese dip and round out the savory side with sweet chili chicken lettuce wraps before bringing out these bars as the grand finale.
Go Make These This Weekend
If you’ve been wanting a gluten-free brownie that actually impresses — the kind that makes people pause mid-bite and ask for the recipe — this is the one to try. Three layers, one pan, and a result that looks far more complicated than the effort it takes. Drop a comment below if you make them, and save this recipe to your Pinterest dessert board so it’s ready the next time you need something showstopping.
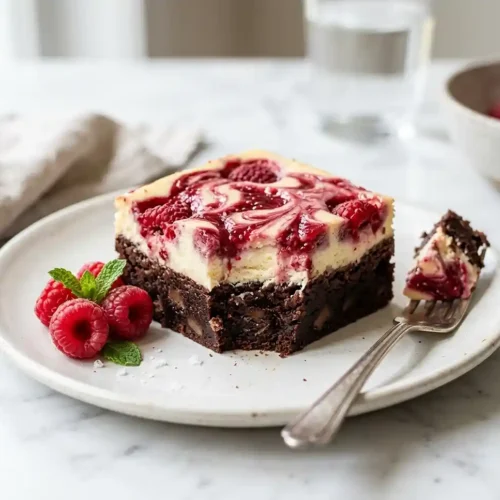
Raspberry Swirl Cheesecake Brownie Bars
Equipment
- 20cm (8-inch) square baking tin
- Baking paper (parchment paper)
- Medium saucepan
- Whisk
- Hand mixer
- Large mixing bowl
- Separate medium mixing bowl
- Offset spatula
- Spatula or Large Spoon
- Fork
- Sharp straight-edged knife
Ingredients
Brownie Layer
- 125 g butter 1/2 cup plus 1 tablespoon
- 25 g cocoa powder 1/4 cup
- 90 g 70% dark chocolate
- 35 g milk chocolate
- 2 large eggs
- 75 g caster sugar 1/4 cup plus 2 tablespoons
- 75 g brown sugar 1/4 cup plus 2 tablespoons
- 1 teaspoon vanilla
- 60 g gluten-free cake flour or gluten-free all-purpose flour blend 1/2 cup
- 50 g fresh raspberries
- 1 pinch flaky sea salt
White Chocolate Cheesecake Layer
- 250 g cream cheese room temperature
- 50 g caster sugar 1/4 cup
- 1 tablespoon cornflour
- 60 g sour cream 1/4 cup
- 80 g gluten-free white chocolate melted and cooled
- 2 large eggs
- 50 g fresh raspberries
- 1 teaspoon vanilla extract
Raspberry Ripple
- 100 g fresh raspberries
- 1 tablespoon caster sugar
- 1 teaspoon cornflour
Instructions
- Preheat the oven to 160 degrees Celsius. Grease and line a 20cm square tin with baking paper, allowing a 2cm overhang on two opposite sides so the finished bars can be lifted out cleanly.
- Melt the 125g butter in a medium saucepan over low heat. Remove from the heat and immediately whisk in the 25g cocoa powder to bloom it — the mixture will turn glossy and deeply fragrant. Add the 90g dark chocolate and 35g milk chocolate and stir until completely melted and smooth. Set aside to cool slightly.
- In a separate bowl, use a hand mixer to whisk the 2 large eggs, 1 teaspoon vanilla, 75g caster sugar, and 75g brown sugar until the mixture has tripled in volume and turned pale and ribbony, about 3-4 minutes on medium-high speed.
- Slowly pour the cooled chocolate mixture into the egg mixture and fold gently with a spatula to preserve the trapped air. Fold in the 60g gluten-free flour until just combined with no dry streaks remaining.
- Pour the brownie batter into the prepared tin. Scatter the 50g fresh raspberries and a pinch of flaky sea salt over the top. Set the tin aside.
- Beat the 250g room-temperature cream cheese with a hand mixer until smooth and creamy, about 1-2 minutes. Add the 50g caster sugar and continue beating until combined.
- Add the 1 tablespoon cornflour, 1 teaspoon vanilla extract, 60g sour cream, and 80g melted and cooled gluten-free white chocolate to the cream cheese mixture. Beat until smooth and uniform.
- Fold in the 2 large eggs gently until just combined and the batter is smooth and creamy. Do not overmix, as this incorporates too much air and can cause cracking during baking.
- Spoon the cheesecake mixture carefully over the brownie batter in large dollops. Use an offset spatula to gently spread it into an even layer without mixing the two batters together. Scatter the 50g fresh raspberries on top.
- Mash the 100g fresh raspberries with a fork, keeping some chunky pieces for texture. Stir in the 1 tablespoon caster sugar and 1 teaspoon cornflour until combined.
- Dollop the raspberry mixture randomly over the cheesecake layer. Use the tip of a knife or toothpick to drag through the dollops in gentle figure-eight motions, creating organic ripples. Three or four passes is plenty — do not over-swirl.
- Bake for 30-35 minutes until the cheesecake layer is just set and lightly golden around the edges. The center should still have the slightest wobble when you gently shake the tin.
- Allow the bars to cool completely in the tin at room temperature, then refrigerate for at least 2 hours so the cheesecake can fully set and the brownie layer develops its fudgy texture.
- To cut clean slices, dip a sharp straight-edged knife in boiling water and wipe it dry before each cut. Use the parchment paper overhang to lift the entire slab from the tin before slicing into squares.