Chickpea Protein Cookies
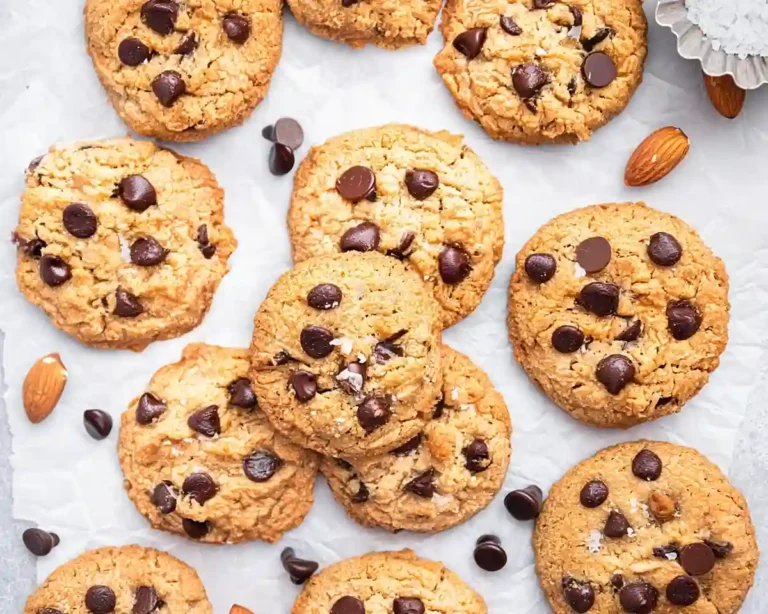
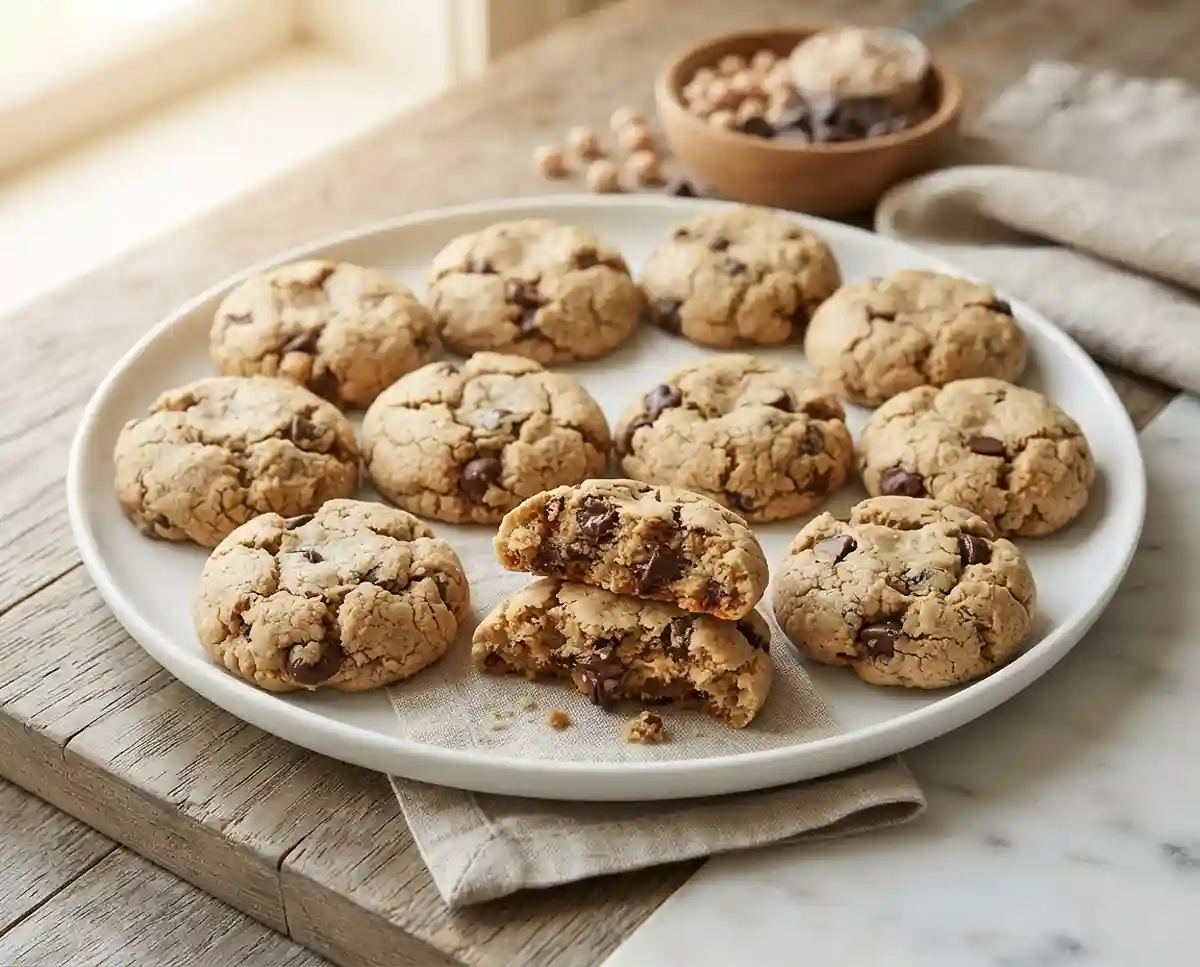
Make these gluten-free chickpea protein cookies once and you’ll stop buying expensive protein bars. I started making them after a back-to-school September when I needed something I could hand my kids on the way out the door that wasn’t full of ingredients I couldn’t pronounce.
The first batch, I used a protein powder with too much sweetener and the cookies came out oddly sticky. I pulled back to a plainer vanilla powder and everything clicked. Now they come out firm on the outside, tender in the middle, and my kids think they’re eating dessert for breakfast.
Well… that’s the kind of win gluten-free baking rarely hands you without a fight. These are worth making.
Why You’ll Love This Chickpea Protein Cookie Recipe
- Genuinely high-protein: Between the chickpeas and the protein powder, each cookie packs real, satisfying protein — not just a trace amount listed on a nutrition label.
- Beginner-friendly: If you can run a food processor and set a timer, you can make these. No mixer, no chilling, no complex technique.
- Naturally dairy-free: Every ingredient is plant-based by default. No swaps needed for dairy-free households.
- Works as a meal-prep staple: Bake a batch on Sunday and you have a grab-and-go option all week. They hold up well in the fridge and freeze beautifully.
The Secret to Perfect Gluten-Free Chickpea Protein Cookies
- Dry your chickpeas completely: After draining and rinsing, pat them firmly with paper towels and let them air out for five minutes. Wet chickpeas add moisture that makes the dough too soft and the cookies won’t set properly in the oven.
- Use a certified gluten-free protein powder: This matters more than it sounds. Many protein powders are processed in facilities that handle wheat. According to Celiac Disease Foundation guidance on gluten-free foods, shared equipment is one of the most common sources of hidden gluten exposure.
- Blend until a real dough forms: The mixture should pull away from the sides of the food processor and look cohesive — not crumbly, not wet. This usually takes 60 to 90 seconds of continuous blending with scraping.
- Flatten before baking: Chickpea-based doughs don’t spread like wheat cookies. Press each portion down gently before it goes in the oven or you’ll end up with dense little pucks instead of proper cookies.
Table of Contents
Ingredients
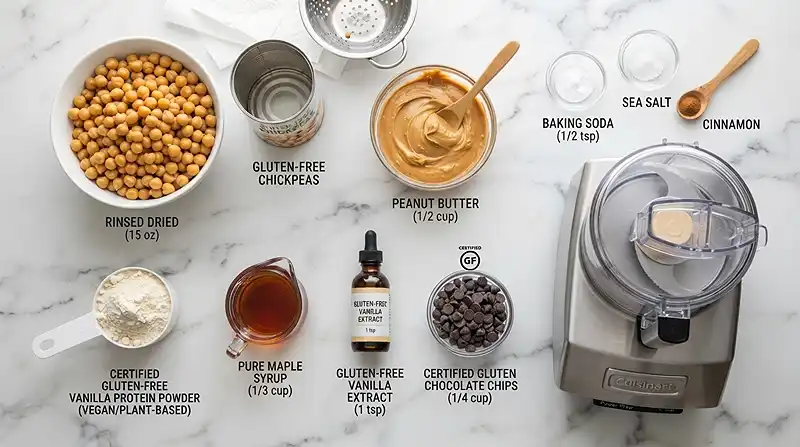
This recipe makes 12 cookies. Here’s everything you need:
| Ingredient | Amount | Notes |
|---|---|---|
| Chickpeas, drained, rinsed, and thoroughly patted dry | 1 (15-ounce) can | Drying step is non-negotiable for texture |
| Creamy peanut butter or almond butter | ½ cup | No-stir varieties work best here |
| Certified gluten-free vanilla protein powder | ½ cup | Check the label — must be certified GF |
| Pure maple syrup | ⅓ cup | Adds sweetness and helps bind the dough |
| Gluten-free vanilla extract | 1 teaspoon | Some extracts contain gluten — verify the label |
| Certified gluten-free chocolate chips | ¼ cup | Folded in by hand after blending |
Instructions
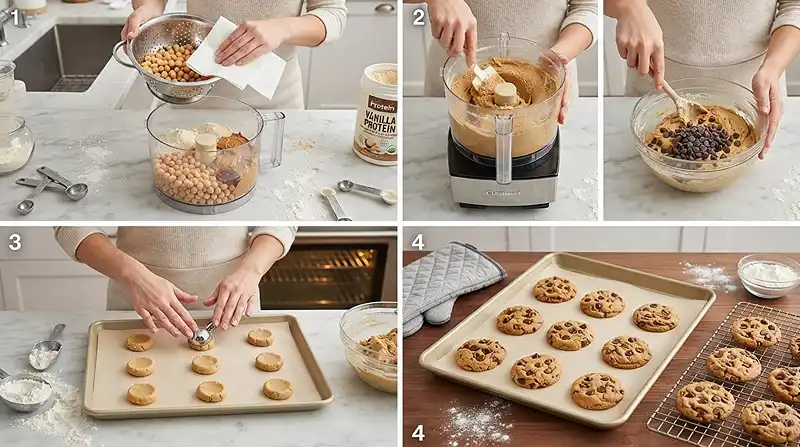
- Preheat and prep. Preheat the oven to 350°F (175°C). Line a baking sheet with parchment paper. Getting the oven fully preheated before the dough goes in makes a real difference — these cookies need even heat from the start to set properly.
- Blend the dough. Add the chickpeas, peanut butter, protein powder, maple syrup, and vanilla extract to a food processor. Blend until smooth and a thick dough forms, scraping down the sides as needed. You’re looking for a consistency like stiff cookie dough — it should hold its shape when pressed.
- Fold in the chocolate chips. Transfer the dough to a bowl and fold in the gluten-free chocolate chips with a spatula. Keep them whole and evenly distributed throughout the dough.
- Portion and flatten. Scoop the dough into 12 equal portions onto the prepared baking sheet. Flatten each portion gently with your fingers or the back of a spoon. They should be about ½ inch thick — thin enough to bake through, thick enough to stay soft in the center.
- Bake. Bake for 12–15 minutes, until the cookies are set and lightly golden around the edges. They’ll look slightly underdone in the center when you pull them — that’s exactly right. They continue to firm up on the pan.
- Cool before moving. Let the cookies cool on the baking sheet for 5 minutes before transferring them to a wire rack. Moving them too early causes them to break. After 5 minutes, they’ll lift cleanly and hold their shape.
Pro Tip: If your cookies crack while flattening, your dough may be slightly dry. Add one teaspoon of water or maple syrup to the food processor and pulse again before portioning.
Make It Your Own
Swap peanut butter for almond butter if you need a peanut-free version — the fat content is similar enough that the texture won’t change. Sunflower seed butter is another good swap and makes these school-safe for nut-free classrooms.
You know… the protein powder choice changes this recipe more than almost any other variable. A plain whey-based powder works, but a plant-based vanilla powder (pea or brown rice) keeps everything dairy-free and tends to produce a slightly chewier texture that holds up better the next day.
For a chocolate version of this healthy chickpea protein cookie recipe, replace 2 tablespoons of the protein powder with certified gluten-free unsweetened cocoa. The dough will be slightly darker and the chocolate flavor goes deeper — especially good if you double up with dark chocolate chips.
If you’d rather skip baking entirely, this same base dough works beautifully as a no-bake treat. Check out these chickpea cookie dough energy bites for a rolled, no-oven version using a very similar ingredient list.
Common Problems & Solutions
Problem: The cookies spread too flat during baking. This usually means the dough had too much moisture, often from insufficiently dried chickpeas. Next time, spend an extra two minutes pressing the chickpeas dry with a clean kitchen towel before blending. A flatter cookie also happens when the protein powder absorbs differently — try reducing maple syrup by one teaspoon.
Problem: The cookies came out dry and crumbly. Too much protein powder relative to the wet ingredients creates a dry dough that won’t hold moisture during baking. Make sure you’re measuring the protein powder loosely — spoon it into the measuring cup rather than scooping directly. If the dough already looks dry before baking, add one teaspoon of maple syrup and blend again.
Man, oh man… Problem: The cookies stuck to the baking sheet. Parchment paper is not optional here. Chickpea-based cookies have very little fat compared to traditional cookies and they will bond to a bare pan. If they’re still sticking through parchment, let them cool an extra two minutes — they release much more cleanly once they’ve set.
Problem: The texture is gummy in the center. Under-baking is the most common cause. The edges should be visibly golden before you pull them. If your oven runs cool, add two minutes to the bake time. A gummy center can also mean the dough was too wet — tighter drying of the chickpeas solves this at the source.
Storage & Meal Prep
| Method | Duration | Notes |
|---|---|---|
| Counter | 2–3 days | Airtight container; keep away from humidity |
| Fridge | 5–7 days | Bring to room temp for 10 min before eating |
| Freezer | 2–3 months | Freeze individually on a sheet, then bag |
To reheat from frozen, place a cookie on a plate and microwave for 20–25 seconds. It comes out warm, soft in the center, and tastes like it just came out of the oven — genuinely one of the better reheated gluten-free textures I’ve tested.
For meal prep, bake a double batch and freeze half immediately. Pull cookies the night before and let them thaw in the fridge overnight. This keeps the texture close to fresh-baked and means you always have a high-protein grab-and-go option ready.
Chickpea Protein Cookies FAQs
Can I use a different protein powder in this recipe?
Yes, but the type matters. A plain vanilla whey or plant-based protein powder works best. Avoid highly sweetened powders or those with artificial flavors — they can make the dough too sticky or leave an aftertaste after baking. Always confirm the powder is certified gluten-free.
How do I know when the cookies are done baking?
The cookies are done when the edges look lightly golden and the surface appears set — not shiny or wet-looking. The center will still feel soft when you press it gently, but it firms up during the 5-minute rest on the pan. Pulling them too early leads to a gummy center.
What’s the best way to get consistent cookie sizes?
A cookie scoop (also called a disher) is the most reliable tool here. A standard 1.5-tablespoon scoop gives you 12 even portions without guessing. Even sizing means every cookie bakes at the same rate — no overcooked edges while the center is still raw.
Why did my cookies turn out dense instead of soft?
Dense cookies usually mean the dough wasn’t blended long enough or the portions weren’t flattened before baking. Chickpea dough needs a full 60 to 90 seconds in the food processor to fully smooth out and aerate slightly. And unlike wheat-flour cookies, this dough won’t spread on its own — pressing it flat before baking is essential.
Can I make these without a food processor?
A high-powered blender works as a substitute. The texture may not be quite as smooth, but the cookies will still bake correctly. A hand mixer with a beater attachment can work in a pinch if the chickpeas are very well-drained and soft from the can — expect a slightly chunkier dough.
Serving Suggestions
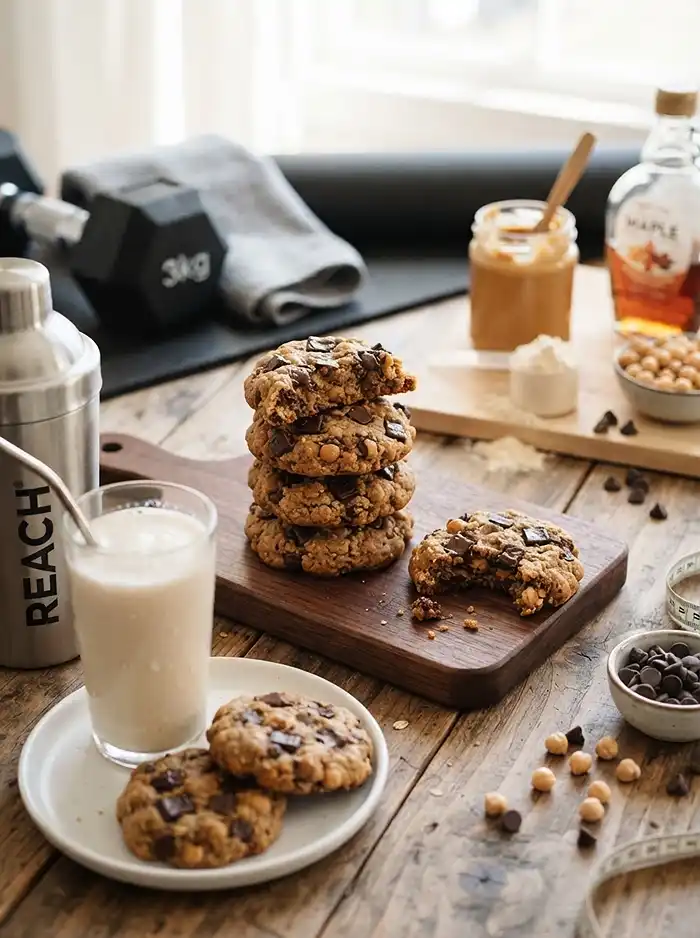
These cookies are sturdy enough to hold up in a lunchbox without crumbling — which makes them a natural fit for back-to-school snack prep or a Thanksgiving morning snack while the kitchen chaos ramps up. Pair one with a glass of almond milk or alongside a bowl of fruit and you have a genuinely balanced snack.
If you want to build a full chickpea-based dessert spread, the chickpea cookie dough bark makes a great companion — different texture, same clean ingredient list. The no-bake chickpea cookie dough is also worth keeping in the fridge alongside these for when someone wants something cold and scoopable instead.
For more on how chickpeas contribute protein and fiber in baked goods, the Healthline overview of chickpea nutrition is a clear, well-sourced read that explains exactly why legumes work so well as a flour and protein substitute in sweet recipes.
Made a batch? Drop a comment below and let me know how they turned out — especially if you tried a different protein powder or nut butter. Pinning this on Pinterest helps other gluten-free families find it, and I love seeing what tweaks people make to recipes like this one.
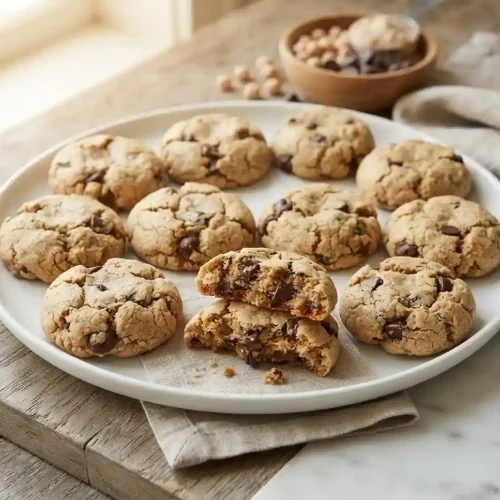
Gluten-Free Chickpea Protein Cookies — Simple and High-Protein
Equipment
- Food processor
- Baking sheet
- Parchment paper
- Mixing bowl
- Spatula
- Cookie scoop
- Wire rack
Ingredients
Chickpea Protein Cookies
- 1 15-ounce can Chickpeas Drained, rinsed, and thoroughly patted dry
- ½ cup Creamy peanut butter or almond butter No-stir varieties work best
- ½ cup Certified gluten-free vanilla protein powder Check the label and use a certified gluten-free powder
- ⅓ cup Pure maple syrup Adds sweetness and helps bind the dough
- 1 teaspoon Gluten-free vanilla extract Verify the label is gluten-free
- ¼ cup Certified gluten-free chocolate chips Folded in by hand after blending
Instructions
- Preheat the oven to 350°F (175°C) and line a baking sheet with parchment paper.
- Add the chickpeas, peanut butter, protein powder, maple syrup, and vanilla extract to a food processor. Blend until smooth and a thick dough forms, scraping down the sides as needed.
- Transfer the dough to a bowl and fold in the gluten-free chocolate chips with a spatula, keeping them whole and evenly distributed.
- Scoop the dough into 12 equal portions onto the prepared baking sheet. Flatten each portion gently with your fingers or the back of a spoon to about ½ inch thick.
- Bake for 12–15 minutes, until the cookies are set and lightly golden around the edges. The centers may still look slightly soft.
- Let the cookies cool on the baking sheet for 5 minutes, then transfer them to a wire rack to cool completely.