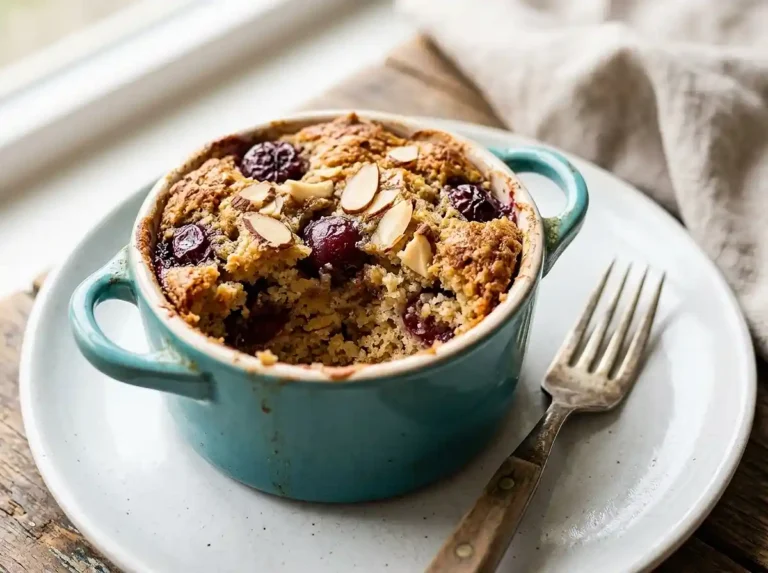
Chickpea Cookie Dough Energy Bites
Make these gluten-free chickpea cookie dough energy bites with pantry staples. No baking needed — just blend, roll, and chill. Ingredients, tips, and storage included.
My youngest used to ask for cookie dough every single afternoon after school, and for a while I’d just say no. Then I started making these gluten-free chickpea cookie dough energy bites, and that battle disappeared overnight. They taste like the real thing — dense, sweet, and loaded with chocolate chips — without any raw eggs or refined flour.
Chickpeas are the backbone here, and before you click away, hear me out. Blended smooth with peanut butter, maple syrup, and vanilla, they create a base that’s rich and almost fudge-like — as dense and satisfying as a proper cookie dough truffle.
Table of Contents
Why You’ll Love These Chickpea Cookie Dough Energy Bites
- Texture that actually satisfies: The combination of oat flour and rolled oats gives each bite a slightly chewy interior with enough structure to hold its shape without crumbling.
- Genuinely beginner-friendly: No baking, no candy thermometer, no special techniques. A food processor and a bowl are all you need.
- Naturally gluten-free and vegan: Every ingredient is plant-based. Use certified gluten-free oats and chocolate chips and these are safe for celiac households too.
- Make-ahead and meal-prep ready: A batch lasts all week in the fridge and up to three months in the freezer — perfect for busy mornings and after-school snacks.
The Secret to Perfect Gluten-Free Chickpea Cookie Dough Energy Bites
- Chill the dough before rolling: The mixture is sticky right out of the food processor. Thirty minutes in the fridge firms it up just enough to roll cleanly without the dough sticking to your palms and falling apart.
- Pat your chickpeas completely dry: Excess moisture from the can makes the dough too soft to hold its shape. After rinsing, spread them on a clean towel and blot firmly before adding them to the processor.
- Use both oat flour and rolled oats: Oat flour creates a smooth, cookie-dough-like consistency, while the rolled oats add subtle chew and body. Using only one or the other gives you a dough that’s either too dense or too loose.
- Blend the wet base until truly smooth: Any visible chickpea chunks in the finished dough mean you stopped too early. Keep blending, scrape the sides, and blend again — this step takes longer than you’d expect and makes a real difference in texture. The plant-based protein guidance from the Academy of Nutrition and Dietetics confirms that chickpeas are one of the most nutrient-dense legumes for snack applications.
Ingredients
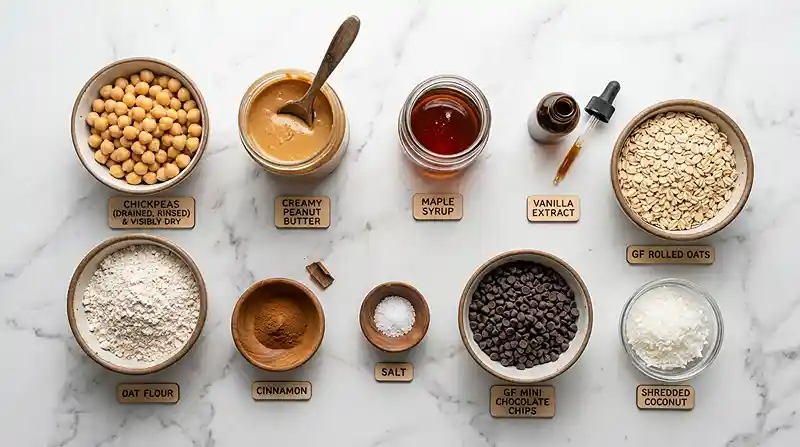
Wet Ingredients
- 1 cup canned chickpeas, drained, rinsed, and patted dry
- 1/2 cup creamy peanut butter or almond butter
- 1/3 cup pure maple syrup
- 1 tsp vanilla extract
Dry Ingredients
- 1 cup certified gluten-free oat flour
- 1/3 cup certified gluten-free rolled oats
- 1/2 tsp cinnamon
- 1/4 tsp salt
Mix-Ins
- 1/3 cup mini dark chocolate chips, certified gluten-free
- 2 tbsp unsweetened shredded coconut, optional
Note: For celiac households, check that your oat flour, rolled oats, and mini chocolate chips are all labeled certified gluten-free. Cross-contamination in oat processing is common. The certified oat labeling standards from Beyond Celiac are worth bookmarking if you’re new to navigating this.
Instructions
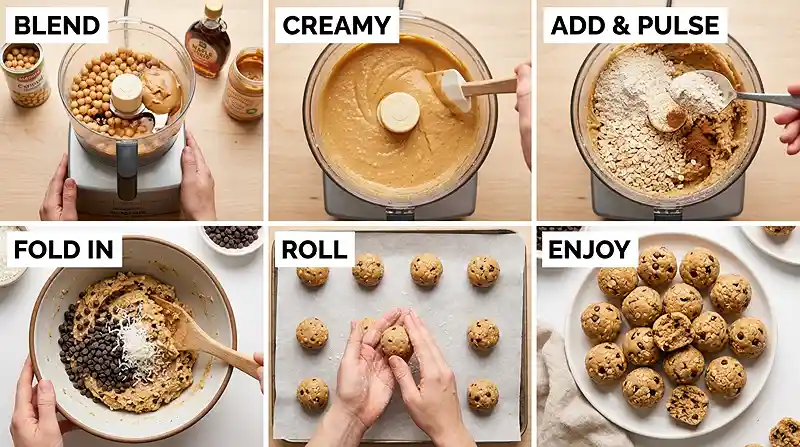
- Blend the wet base. Add the chickpeas, peanut butter, maple syrup, and vanilla to a food processor. Blend until smooth and creamy, scraping down the sides as needed. This usually takes 2-3 minutes — keep going until there are no visible chickpea pieces.
- Add the dry ingredients. Add the oat flour, rolled oats, cinnamon, and salt. Pulse until a thick, sticky dough forms. It should pull together into a cohesive mass and hold its shape when you press a small piece between your fingers.
- Fold in the mix-ins. Transfer the mixture to a bowl and fold in the mini chocolate chips and shredded coconut, if using. Folding by hand keeps the chips intact and evenly distributed.
- Chill the dough. Cover the bowl and refrigerate for 20-30 minutes. This step is not optional — it firms the dough enough to roll without it sticking to your hands or losing its shape.
- Roll the bites. Scoop about 1 tablespoon of the mixture and roll firmly between your palms to form a smooth ball. If the dough sticks, dampen your palms very lightly with water. Pro Tip: A cookie scoop makes the portions consistent and speeds up this step considerably.
- Finish rolling. Repeat with the remaining mixture to make 16-18 energy bites. Place them on a parchment-lined plate or tray as you go.
- Chill before serving. Refrigerate the finished bites for at least 30 minutes before serving. This second chill sets their shape and improves the texture — they firm up noticeably and become easier to handle.
Make It Your Own
Well… the peanut butter is doing real structural work in this recipe, so if you swap it, choose a nut or seed butter that’s similarly thick and creamy. Almond butter creates a slightly milder, more neutral flavor. Sunflower seed butter works for nut-free households — just expect a faint color change from a natural chemical reaction with the oat flour. It’s harmless and doesn’t affect the taste.
The shredded coconut is listed as optional, but it adds a subtle chew and a faint tropical note that pairs well with dark chocolate. If you’re not a coconut fan, swap it for an extra tablespoon of mini chocolate chips or finely chopped walnuts for a little crunch.
For a richer chocolate version, these gluten-free energy bites work beautifully with a drizzle of melted dark chocolate over the finished balls. Let them set in the fridge for 15 minutes after drizzling and they look impressive enough to serve as a party dessert.
If you want to boost the protein content further, stir in a tablespoon of hemp seeds or ground flaxseed with the dry ingredients. These add nutrition without changing the flavor or texture in any noticeable way, making this an even more filling after-workout snack.
Common Problems and Solutions
Problem: The dough is too sticky to roll even after chilling. Chill it longer — an additional 15-20 minutes usually solves this. If it’s still unworkable, add one extra tablespoon of oat flour, stir it in, and chill again for 10 minutes. Overly runny nut butter is the most common culprit, so use a natural peanut butter that’s been stirred well and is not separated.
Problem: The bites crumble when rolled. The dough is too dry. Add one teaspoon of maple syrup, mix it in thoroughly, and try rolling again. This usually happens when the chickpeas weren’t blended long enough and the dough didn’t fully emulsify into a cohesive base.
Man, oh man… I once skipped the first chill step entirely because I was in a hurry, and I ended up with flat, misshapen blobs that stuck to everything. The 30-minute rest in the fridge feels like an inconvenience when you’re hungry, but it genuinely transforms the dough from a sticky mess into something you can actually shape.
Problem: The bites taste bland or have a faint beany flavor. Add a pinch more salt and an extra splash of vanilla extract. Salt is the single most effective flavor amplifier in no-bake recipes like this one — don’t skip it or reduce it. A faint beany taste usually means the chickpeas needed longer blending time to fully break down and integrate with the nut butter.
Storage and Meal Prep
| Method | Duration | Notes |
|---|---|---|
| Counter | 2-3 days | Airtight container; best in cooler kitchens |
| Fridge | 5-7 days | Airtight container; texture improves after day one |
| Freezer | 2-3 months | Freeze on a tray first, then transfer to a zip bag |
These bites don’t need reheating — they’re best eaten cold or at room temperature. Pull them from the freezer and let them sit for 5-10 minutes before eating; they thaw quickly and the texture stays firm and satisfying.
For no-waste prep, make a double batch on Sunday and stash half in the freezer. You’ll have a ready snack all week without any additional effort — a practical move that makes the food processor cleanup worth it.
Your Questions Answered
Can I make gluten-free chickpea energy bites without a food processor?
A high-powered blender is the best alternative. Blend in short bursts and scrape the sides frequently. A fork or potato masher won’t get the chickpeas smooth enough — you’ll end up with a lumpy dough that doesn’t hold together when rolled. Add an extra tablespoon of nut butter if your blender struggles to move.
How long do chickpea cookie dough energy bites last in the fridge?
They keep well for 5-7 days in an airtight container in the refrigerator. Layer them between sheets of parchment paper to prevent sticking. For longer storage, freeze them for up to 2-3 months and thaw at room temperature for 5-10 minutes before eating.
Can I use honey instead of maple syrup in this recipe?
Yes, honey works as a 1:1 swap and creates a slightly stickier, denser bite. Agave syrup also works and keeps the recipe vegan. Avoid granulated sweeteners like coconut sugar — they won’t dissolve into the dough and will create a gritty texture.
Why are my energy bites falling apart when I roll them?
The dough is likely too dry, or the chickpeas weren’t blended long enough to fully emulsify. Add one teaspoon of maple syrup, mix thoroughly, and try rolling again. Make sure the wet base is completely smooth before adding the dry ingredients — visible chickpea pieces mean the dough hasn’t come together properly yet.
Are these energy bites safe for celiac disease?
They can be, as long as you use certified gluten-free oat flour, certified gluten-free rolled oats, and certified gluten-free chocolate chips. Cross-contamination in oat processing is common, so the certification label matters. Always check every package individually rather than assuming a product is safe based on the ingredient alone.
Serving Suggestions
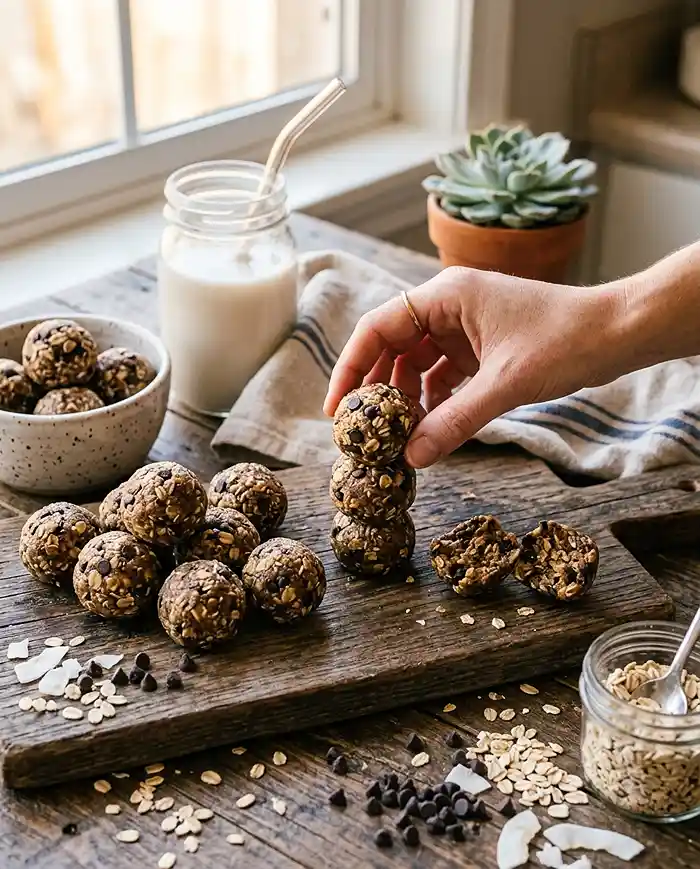
These bites are a natural fit alongside a cup of coffee or a glass of almond milk — the chocolate and nut butter flavors balance a good dark roast beautifully. They’re also a crowd-pleasing addition to a holiday cookie exchange at Christmas or Thanksgiving; set them out on a platter and they disappear before anyone asks what’s in them.
For a fuller snack spread, pair them with these gluten-free banana chickpea cookies — the banana flavor plays well against the peanut butter and chocolate in these bites.
If you want to explore more ways to use chickpeas in gluten-free baking, the 4-ingredient chickpea cookie recipe is a great starting point, and these gluten-free vegan chickpea cookies round out a full chickpea dessert lineup perfectly.
If you make these, drop a comment below and let me know how they turned out — I especially love hearing about creative mix-ins people try. Save this recipe to Pinterest so it’s easy to find the next time a snack craving hits.

Gluten-Free Chickpea Cookie Dough Energy Bites — Simple No-Bake Recipe
Equipment
- Food processor
- Mixing bowl
- Spatula
- Measuring cups and spoons
- Parchment paper
- Plate or tray
- Cookie scoop
Ingredients
Wet Ingredients
- 1 cup Canned chickpeas drained, rinsed, and patted dry
- ½ cup Creamy peanut butter or almond butter
- ⅓ cup Pure maple syrup
- 1 tsp Vanilla extract
Dry Ingredients
- 1 cup Certified gluten-free oat flour
- ⅓ cup Certified gluten-free rolled oats
- ½ tsp Cinnamon
- ¼ tsp Salt
Mix-Ins
- ⅓ cup Mini dark chocolate chips certified gluten-free
- 2 tbsp Unsweetened shredded coconut optional
Instructions
- Add the chickpeas, peanut butter or almond butter, maple syrup, and vanilla to a food processor. Blend until completely smooth and creamy, scraping down the sides as needed, about 2–3 minutes.
- Add the oat flour, rolled oats, cinnamon, and salt. Pulse until a thick, sticky dough forms and holds together when pressed.
- Transfer the mixture to a bowl and fold in the mini chocolate chips and shredded coconut, if using.
- Cover the bowl and refrigerate for 20–30 minutes to firm the dough.
- Scoop about 1 tablespoon of the mixture and roll firmly between your palms to form a smooth ball. Lightly dampen your palms if the dough sticks.
- Repeat with the remaining mixture to make 16–18 energy bites. Place them on a parchment-lined plate or tray.
- Refrigerate the finished bites for at least 30 minutes before serving so they firm up and hold their shape.