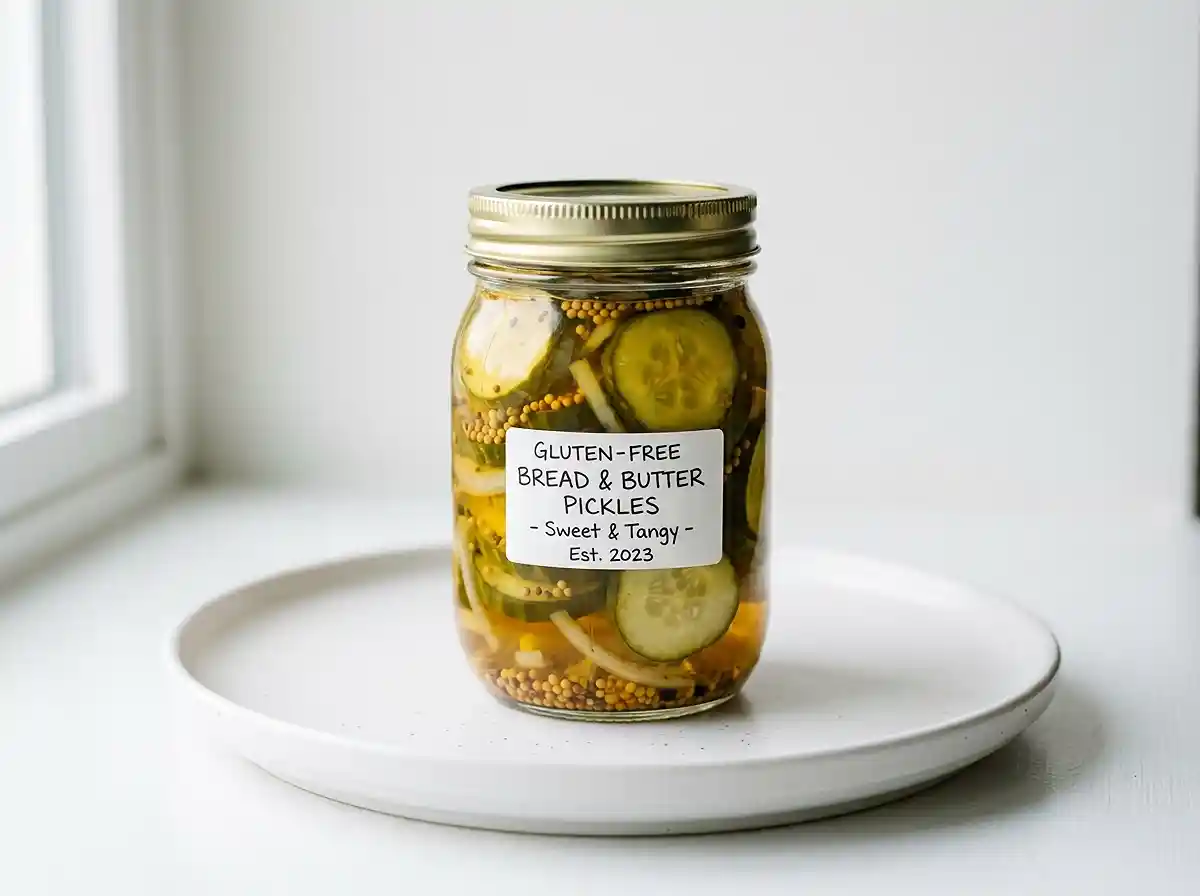
Gluten-Free Bread and Butter Pickle Recipe for Canning
Make gluten-free bread and butter pickles for canning with step-by-step instructions, a simple brine, and tips for a perfect seal every time.
My grandmother canned bread and butter pickles every August without fail. She never measured a thing — just eyeballed the sugar and vinegar and somehow produced jar after jar of sweet, tangy pickles that disappeared before Thanksgiving.
When I started making my own gluten-free bread and butter pickle recipe for canning, I wanted that same result but with exact measurements I could actually repeat. It took a few batches to get the brine balance right, but this recipe is now my go-to every summer cucumber season.
Well… if you’ve ever opened a store-bought jar and squinted at the ingredients label wondering whether it’s actually gluten-free, you’ll understand exactly why making your own is worth every minute of prep time.
Table of Contents
Why You’ll Love This Bread and Butter Pickle Recipe
- Certified gluten-free from the start: Every ingredient in this recipe is naturally gluten-free — no hidden malt vinegar, no ambiguous seasonings, no label anxiety.
- Shelf-stable for up to a year: Properly processed jars store beautifully in a cool pantry, making this a genuinely useful make-ahead project.
- Classic sweet-tangy brine: The combination of apple cider vinegar, sugar, mustard seeds, and turmeric hits that familiar bread-and-butter flavor profile — sweet up front with a gentle spice finish.
- Beginner canning friendly: This is a water bath canning recipe, the most accessible form of home canning — no pressure canner required.
The Secret to Perfect Gluten-Free Bread and Butter Pickles for Canning
Getting crisp, well-seasoned pickles that actually seal and store safely comes down to a handful of techniques that experienced canners know well.
- Use pickling cucumbers, not slicing cucumbers: Pickling varieties like Kirby have thinner skins, fewer seeds, and a firmer flesh that stays crisp through the brining and canning process. Regular slicing cucumbers go soft quickly and won’t hold up.
- The salt-and-ice soak is non-negotiable: Salting the cucumbers and onions draws out excess moisture and firms the cell walls before any heat is applied. Skipping this step is the number one reason home-canned pickles turn out limp. The USDA Complete Guide to Home Canning, available through the National Center for Home Food Preservation’s canning resource library, recommends this exact technique for crisp pickle texture.
- Use apple cider vinegar at 5% acidity: Acidity is what makes this recipe safe for water bath canning. Never dilute the vinegar or substitute a lower-acidity variety — maintaining the correct pH is what prevents bacterial growth in sealed jars.
- Pack hot into hot jars: Thermal shock from adding hot brine to cold jars can crack the glass or compromise the seal. Keep your sterilized jars warm in the canner until the moment you’re ready to fill them.
Ingredients
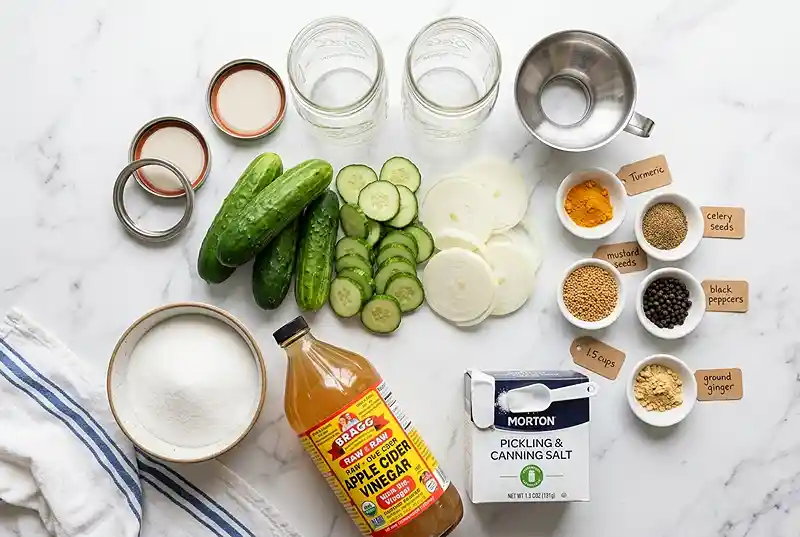
This recipe makes approximately 6 pint jars. Do not alter ingredient quantities, especially the vinegar — changes affect both flavor and food safety.
| Category | Ingredient | Amount | Notes |
|---|---|---|---|
| Produce | Pickling cucumbers, sliced into ¼-inch rounds | 4 lbs (1.8 kg) | Kirby or similar variety; firm and fresh |
| Produce | Medium onions, thinly sliced | 2 | Yellow or white onions work well |
| Curing | Pickling salt | ¼ cup | Do not substitute table salt or kosher salt |
| Brine | Apple cider vinegar (5% acidity) | 4 cups | Must be 5% acidity for safe canning |
| Brine | Granulated sugar | 2 cups | Standard white sugar |
| Spices | Mustard seeds | 2 tbsp | Yellow mustard seeds are traditional |
| Spices | Celery seeds | 2 tsp | Adds earthy depth to the brine |
| Spices | Ground turmeric | 1 tsp | Responsible for the golden color |
| Spices | Whole black peppercorns | 1 tsp | Adds subtle heat and complexity |
| Optional | Ground ginger | ½ tsp | Adds gentle warmth — highly recommended |
Instructions
Prep the Cucumbers
- Wash and slice the cucumbers. Wash the 4 lbs of pickling cucumbers thoroughly under cold running water, scrubbing off any dirt or debris. Slice them into ¼-inch rounds and thinly slice the 2 medium onions. Uniform slices ensure even brining and an attractive finished jar.
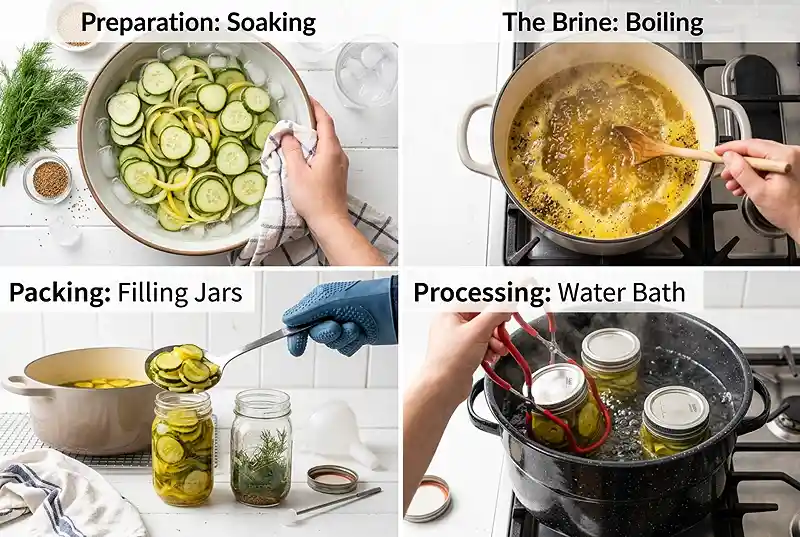
- Salt and soak. In a large non-reactive bowl, combine the cucumber slices, onions, and ¼ cup pickling salt. Cover with ice water and let stand for 2 hours. This draws out excess moisture and firms the cucumbers — the ice keeps everything cold while the salt does its work.
- Rinse and drain well. Drain the cucumbers and onions completely, then rinse under cold water to remove the salt. Drain again thoroughly — excess moisture dilutes the brine and can affect both flavor and jar seal. A clean kitchen towel or paper towels help remove extra water.
Prepare the Canner and Brine
- Set up your canning equipment. Prepare a boiling water canner and sterilize the canning jars and lids according to current safe canning guidelines. Keep the jars warm in the canner until you’re ready to fill — cold jars are a common cause of cracked glass and failed seals.
- Make the brine. In a large non-reactive pot (stainless steel or enameled), combine the 4 cups apple cider vinegar, 2 cups granulated sugar, 2 tbsp mustard seeds, 2 tsp celery seeds, 1 tsp ground turmeric, 1 tsp whole black peppercorns, and ½ tsp ground ginger if using. Bring to a boil over medium-high heat, stirring until the sugar fully dissolves. The brine will turn a rich golden yellow from the turmeric — this is exactly what you want.
Cook and Pack the Pickles
- Add the cucumbers and onions. Add the drained cucumbers and onions to the hot brine. Return to a gentle boil and cook for 5 minutes, stirring occasionally. Don’t let them boil aggressively — a hard boil breaks down the cucumbers too quickly and softens the final texture.
- Pack the jars. Using a slotted spoon, pack the hot pickles tightly into hot sterilized jars, leaving ½ inch headspace at the top. Tight packing prevents floating vegetables and helps ensure even brine distribution throughout the jar.
- Ladle in the brine. Ladle the hot brine over the packed pickles, maintaining ½ inch headspace. Run a thin spatula or bubble remover around the inside edges to release any trapped air bubbles. Wipe the jar rims clean with a damp cloth — any residue on the rim prevents a proper seal.
Process and Store
- Apply lids and bands. Apply the lids and screw bands until fingertip tight — snug but not cranked down hard. Over-tightening prevents the air from venting properly during processing, which can compromise the seal.
- Process in a boiling water bath for 10 minutes. Adjust processing time for altitude if you live above 1,000 feet — consult the Ball canning altitude adjustment guide for specific timing at higher elevations. Start the timer only when the water returns to a full boil.
- Remove and cool. Carefully remove the jars and set them on a towel-covered counter, at least 1 inch apart. Let them cool completely undisturbed for 12–24 hours. You’ll hear the satisfying pop of lids sealing as the jars cool — one of the best sounds in home canning.
- Check the seals. Press the center of each lid — a properly sealed jar won’t flex or pop back. Check that each jar has sealed before storing. Refrigerate any unsealed jars and use within a few weeks.
Make It Your Own
You know… one of the things I love most about this canned bread and butter pickles recipe is how forgiving it is once you understand the brine ratios. The sweet-to-sour balance is what defines the style — and there’s real room to personalize within that framework.
For a spicier version, add ½ tsp red pepper flakes to the brine along with the other spices. The heat mellows through the canning process and gives each jar a gentle kick that builds on the back end. This version pairs especially well with sharp cheddar and charcuterie boards.
If you prefer a less sweet pickle — closer to a classic bread and butter pickle recipe without the syrupy sweetness some people dislike — reduce the sugar by ¼ to ½ cup. Go lower than that and you’ll start to lose the characteristic bread-and-butter flavor profile, since the sweetness is what separates these from dill pickles.
For granny’s bread and butter pickles recipe vibes, swap the apple cider vinegar for white distilled vinegar. The flavor is cleaner and sharper with less of the mellow fruitiness that cider vinegar brings. Many older family recipes use white vinegar — both versions are safe for water bath canning at 5% acidity.
Common Problems & Solutions
Problem: The pickles turned out soft and limp rather than crisp.
The most likely cause is skipping or shortening the salt-and-ice soak step. Two full hours in salted ice water firms the cucumber cell walls before heat is applied. If you’ve already processed the jars, the texture won’t improve — but your next batch will be significantly crisper with the full soak time.
Problem: One or more jars didn’t seal after cooling.
A failed seal usually means residue was left on the jar rim, or the bands were over-tightened. Refrigerate any unsealed jars immediately and use within a few weeks — the pickles are still safe to eat, just not shelf-stable. For the next batch, wipe rims carefully and aim for fingertip-tight only on the bands.
Man, oh man… cloudy brine in a freshly opened jar is one of the most alarming things to see after all that work. In most cases with this recipe, slight cloudiness comes from the turmeric or natural starches — not spoilage. However, if the cloudiness is accompanied by an off smell, bubbling, or a spurting lid, discard the jar without tasting.
Problem: The brine level dropped significantly inside the jar after processing.
This happens when air bubbles weren’t fully removed before processing or when jars were over-filled past the ½ inch headspace. As long as the lid sealed, the jar is safe to store — but the exposed pickles at the top may discolor over time. Use those jars first and aim to remove bubbles more thoroughly in your next batch.
Storage & Meal Prep
| Method | Duration | Notes |
|---|---|---|
| Pantry (sealed jars) | Up to 12 months | Cool, dark location away from direct sunlight |
| Fridge (opened jar) | 3–4 weeks | Keep submerged in brine for best texture |
| Fridge (unsealed jar) | 2–3 weeks | Treat as refrigerator pickles — use promptly |
Once opened, always keep the pickles submerged in their brine — exposed slices dry out and lose their flavor quickly. If brine runs low after a few servings, the jar is still safe but best finished soon.
For a no-waste tip: the leftover brine after the pickles are gone is genuinely useful. Use it to quick-pickle thinly sliced radishes or red onions in the fridge overnight, or add a splash to potato salad dressing for a bright, tangy depth that’s hard to pinpoint but impossible to miss.
FAQs About Gluten-Free Bread and Butter Pickle Recipe for Canning
Are bread and butter pickles gluten-free?
Homemade bread and butter pickles made with apple cider vinegar and whole spices are naturally gluten-free. The name refers to their traditional use in sandwiches, not any wheat or bread ingredient. Store-bought versions may use malt vinegar or shared equipment, so making your own is the safest option for celiac or gluten-sensitive households.
What is the brine for bread and butter pickles?
The brine is a cooked mixture of apple cider vinegar, sugar, mustard seeds, celery seeds, turmeric, and black peppercorns. This recipe uses 4 cups of vinegar to 2 cups of sugar for a sweet-forward pickle with good acidity. Turmeric gives the classic golden color, while mustard and celery seeds add spiced depth.
Can I reduce the sugar in this bread and butter pickle recipe?
You can reduce the sugar by up to half a cup without significantly affecting food safety or texture. Going much lower changes the flavor profile enough that the pickles lose their characteristic sweetness. Start by reducing to 1 and three-quarter cups and taste before adjusting further.
What is the best cucumber variety for canning bread and butter pickles?
Pickling cucumbers, especially Kirby varieties, give the crispest results for canned pickles. They have thinner skins, firmer flesh, and smaller seed cavities than slicing cucumbers. Garden-fresh cucumbers processed within 24 hours of harvest produce noticeably crisper pickles than store-bought ones.
Why did my jar of bread and butter pickles not seal after processing?
A failed seal usually means residue was left on the jar rim, or the bands were tightened too much before processing. Refrigerate any unsealed jars immediately and use within a few weeks. For future batches, wipe rims thoroughly and aim for fingertip-tight only on the screw bands.
Serving Suggestions
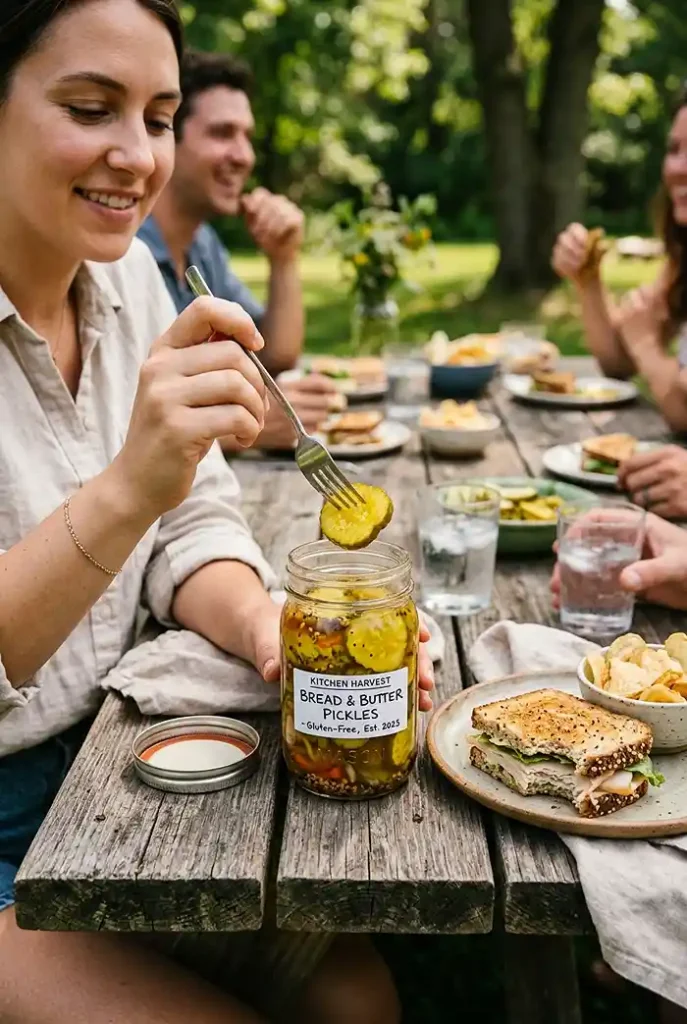
These pickles shine alongside pulled pork sliders, grilled burgers, or tucked into a classic chicken sandwich. The sweet-and-tangy brine cuts through rich, fatty proteins beautifully — like a palate reset between bites.
A jar of these makes a thoughtful, personal gift for the food lovers in your life — and they’re always a hit on the Thanksgiving table alongside a charcuterie spread. Set out a bowl next to a platter from my gluten-free chicken parmesan skillet for an easy family dinner that covers every dietary need at the table.
For a full gluten-free spread, pair with my lemon berry frozen cheesecake squares for a no-fuss dessert, or round out a casual brunch with slices from my 3-ingredient banana bread without flour or oats — naturally sweet, grain-free, and always a crowd-pleaser.
Give this recipe a try and let me know how your jars turned out in the comments below — I’d especially love to hear if you added any spice variations. And if you share it on Pinterest, tag me so I can see those beautiful golden jars on your counter.
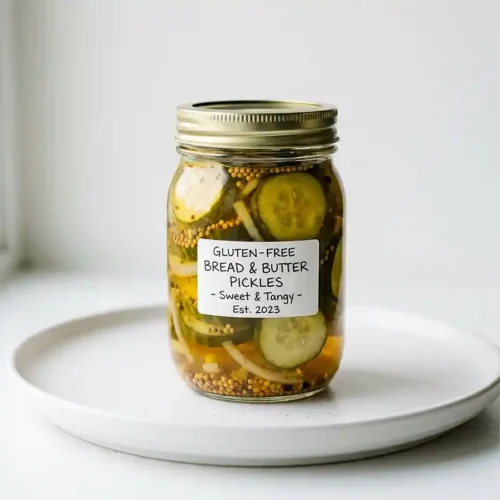
Gluten-Free Bread and Butter Pickle Recipe for Canning
Equipment
- Boiling water canner
- 6 pint canning jars with lids and bands
- Large non-reactive bowl
- Large non-reactive pot
- Slotted spoon
- Ladle
- Bubble remover or thin spatula
- Kitchen towel
Ingredients
Produce
- 4 lbs Pickling cucumbers Sliced into 1/4-inch rounds; Kirby or similar variety
- 2 Medium onions Thinly sliced
Curing
- ¼ cup Pickling salt Do not substitute
Brine
- 4 cups Apple cider vinegar 5% acidity
- 2 cups Granulated sugar
Spices
- 2 tbsp Mustard seeds Yellow mustard seeds
- 2 tsp Celery seeds
- 1 tsp Ground turmeric
- 1 tsp Whole black peppercorns
Optional
- ½ tsp Ground ginger Optional
Instructions
- Wash the cucumbers thoroughly, slice them into 1/4-inch rounds, and thinly slice the onions.
- Combine the cucumber slices, onions, and pickling salt in a large non-reactive bowl. Cover with ice water and let soak for 2 hours.
- Drain and rinse the cucumbers and onions well, then drain thoroughly to remove excess moisture.
- Prepare a boiling water canner and sterilize the jars and lids. Keep the jars warm until ready to fill.
- Combine the apple cider vinegar, sugar, mustard seeds, celery seeds, turmeric, black peppercorns, and optional ground ginger in a large non-reactive pot. Bring to a boil, stirring until the sugar dissolves.
- Add the drained cucumbers and onions to the hot brine. Return to a gentle boil and cook for 5 minutes.
- Pack the hot pickles into hot sterilized pint jars, leaving 1/2 inch headspace.
- Ladle the hot brine over the pickles, maintain 1/2 inch headspace, remove air bubbles, and wipe the jar rims clean.
- Apply lids and screw bands until fingertip tight.
- Process the jars in a boiling water bath for 10 minutes, adjusting for altitude if necessary.
- Remove the jars and cool undisturbed for 12 to 24 hours.
- Check the seals before storing. Refrigerate any unsealed jars and use within a few weeks.