4 Ingredient Chickpea Cookies
The first batch of gluten-free 4 ingredient chickpea cookies I ever made came from a moment of pure desperation. I had a can of chickpeas, half a jar of peanut butter, and a houseful of kids who needed an after-school snack right now—so I blended, scooped, and hoped for the best.
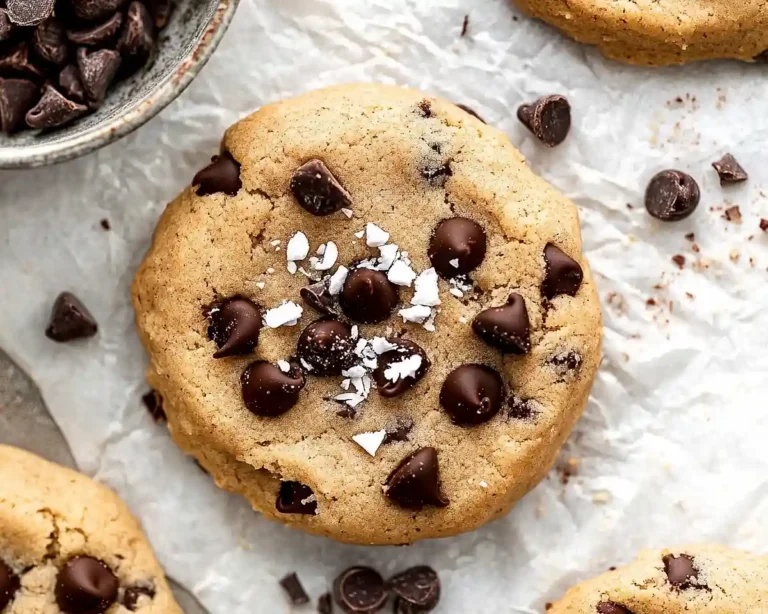
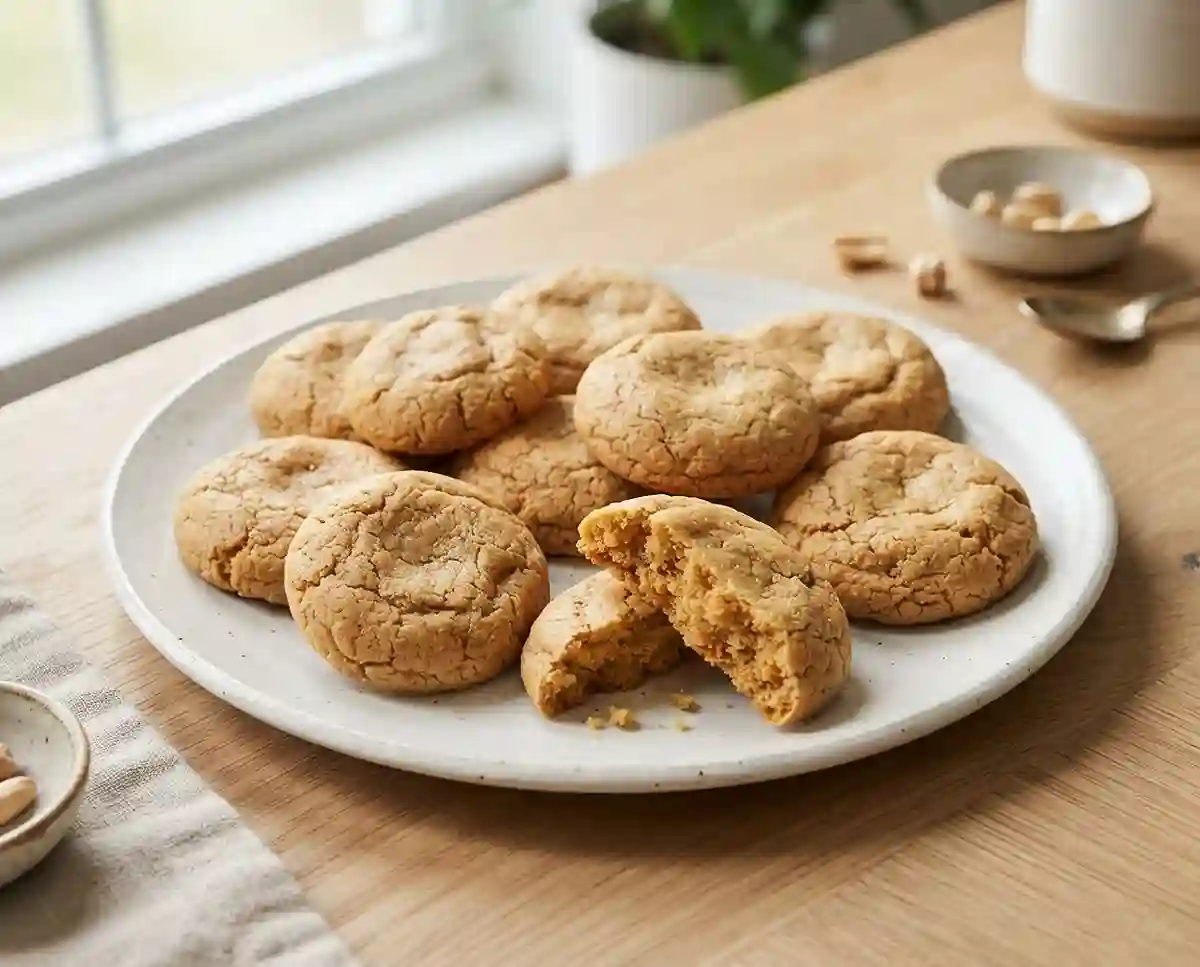
What came out of that oven stopped me cold. The cookies were soft in the center with just enough golden color around the edges, and not one kid asked what was in them. That’s the magic of this recipe: the chickpeas completely disappear into the background, doing all the structural heavy lifting without a single trace of bean flavor.
Why would you choose cookies with chickpeas over a classic flour-based dough? Because a single cup of cooked chickpeas delivers around 14 grams of protein and over 12 grams of fiber, according to Healthline’s evidence-based chickpea nutrition guide—and that nutrition is baked right into every bite.
Why You’ll Love These Gluten-Free 4 Ingredient Chickpea Cookies
- Texture that wins every time: These cookies bake up soft and dense in the center with a lightly set edge—somewhere between a fudgy brownie and a classic chewy cookie.
- Four ingredients, real food: Chickpeas, nut butter, maple syrup, vanilla. That’s the whole list. No flour blends, no xanthan gum, no mystery stabilizers.
- Naturally gluten-free and easily vegan: There are no eggs or dairy in the base recipe, so this works for almost every dietary table.
- Ready in under 25 minutes: From blender to oven to cooling rack, this is a weeknight-friendly recipe that still feels like a treat.
The Secret to Perfect Gluten-Free 4 Ingredient Chickpea Cookies
- Dry your chickpeas thoroughly. This is the single most important step. Wet chickpeas add excess moisture to the dough, which leads to cookies that never fully set and stay gummy inside. Drain, rinse, then spread them on a clean kitchen towel and pat hard—you want them dry enough that no steam rises when you press them.
- Blend until completely smooth. Chickpea cookies fail most often because the dough is under-processed. Scrape down the sides of the food processor at least twice and keep blending until you can’t detect any grain or grittiness. The dough should feel like thick, smooth nut butter.
- Flatten before baking—the dough won’t spread. Unlike wheat-flour cookies, there’s no gluten network here to create spread during baking. What goes onto the sheet is what comes out, so shape them to your preferred thickness before they go in the oven.
- Let them cool fully before moving them. Fresh from the oven, these cookies are fragile. The structure firms up as they cool—give them the full 5 minutes on the pan, then another 10 on the rack, and they’ll hold together beautifully.
Table of Contents
4 Ingredient Chickpea Cookies FAQs Ingredients
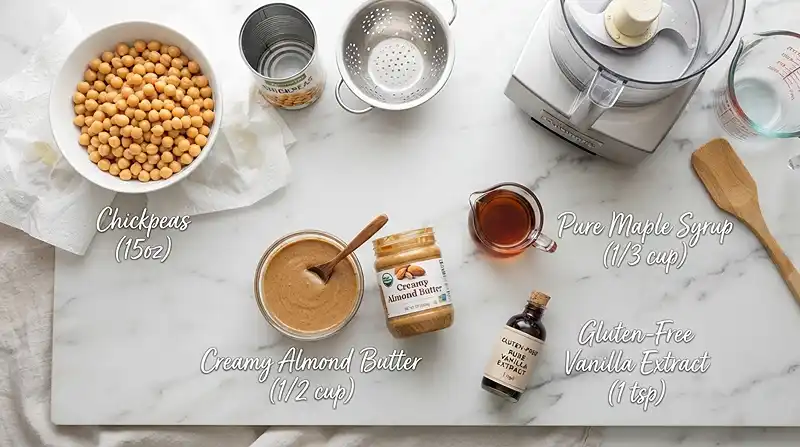
Here’s everything you need to make 12 cookies. The beauty is in the simplicity—no specialty flour, no binding agents, just four real ingredients.
The Dough
- 1 (15-ounce) can chickpeas, drained, rinsed, and thoroughly patted dry
- ½ cup creamy peanut butter or almond butter
- ⅓ cup pure maple syrup
- 1 teaspoon gluten-free vanilla extract
Ingredient note: Use creamy nut butter, not natural nut butter with separated oil on top—the emulsified kind gives you a dough with a more even consistency. Make sure your vanilla extract is labeled gluten-free, as some conventional extracts are processed on shared equipment.
Instructions
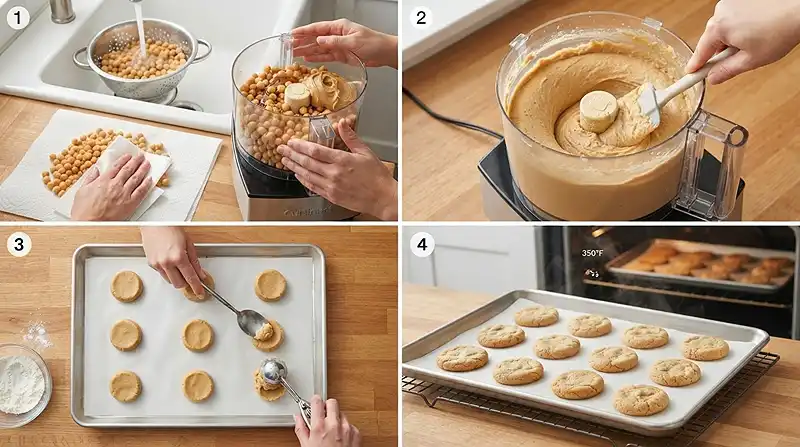
Preheat and prep. Preheat the oven to 350°F (175°C) and line a baking sheet with parchment paper. Getting the pan ready now means you can move quickly once the dough is blended.
Blend until smooth. Add the chickpeas, peanut butter, maple syrup, and vanilla to a food processor. Blend until completely smooth, scraping down the sides as needed. Keep going until there is zero graininess—the dough should look glossy and move like very thick hummus.
Pro Tip: If the dough feels too stiff to blend smoothly, add one teaspoon of water at a time, up to two teaspoons maximum.
Scoop and flatten. Scoop the dough into 12 portions onto the prepared baking sheet. Flatten each portion gently with the back of a spoon or your fingers, since the cookies will not spread much during baking. Aim for about ½-inch thickness.
Pro Tip: A standard cookie scoop makes even portions that bake uniformly. Wet your fingers lightly before flattening to prevent sticking.
Bake until set. Bake for 12–15 minutes, until the cookies are set and lightly golden around the edges. They should feel firm when you gently press the center—not wet or soft.
Cool before transferring. Let the cookies cool on the baking sheet for 5 minutes, then transfer them to a wire rack to cool completely. Resist moving them too early—this is when the structure locks in.
Make It Your Own
Well… one of my favorite things about this recipe is how much personality you can give it with almost no effort. The base dough is essentially a blank canvas that takes add-ins beautifully.
Swap the nut butter. Peanut butter gives a classic, slightly savory-sweet flavor that most people love. Almond butter is milder and pairs beautifully with vanilla. Sunflower seed butter is the best nut-free option for allergy households—it works identically in terms of fat content and texture, though it can turn the cookies slightly green after baking due to a natural reaction with baking soda (if you add it). That’s harmless but worth knowing in advance. For simple gluten-free chickpea cookies from scratch, creamy tahini is another interesting choice that lends a more complex, nutty flavor.
Add mix-ins. The dough takes add-ins well—fold in ¼ cup of mini chocolate chips, chopped walnuts, dried cranberries, or shredded coconut after blending. Chocolate chips in particular make these feel genuinely indulgent while keeping the ingredient list short.
Adjust the sweetness. The ⅓ cup of maple syrup gives a mild sweetness. If you prefer a less sweet cookie, pull back to ¼ cup and compensate with a tiny pinch of salt to sharpen the flavor. Honey works as a direct swap for maple syrup, though it changes the flavor profile toward something more floral and warm.
Make them soft and chewy gluten-free chickpea cookies every time. For an extra-chewy texture, slightly underbake them—pull them at the 12-minute mark even if the edges haven’t fully colored. They’ll firm up as they cool, and that center stays almost fudgy.
Common Problems & Solutions
Man, oh man… chickpea-based doughs have a few quirks that can catch you off guard if it’s your first time. Here’s what to watch for and exactly how to fix it.
Problem: The cookies are gummy inside even after cooling. This almost always traces back to wet chickpeas. Even a small amount of excess moisture is enough to prevent the cookies from setting properly. Next time, after rinsing, spread the chickpeas on a clean towel and really press them dry—then let them sit uncovered for 5 minutes before blending. You can also pop the drained chickpeas in a 300°F oven for 8 minutes to drive off moisture before blending.
Problem: The dough is too thick to blend smoothly. Add cold water one teaspoon at a time, blending after each addition. Stop as soon as the dough moves freely. Too much liquid will send you back to the gummy texture problem above, so go slowly here and err on the side of less.
Problem: The cookies crumble when I pick them up. They haven’t cooled long enough. Chickpea cookies have almost no structural gluten to hold them together while hot. The binding comes from the proteins in the chickpeas and nut butter firming as they cool—give them the full time on the baking sheet before attempting to move them.
Problem: I can taste the beans. Your blend wasn’t long enough, or the dough wasn’t fully smooth before baking. The bean flavor also comes through more strongly when the cookies are still warm. Let them cool completely—the flavor mellows significantly at room temperature, and the sweetness from the maple syrup comes forward more clearly once the heat is gone.
Storage & Meal Prep
| Method | Duration | Notes |
|---|---|---|
| Counter | 2–3 days | Airtight container; keep away from heat and humidity |
| Fridge | 5–7 days | Bring to room temperature before eating for best texture |
| Freezer | Up to 2 months | Wrap individually in plastic wrap, then store in a zip bag |
These cookies are excellent make-ahead snacks. Bake a full batch on Sunday, refrigerate them, and they’re ready to grab all week long. Cold cookies from the fridge are actually firmer and hold together even better than room-temperature ones, which makes them great for lunchboxes.
To reheat from frozen, let a cookie thaw at room temperature for 20 minutes or microwave it for 15–20 seconds. It comes back to soft and warm quickly. Leftover dough—if you have any—can also be refrigerated for up to 2 days before baking.
4 Ingredient Chickpea Cookies FAQs
Can I make these without a food processor?
A high-powered blender works, though you may need to stop and scrape down the sides more frequently. A standard blender struggles with this dough because it is very thick—if the blades start to spin freely without catching the dough, add one teaspoon of water at a time to help it move. A potato masher and strong elbow grease can work in a pinch, but the texture will be slightly grainier and the cookies will have a more rustic, less uniform bite.
How do I know when the cookies are done?
The cookies are done when the edges look lightly golden and the centers feel firm—not wet or soft—when you press them gently with one finger. At 12 minutes they will be soft and chewy; at 15 minutes they will be a little more set with slightly crisper edges. Both are correct, just different texture preferences. They will continue to firm up as they cool, so do not judge doneness entirely by how they feel straight from the oven.
What’s the best nut butter to use in this recipe?
Creamy, emulsified peanut butter gives the most consistent results and the most familiar flavor. Almond butter is a close second and produces a slightly lighter, more neutral-tasting cookie. Avoid natural nut butters where the oil has separated, as the uneven fat distribution can make the dough inconsistent. Sunflower seed butter is the go-to for nut-free households and works just as well texturally.
Why did my cookies turn green after baking?
If you used sunflower seed butter, the cookies may turn a greenish color inside—this is a natural and harmless chemical reaction between chlorogenic acid in sunflower seeds and baking soda or baking powder, if you added either. The color change does not affect flavor or safety at all. To prevent it, simply avoid adding any leavening agents when using sunflower seed butter.
Can I use dried chickpeas instead of canned?
Yes, cook them first until completely tender—dried chickpeas that are even slightly undercooked will leave a grainy, starchy texture in the dough that no amount of blending will fix. Cook a 15-ounce equivalent (about 1.5 cups of cooked chickpeas) and make sure they are fully cooled and thoroughly dried before adding them to the food processor.
Serving Suggestions
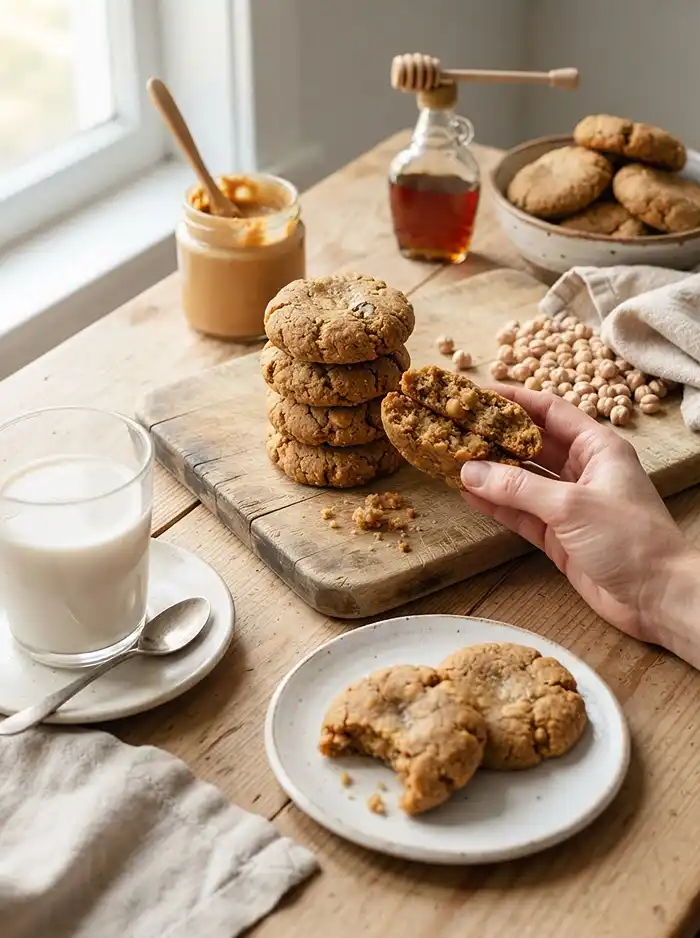
You know… these cookies are the kind of thing I put out at Thanksgiving for the kids to snack on while dinner finishes cooking, and they disappear before anyone even sits down. They hold up well at room temperature for a few hours, which makes them practical for parties and potlucks where you can’t control how long food sits out.
For a full snack spread, pair these with a warm mug of something cozy, or crumble one over a bowl of coconut yogurt with fresh berries for a genuinely satisfying breakfast. If you’re looking for more healthy gluten-free chickpea cookie recipes and simple no-fuss desserts, the gluten-free raspberry croissant ice cream sandwich on this site is a beautiful counterpart—one for everyday snacking, one for when you want to impress.
For a lighter meal before you reach for dessert, try pairing the week with this comforting gluten-free coconut curry soup—it’s just as simple and satisfying as these cookies. And if you want to show guests that gluten-free cooking can feel genuinely indulgent, follow dinner with this rich pappardelle burrata pasta before bringing these out for dessert.
The Cleveland Clinic’s overview of chickpea health benefits is worth a read if you want to understand exactly why this little legume is one of the most nutrient-dense foods you can build a snack around—it makes these cookies feel even better to eat.
If you try this recipe, please leave a star rating and let me know what mix-ins you added. I love hearing how people make these their own—drop a comment below, and if you’re saving recipes on Pinterest, this one earns its spot in a healthy snacks board.
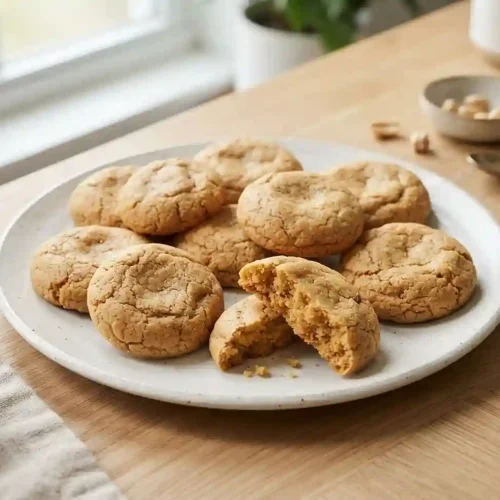
Gluten-Free 4 Ingredient Chickpea Cookies
Equipment
- Food processor
- Baking sheet
- Parchment paper
- Wire rack
- Cookie scoop
Ingredients
The Dough
- 1 15-ounce can Chickpeas Drained, rinsed, and thoroughly patted dry
- ½ cup Creamy peanut butter or almond butter Use creamy, emulsified nut butter rather than separated natural nut butter
- ⅓ cup Pure maple syrup
- 1 teaspoon Gluten-free vanilla extract Use vanilla extract labeled gluten-free
Instructions
- Preheat and prep. Preheat the oven to 350°F (175°C) and line a baking sheet with parchment paper.
- Blend until smooth. Add the chickpeas, peanut butter, maple syrup, and vanilla to a food processor. Blend until completely smooth, scraping down the sides as needed. Continue blending until there is no graininess and the dough looks glossy and moves like very thick hummus. If needed, add 1 teaspoon of water at a time, up to 2 teaspoons maximum.
- Scoop and flatten. Scoop the dough into 12 portions onto the prepared baking sheet. Flatten each portion gently with the back of a spoon or your fingers to about 1/2-inch thickness, since the cookies will not spread much during baking.
- Bake until set. Bake for 12–15 minutes, until the cookies are set and lightly golden around the edges. They should feel firm when gently pressed in the center.
- Cool before transferring. Let the cookies cool on the baking sheet for 5 minutes, then transfer them to a wire rack to cool completely before serving.