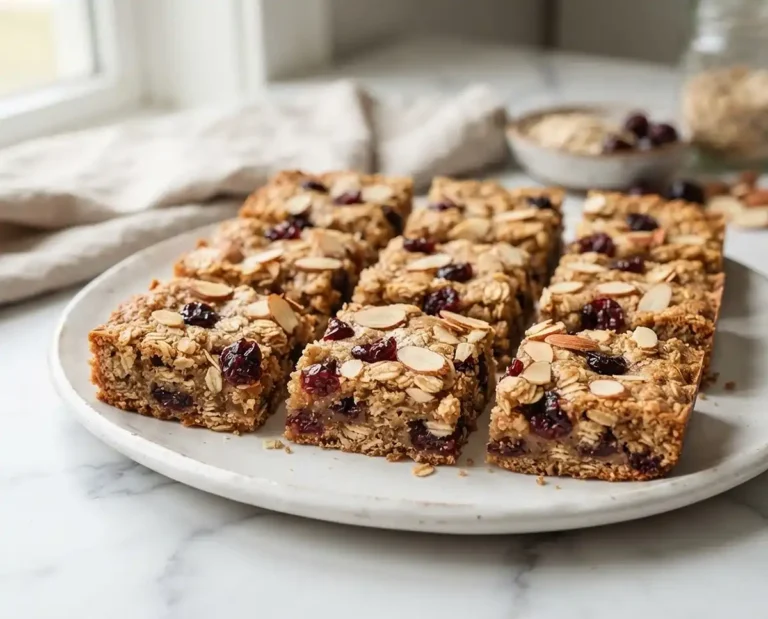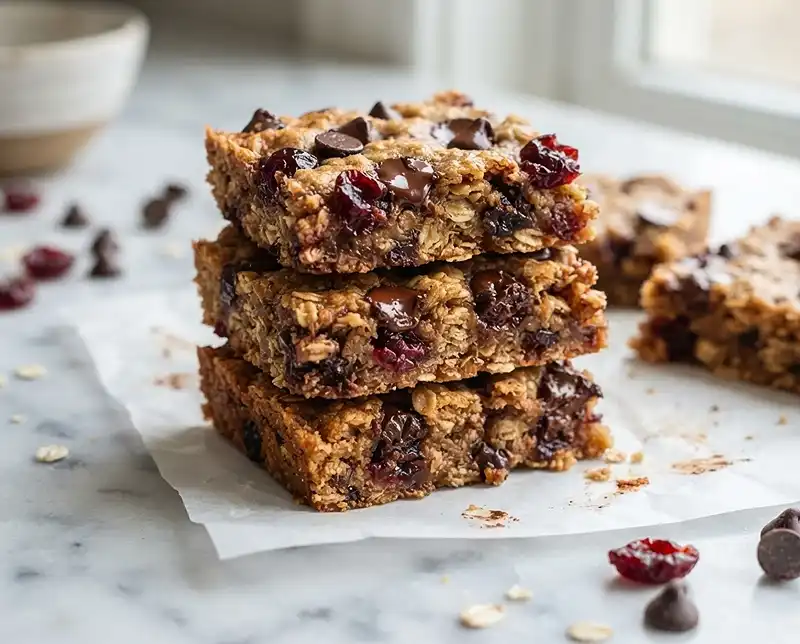
Chocolate Chip Cherry Oat Snack Bars
Easy Gluten-Free Chocolate Chip Cherry Oat Snack Bars — soft, chewy, and ready in 30 minutes. Step-by-step recipe with ingredients, tips, and storage guide.
The first time I packed homemade bars into my kids’ lunchboxes, I used a conventional oat bar recipe I’d been making for years. Big mistake. Within an hour, my celiac daughter had a reaction, and I was back at square one.
That failure sent me deep into gluten-free oat baking—testing batch after batch until I landed on these gluten-free chocolate chip cherry oat snack bars. They hold together cleanly, stay chewy for days, and disappear fast at any table they hit.
What makes a snack bar actually worth making again? For me, it comes down to texture, simplicity, and flavor that doesn’t feel like a compromise—and this recipe checks every box.
Why You’ll Love This Gluten-Free Chocolate Chip Cherry Oat Snack Bars Recipe
- Chewy, not crumbly: Certified gluten-free oats and oat flour give these bars a tender, cohesive bite that holds its shape when sliced.
- Beginner-friendly: One bowl, no mixer, no special equipment—just a whisk, a spatula, and an 8×8 pan.
- Naturally sweetened: Brown sugar and pure maple syrup keep the sweetness balanced, not cloying.
- Lunchbox and snack-table ready: These bars travel well, making them a go-to for school days, road trips, and holiday cookie platters alike.
The Secret to Perfect Gluten-Free Chocolate Chip Cherry Oat Snack Bars
- Certified gluten-free oats matter: Regular oats are cross-contaminated in processing. Using certified gluten-free rolled oats and oat flour is non-negotiable for anyone with celiac disease or serious sensitivity.
- Press the dough firmly: Gluten-free doughs don’t bind the same way wheat-based doughs do. Pressing the mixture tightly into the pan is what creates that satisfying, sliceable bar texture.
- Cool completely before cutting: The bars firm up significantly as they cool. Slicing too early leads to crumbling—refrigerating for 30–60 minutes after cooling makes a real difference. According to trusted celiac research from Beyond Celiac, even trace gluten exposure can cause harm, which is why ingredient sourcing is so critical in recipes like this.
- The milk is optional, not arbitrary: Oat flour can vary in absorbency by brand. Adding milk one tablespoon at a time lets you dial in the dough without guessing.
Table of Contents
Ingredients
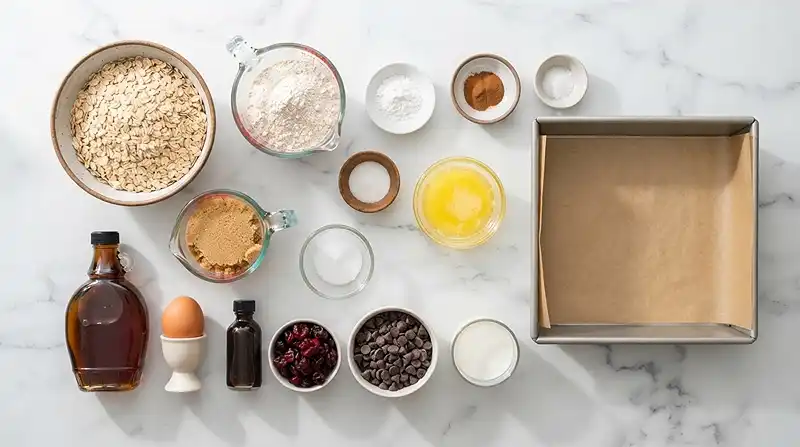
Dry Ingredients
| Ingredient | Amount | Notes |
|---|---|---|
| Certified gluten-free old-fashioned rolled oats | 2 cups | Must be labeled certified GF |
| Certified gluten-free oat flour | 1 cup | Provides structure without gumminess |
| Baking powder | ½ teaspoon | Adds a slight lift |
| Ground cinnamon | ½ teaspoon | Warm background note |
| Fine sea salt | ¼ teaspoon | Balances sweetness |
Wet Ingredients
| Ingredient | Amount | Notes |
|---|---|---|
| Unsalted butter, melted and slightly cooled | ½ cup | Slightly cooled prevents scrambling the egg |
| Light brown sugar, packed | ½ cup | Packed for accurate measure |
| Pure maple syrup | ¼ cup | Adds depth and moisture |
| Large egg | 1 | Binds the dough |
| Vanilla extract | 1 teaspoon | Use pure, not imitation |
| Milk (if needed) | 2 tablespoons | Add 1 tablespoon at a time if dough is too dry |
Mix-Ins
| Ingredient | Amount | Notes |
|---|---|---|
| Dried cherries, roughly chopped | ¾ cup | Roughly chop for even distribution |
| Semi-sweet or dark chocolate chips | ½ cup | Reserve a few for the top |
Instructions
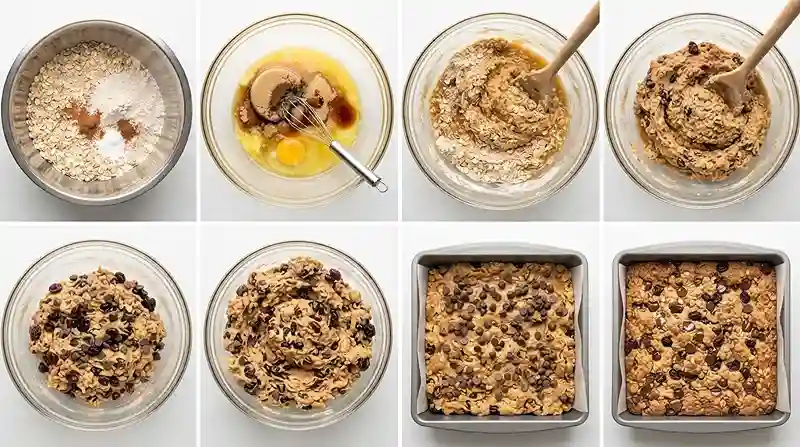
- Preheat and prep. Preheat the oven to 350°F (175°C). Line an 8×8-inch square baking pan with parchment paper, leaving some overhang for easy removal later.
- Whisk the dry ingredients. In a medium bowl, whisk together the gluten-free rolled oats, oat flour, baking powder, cinnamon, and salt until evenly combined.
- Mix the wet ingredients. In a separate large bowl, whisk together the melted butter, brown sugar, maple syrup, egg, and vanilla until the mixture is smooth and slightly ribbony.
- Combine wet and dry. Add the dry ingredients to the wet ingredients and stir until a thick, cohesive dough forms. If the mixture seems unusually dry, add the milk 1 tablespoon at a time.
- Fold in the mix-ins. Fold in the dried cherries and chocolate chips, reserving a few chocolate chips for the top if desired. The dough will look like chunky oatmeal cookie batter—dense and slightly sticky.
- Fill the pan. Transfer the mixture to the prepared pan. Press it firmly and evenly into the pan using a spatula or the back of a spoon. This step is critical—pack it tightly.
- Top with chocolate chips. Sprinkle the reserved chocolate chips over the surface so every bar gets a little chocolatey finish on top.
- Bake. Bake for 22–28 minutes, until the edges are lightly golden and the center looks set. The top should feel firm, not wet, when gently pressed.
- Cool completely. Let the bars cool completely in the pan. For cleaner slices, refrigerate them for 30–60 minutes after cooling—this firms the texture significantly.
- Slice and serve. Use the parchment paper to lift the slab from the pan and cut into 12 bars. A sharp knife gives the cleanest edges.
Make It Your Own
Well… one of the best things about a bar recipe like this is how easily it adapts to what you have on hand or who you’re feeding.
Dairy-free swap: Replace the butter with refined coconut oil or vegan butter, and use any non-dairy milk in place of the optional milk. The texture stays nearly identical—you’d never know the difference.
Cherry alternatives: Dried cranberries, chopped dried apricots, or raisins all work beautifully here. These cherry oat bars take especially well to tart fruit because the maple syrup provides a mellow sweetness that balances the sharpness.
Chocolate chip swaps: White chocolate chips lean sweeter and pair especially well with dried cherries for a chocolate chip dessert-adjacent feel. Dark chocolate (70% or higher) makes the bars feel more sophisticated and slightly less sweet overall.
Add a protein boost: Stir in 2 tablespoons of almond butter or sunflower butter with the wet ingredients. It adds richness and a small protein lift without changing the structure. If you love high-protein snack ideas, check out these wholesome gluten-free baked goods that pack real nutrition.
Nut additions: Roughly chopped pecans or walnuts fold in beautifully with the cherries. Add up to ¼ cup without adjusting anything else in the recipe.
Common Problems & Solutions
Man, oh man… gluten-free baking has a reputation for going sideways, but most bar problems are easy to diagnose once you know what to look for.
Problem: Bars are crumbly and fall apart when cut.
Solution: You likely didn’t press the dough firmly enough into the pan, or the bars were cut before they fully cooled. Pack the dough tightly and refrigerate for at least 30 minutes post-bake before slicing.
Problem: The center is gummy or undercooked.
Solution: The bars weren’t baked long enough, or your oven runs cool. The edges should be lightly golden and the center should feel set—not soft or wet—when gently pressed. Add 3–5 minutes and test again.
Problem: The dough seems too dry before baking.
Solution: Oat flour absorbency varies by brand. Add the optional milk one tablespoon at a time, mixing between additions, until the dough holds together when pressed. Don’t skip this step if the texture feels crumbly before it hits the pan.
Problem: Bars are too dense or heavy.
Solution: Overmixing after combining the wet and dry ingredients can make these bars tough. Stir just until combined—a few dry streaks are fine before you fold in the mix-ins. According to the Celiac Disease Foundation’s authoritative gluten-free baking guidance, gluten-free baked goods benefit most from minimal mixing and proper resting time, both of which apply here.
Storage & Meal Prep
| Method | Duration | Notes |
|---|---|---|
| Counter | 2–3 days | Airtight container at room temperature |
| Fridge | 5–7 days | Bring to room temp before eating for best texture |
| Freezer | 2–3 months | Wrap individually in plastic wrap, then freeze in a zip bag |
To reheat from frozen, let a bar thaw at room temperature for 20–30 minutes, or microwave on 50% power for 30–45 seconds. If you’re making these as a lunchbox treat, bake a double batch and freeze half—you’ll thank yourself on a busy school morning.
For no-waste ideas, crumble any broken bars over yogurt or stir them into a bowl of oatmeal for a quick breakfast with built-in flavor.
Chocolate Chip Cherry Oat Snack Bars FAQs
Can I use quick oats instead of old-fashioned rolled oats?
Quick oats will work but the texture changes noticeably. Old-fashioned rolled oats give these bars their characteristic chew and structure. Quick oats absorb more liquid and can make the bars denser and slightly gummier. If that’s all you have, reduce the optional milk and watch the bake time closely.
How do I make sure my bars hold together after cutting?
Press the dough firmly into the pan before baking, cool the bars completely, and refrigerate for 30 to 60 minutes before slicing. A sharp knife—rather than a serrated one—also helps produce cleaner edges with less crumbling.
What’s the best chocolate chip for this recipe?
Semi-sweet chocolate chips are the classic choice here and balance well with the tartness of the dried cherries. Dark chocolate chips (60% or higher) work beautifully if you prefer less sweetness. Avoid milk chocolate chips, which can make the bars taste overly sweet alongside the maple syrup and brown sugar.
Why did my bars come out dry even though I followed the recipe?
Oat flour brands vary in how much liquid they absorb. If your dough looked too dry before baking, add the optional milk one tablespoon at a time until it holds together when pressed. Also check that your brown sugar was properly packed—loose sugar can result in a drier dough than intended.
Can I make these bars without eggs?
Yes, with a small adjustment. Replace the egg with one flax egg—one tablespoon of ground flaxseed mixed with three tablespoons of water, rested for five minutes until gel-like. The bars may be slightly softer and less structured, so pressing the dough firmly and chilling before slicing becomes even more important.
Serving Suggestions
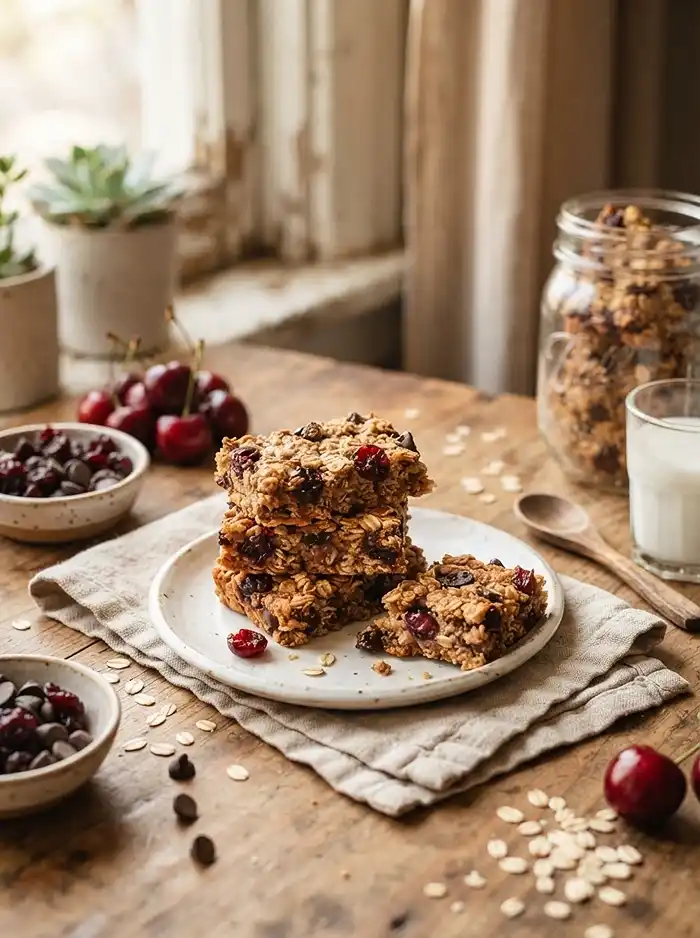
You know… these bars are the kind of thing that feels right in almost any setting. Serve them alongside a warm cup of tea or coffee for an afternoon pick-me-up, or pack them into treat bags for a Thanksgiving dessert spread where someone at the table always needs a gluten-free option.
They pair especially well with something creamy—a dollop of almond butter on the side, or a cold glass of oat milk. For more snack ideas in the same vein, try these easy dairy-free freezer snacks or this bright lemon blackberry loaf for a full snack table spread.
If you’re planning a bigger bake day, these bars make a great companion to the savory roasted tomato cottage cheese dip—sweet and salty covered in one afternoon.
Give these gluten-free chocolate chip cherry oat snack bars a try and let me know how they turn out in the comments below. Did you swap the cherries? Go dark chocolate? I genuinely want to hear it. If you loved them, sharing on Pinterest helps other gluten-free families find this recipe too—and that means a lot.
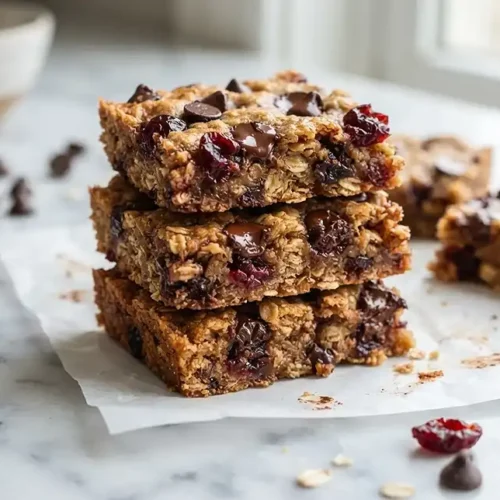
Chocolate Chip Cherry Oat Snack Bars
Equipment
- 8×8-inch square baking pan
- Parchment paper
- Medium bowl
- Large bowl
- Whisk
- Spatula
- Sharp knife
Ingredients
Dry Ingredients
- 2 cups Certified gluten-free old-fashioned rolled oats Must be labeled certified GF
- 1 cup Certified gluten-free oat flour Provides structure without gumminess
- ½ teaspoon Baking powder Adds a slight lift
- ½ teaspoon Ground cinnamon Warm background note
- ¼ teaspoon Fine sea salt Balances sweetness
Wet Ingredients
- ½ cup Unsalted butter, melted and slightly cooled Slightly cooled prevents scrambling the egg
- ½ cup Light brown sugar, packed Packed for accurate measure
- ¼ cup Pure maple syrup Adds depth and moisture
- 1 Large egg Binds the dough
- 1 teaspoon Vanilla extract Use pure, not imitation
- 2 tablespoons Milk Optional; add 1 tablespoon at a time if dough is too dry
Mix-Ins
- ¾ cup Dried cherries, roughly chopped Roughly chop for even distribution
- ½ cup Semi-sweet or dark chocolate chips Reserve a few for the top
Instructions
- Preheat the oven to 350°F (175°C). Line an 8×8-inch square baking pan with parchment paper, leaving some overhang for easy removal.
- In a medium bowl, whisk together the gluten-free rolled oats, oat flour, baking powder, cinnamon, and salt until evenly combined.
- In a separate large bowl, whisk together the melted butter, brown sugar, maple syrup, egg, and vanilla until smooth and slightly ribbony.
- Add the dry ingredients to the wet ingredients and stir until a thick, cohesive dough forms. If the mixture seems unusually dry, add the milk 1 tablespoon at a time.
- Fold in the dried cherries and chocolate chips, reserving a few chocolate chips for the top if desired. The dough should be dense and slightly sticky.
- Transfer the mixture to the prepared pan. Press it firmly and evenly into the pan using a spatula or the back of a spoon. Pack the dough tightly for the best sliceable texture.
- Sprinkle the reserved chocolate chips over the surface.
- Bake for 22–28 minutes, until the edges are lightly golden and the center looks set. The top should feel firm, not wet, when gently pressed.
- Let the bars cool completely in the pan. For cleaner slices, refrigerate for 30–60 minutes after cooling to firm the texture.
- Use the parchment paper to lift the slab from the pan and cut into 12 bars. A sharp knife gives the cleanest edges.